# How does Phoenix handle VDP?
As of version 7.0, Phoenix supports VDP work and makes it easy to create variable data projects. Phoenix uses CSV files to populate products with custom product properties and marks for VDP. There are three main pieces that work together for VDP.
- The VDP data itself comes from a column in a CSV that drives Phoenix
- The VDP data column is mapped to a custom product property
- The data is added to the product via a smart product mark that is populated by the VDP data in the product property
Follow along with the steps below. Example files are supplied at the bottom of this page.
# Create Text Mark
Open Phoenix and click the
 in the Marks window to create a new mark
Choose Text Mark and ensure the Mark Placement Type is Smart and set the anchor to the Product. Click Continue.
Select the typeface, font size, and color you need for the text. In the text box, we will use a **smart **keyword to have this text mark populate with our variable data. To create the smart keyword, type <product.custom.vdp-number>. After you type the closing bracket (>), Phoenix will automatically recognize this text is a smart keyword and the text will appear bold and non-editable. Click Continue.
Continue through the Mark Creator Wizard and set the mark as you require. Define the placement of the mark and give it a name. For this example, we will call this mark VDP-Number. Click Done to complete.
# Create and Import CSV File
Create a CSV with (at least) separate columns for (1) the VDP data being brought in, (2) the art file being used (which will all have the same value), and (3) the name of the VDP mark created above (which in this case will all have the same value of VDP-Number). Each row of the CSV file will create a separate product in Phoenix. Save the CSV.
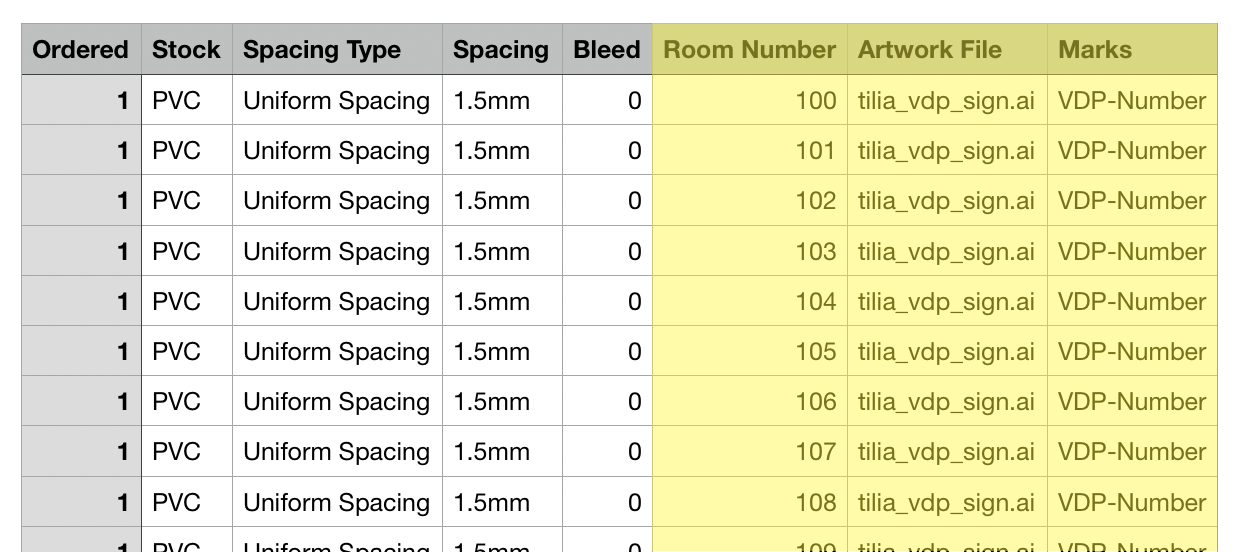
note
The art file path can be relative or absolute. In the example above, the art file (tilia_vdp_sign.ai) is in the same directory as the CSV.
Drag and drop the CSV into Phoenix, or go to the File menu and choose Import Products from CSV. This will bring up the Import Products window, where the CSV columns are mapped to the Product Properties in Phoenix. The Phoenix Properties are on the left side, and the column names in the CSV are on the right. Ensure that the Artwork File and Marks are mapped properly. Click the
symbol in the lower left to add a custom property. Name it the same name as specified in the Smart Keyword used in the Mark above, in this case VDP-Number. Select OK to add the custom property, and then add the mapping to the column name of the VDP data in the CSV (in the example, the column name is Room Number). Optionally choose Save Preset to easily recall the import settings later. Select OK.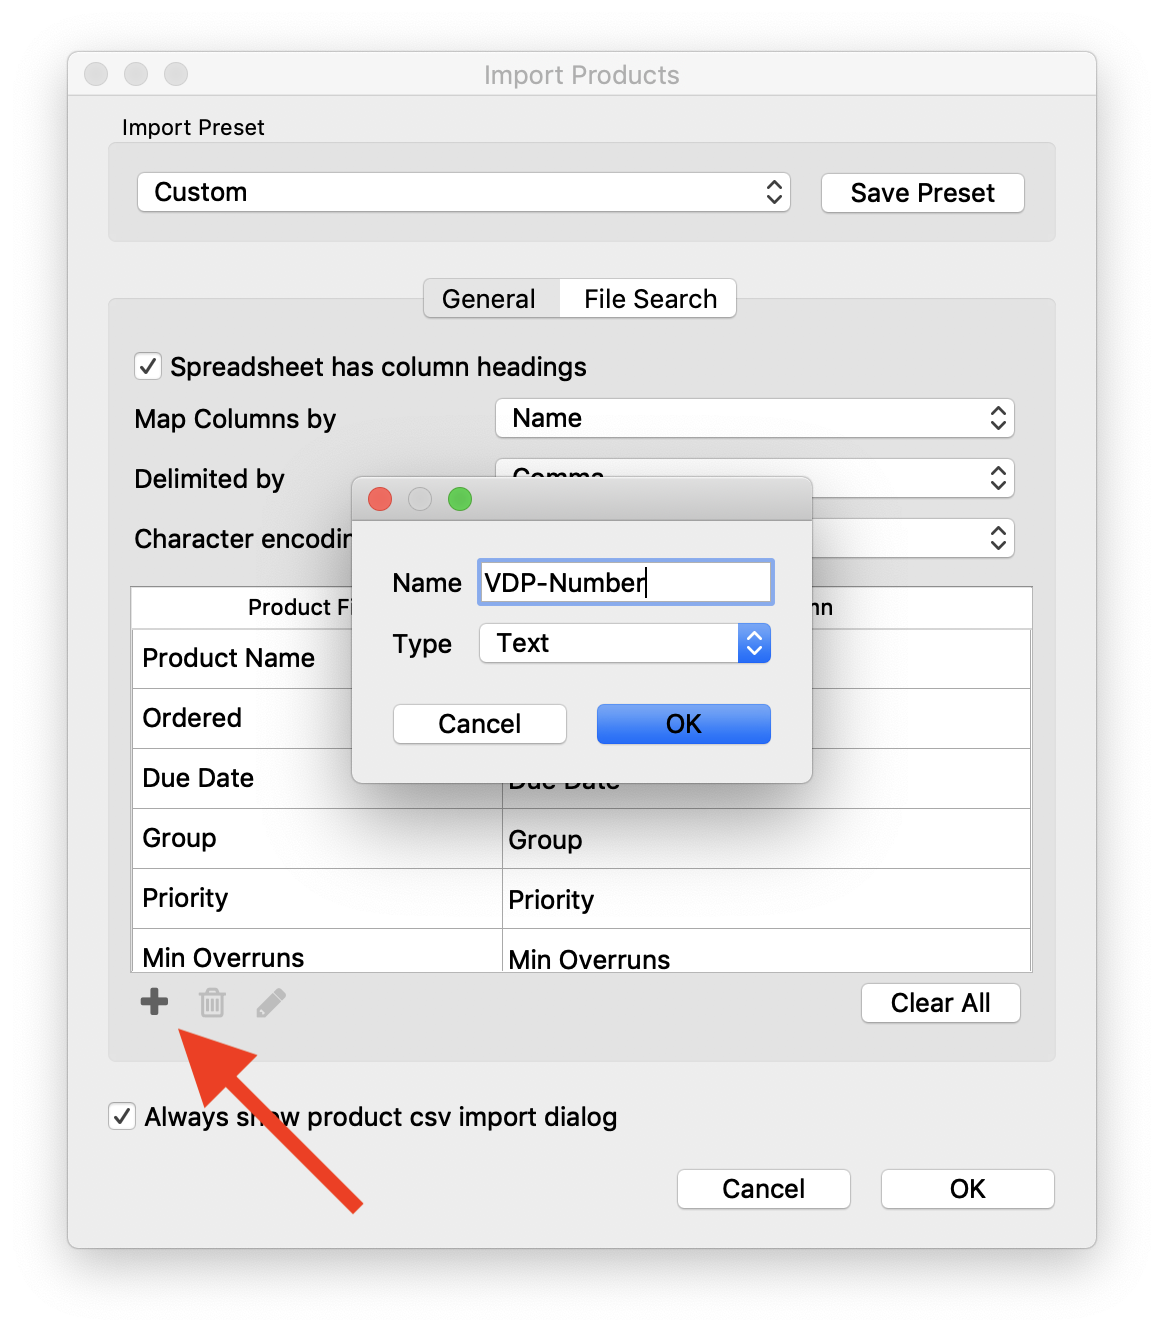
The Products added to the job now have a VDP mark added with the text coming directly from the VDP data in the CSV. Any subsequent CSV files (with the requisite columns) will automatically pull the VDP data in, so the key is making sure that the correct CSV column format is used. Any number of custom VDP data can be added to a product, it simply requires mapping the CSV column to a custom product property and then having a smart text mark that references that property. Multiple marks can be set from the CSV file as long as they are comma-separated.
# Example Files
| Phoenix Library | Phoenix-VDP.phxlib |
| Sample CSV | orders.csv |
| Sample Artwork | tilia_vdp_sign.ai |