# How to assign inks to an empty product for planning
If you would like proper costing calculated as part of the planning result with Phoenix it helps to have "inks" defined for the product.
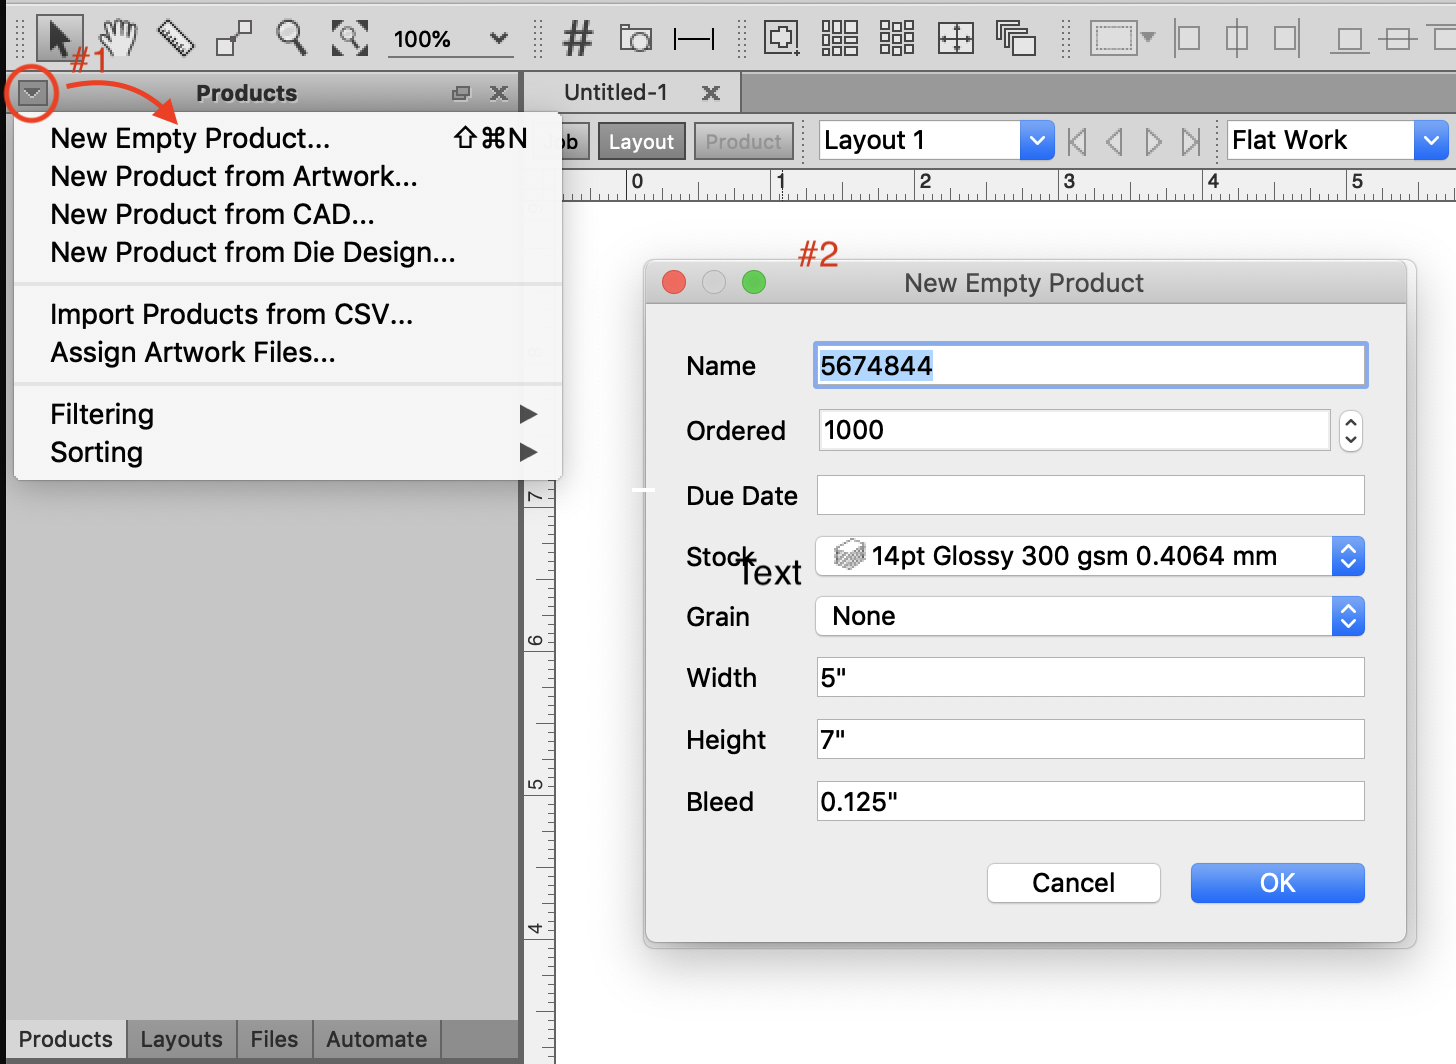
# Make an empty product in Phoenix
- Click the triangle in products or use File / New Empty Product from File menu
- Enter base data to create your product
# Add "inks" to the created product
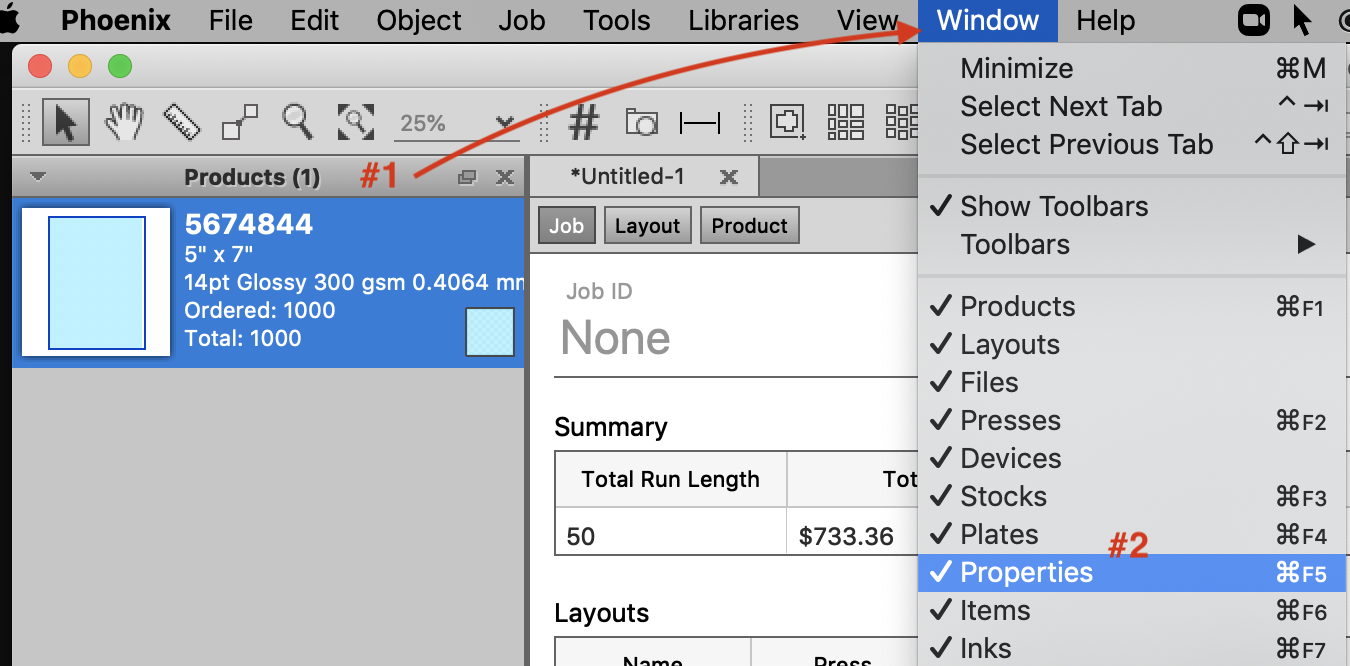
- Select the product in products list
- Open Product properties pallet
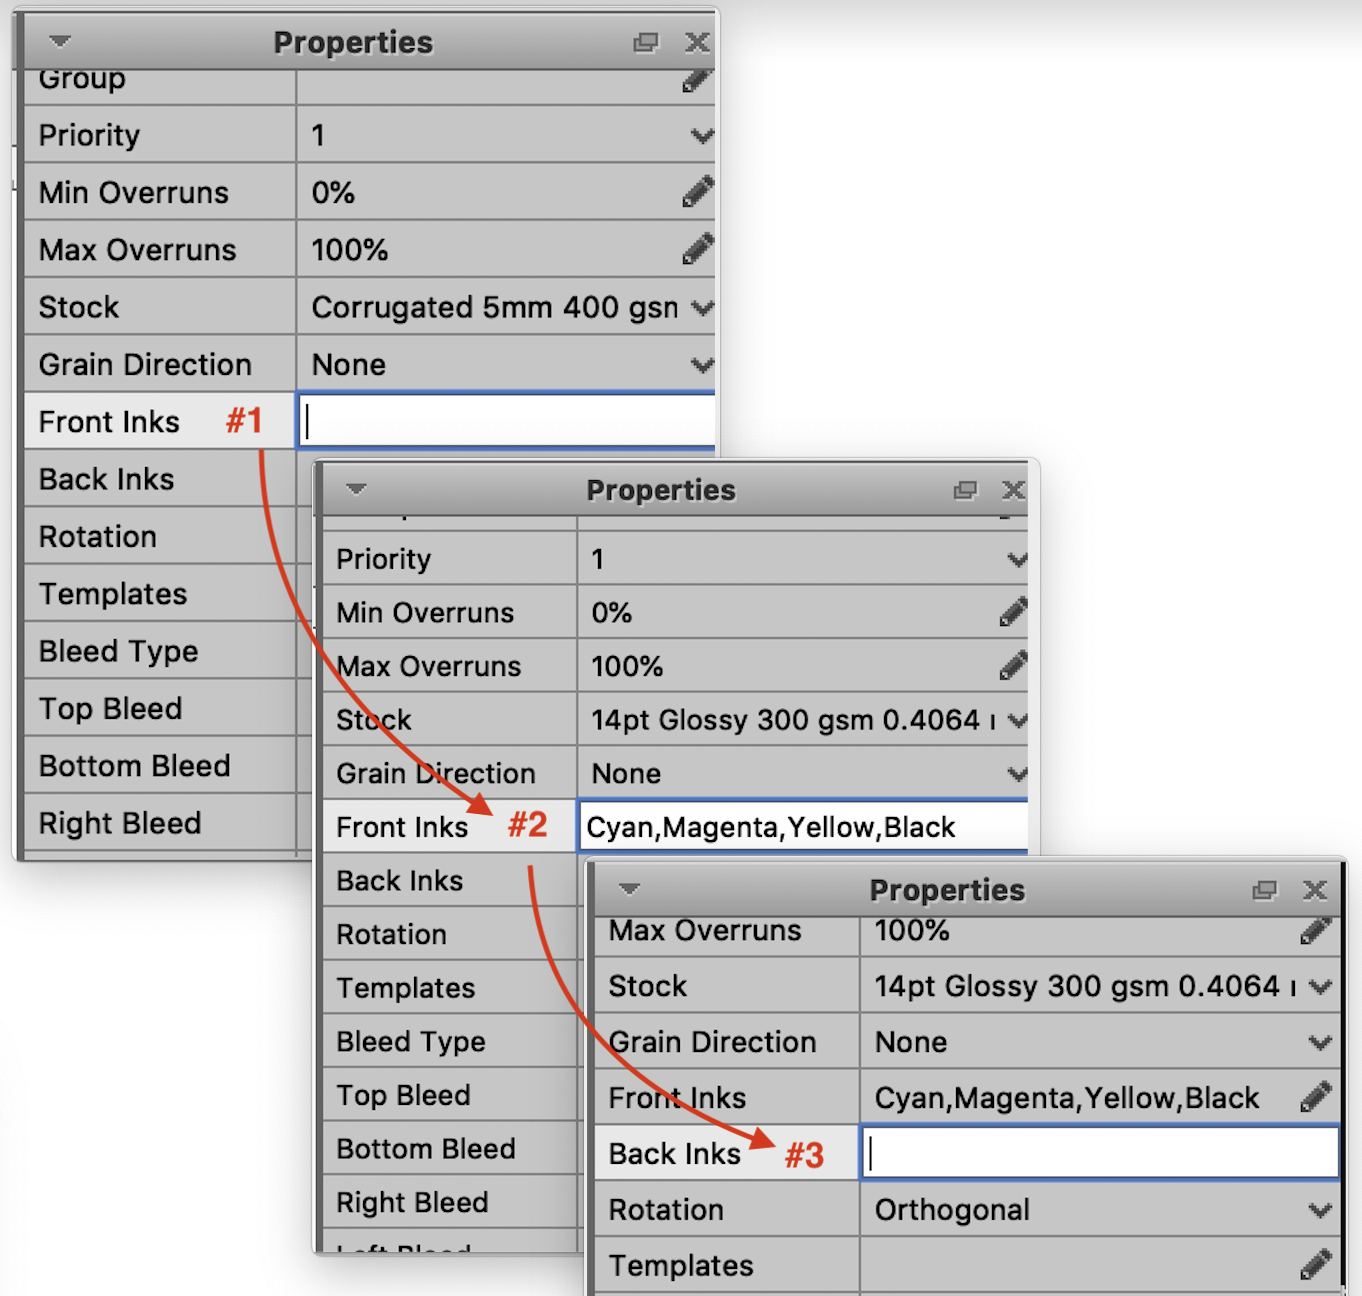
- Scroll to Front Inks
- Enter inks separated by a Comma ","
- You can also add back inks if this is going to be a two sided product
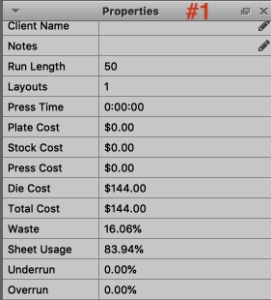
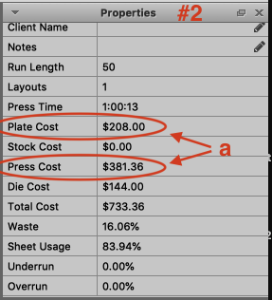
# Run plan again to see difference in costs calculated
- Results with no inks defined
- Results with front inks defined
- Notice costs calculated in Press and Plate sections since this was planned for an offset press
The inks you define in planning don't need to be the exact inks, these can be updated and replaced later in the process.