# Managing Libraries in Aries
Once you understand the basics of tilia Aries you will want to boost your productivity by tailoring the application to match your production environment. This is done by setting up your Substrates, Shape Mapping, and Mark Presets libraries.
# Substrates
Substrates represent the different kinds of media that you work with, the substrate sizes that are available, and printing margins. In addition, you can define default mark presets for printing and cutting marks that you always use with the given substrate.
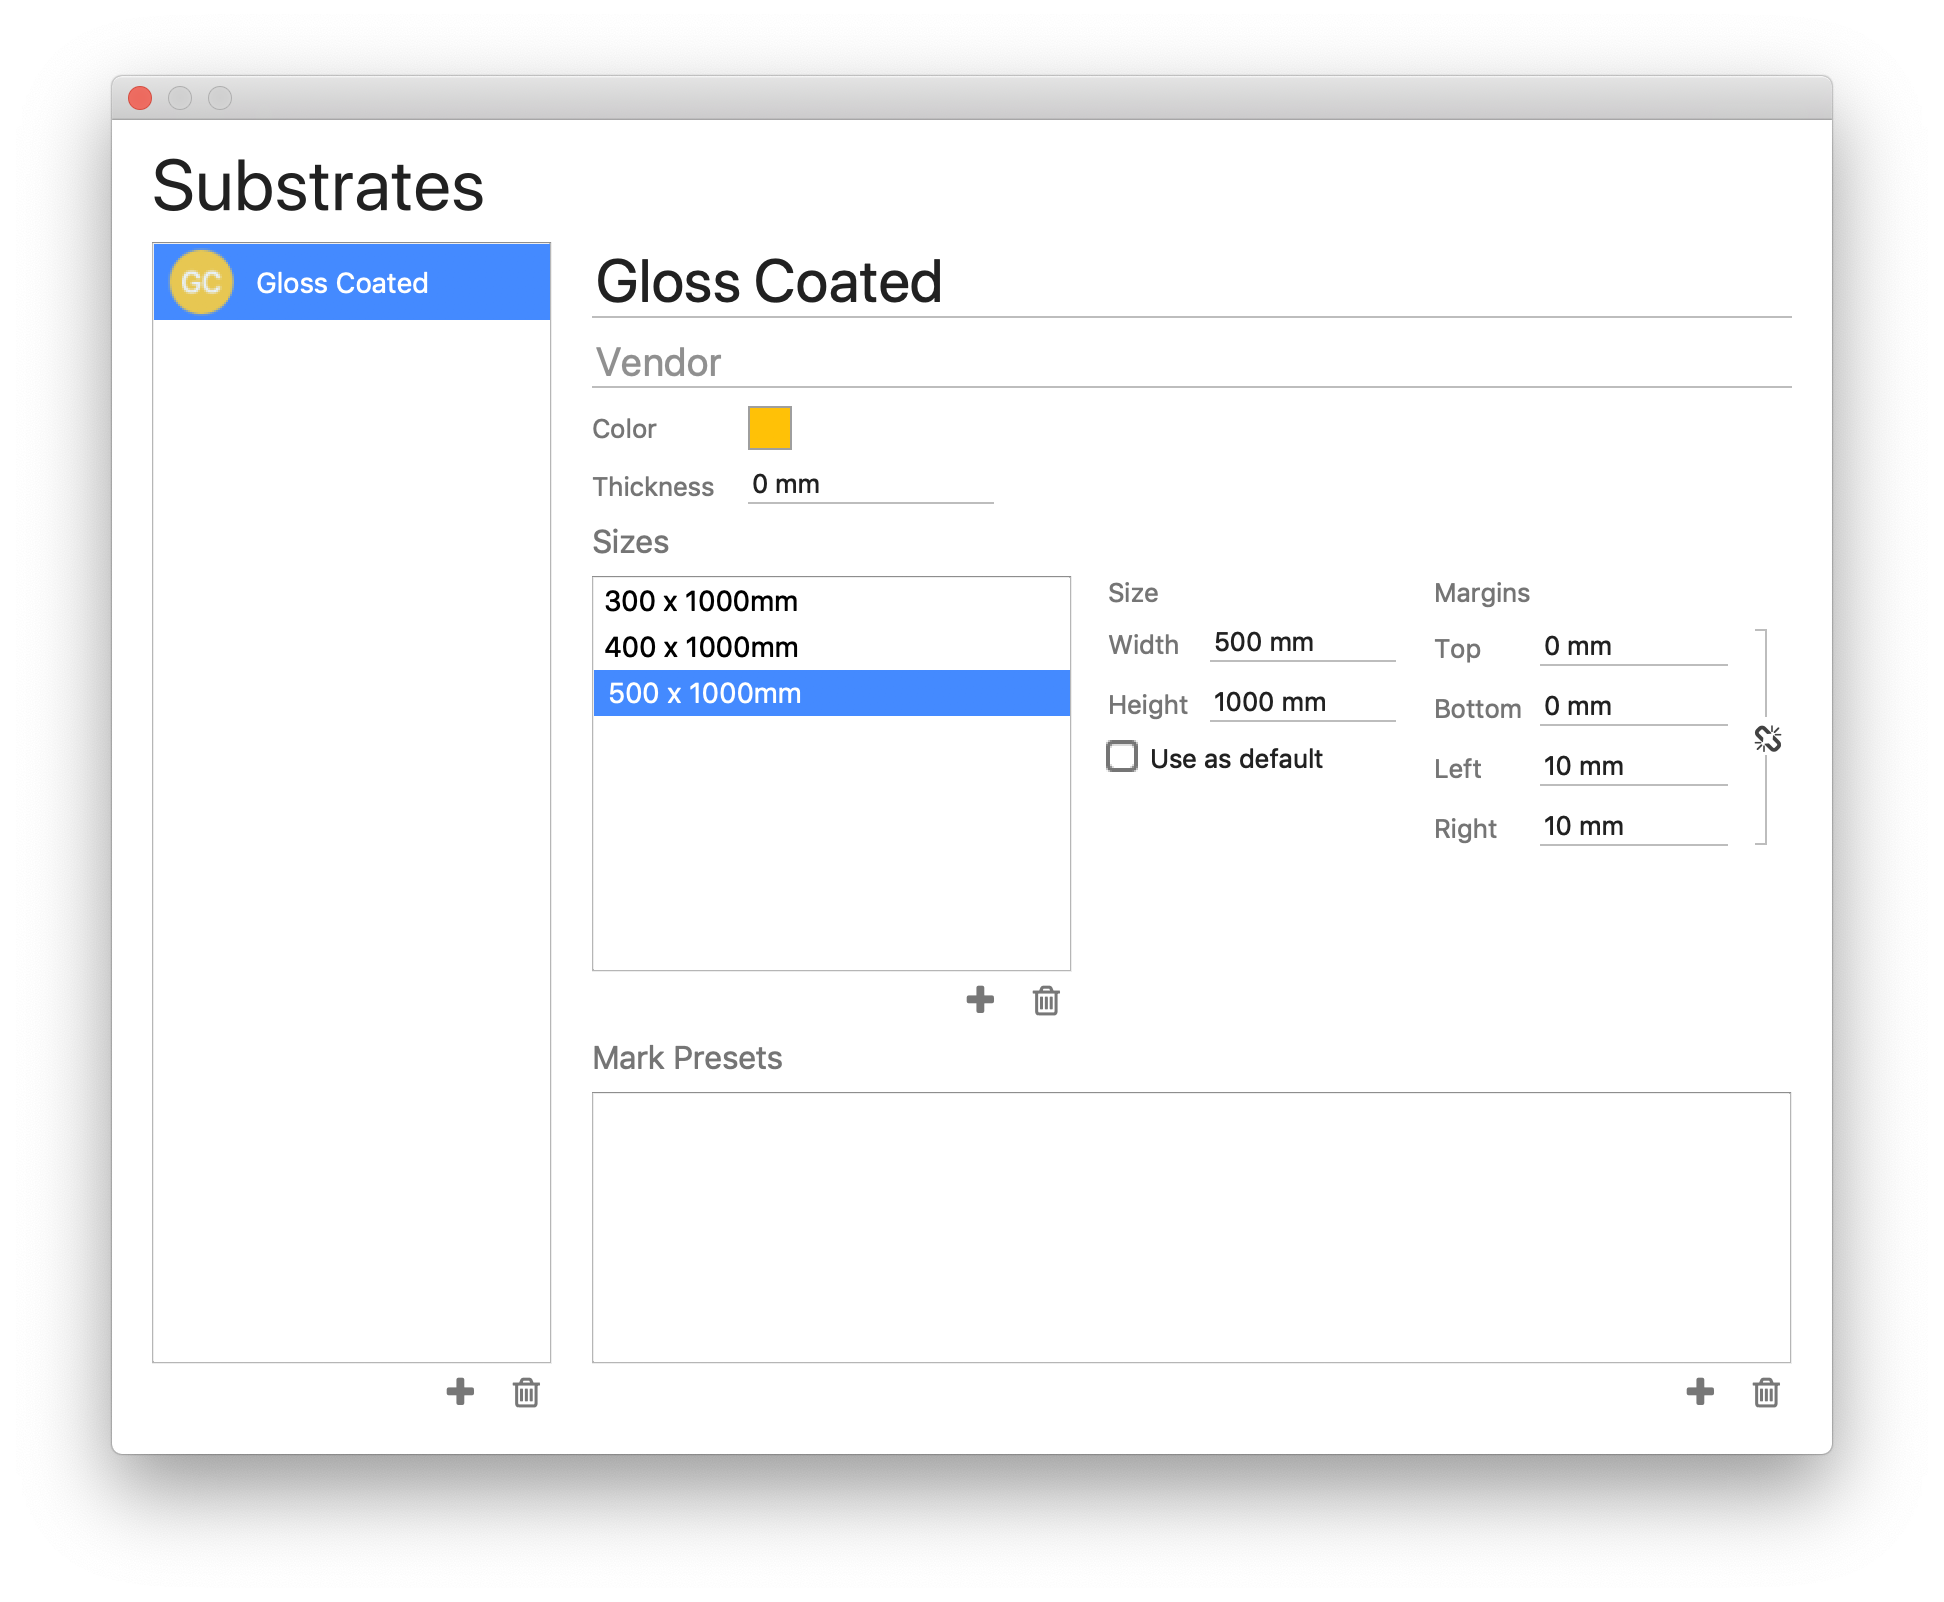
To add, edit, and remove substrates from your library, go to the Window menu and select 'Substrates'. This opens the substrates dialog containing a list of all substrates and their settings.
To add a new substrate, click on the plus ![]() icon below the list of substrates on the left side of the dialog.
icon below the list of substrates on the left side of the dialog.
All the settings pertaining to the new or existing substrates are found on the right side of the dialog.
Name – The name you want to give the substrate.
Vendor – Optional vendor name of the substrate.
Color – Click on the square color icon to change the display color used for the icon for this substrate. Color does not affect export in any way or appearance of the substrate in Layout View.
Sizes – A list of available board sizes or roll widths. To add a new board or roll, click the plus (+) icon below the Board Sizes or Roll Widths list. Use the settings to the right of the list to configure the new or existing board/roll.
Width – Width of the substrate.
Height – Height of the substrate.
Use as default – An option to use the selected substrate size as the default for new jobs.
Margins - The amount of spacing from the edges of the substrate required. Repeats will not place any artwork within this margin.
Mark Presets – A list of pre-defined marks that will be automatically added to layouts using this substrate. For example, you might always want to use a specific set of text marks or a crop marks for the given substrate.
To remove a substrate from the library, select the substrate in the list and click on the trash can icon below the list.
# Shape Mappings

Shape Mappings allows you to automatically map PDF artwork paths defined as spot colors or layers to cut lines. To add, edit, and remove Shape Mappings from your library, go to the Window menu and select Shape Mappings. This will open the Shape Mappings dialog that displays a list of all current mappings.
The list of mappings shows what is currently in effect. Set up your mappings to automatically map paths in the artwork content to the cut line when new artwork is added to your jobs. To add a new mapping, click on the plus + icon below the Mappings list. You will be presented with a mapping dialog.
The mapping dialog contains the following settings:
Source – The source of the mapping for PDF -based artwork formats: 'Spot' or 'Layer'.
Text – The type of mapping rule you want to use: 'Equals', 'Starts With', or 'Contains' as well as the text to match. 'Equals' will match the given text exactly with spot or layer names in the artwork content, while 'Starts With' will match the given text with the beginning of the spot/layer name, and 'Contains' matches the text with any portion of the spot/layer name. All text matching is case insensitive.
Offset – An optional value to shrink or expand the shape of the artwork item based on the PDF path detected. Negative offset values will cause the shape to be reduced while positive values will cause it to increase.
Join Style – The style used to join path segments in the shape when an offset is applied. Options are 'Miter', 'Bevel', and 'Round'.
Miter Limit – In cases where an offset is defined and the join style is 'Miter' the miter limit defines the distance beyond the end of the joined path segments where mitering is clipped to avoid long spikes on sharp corners.
Once you have defined some mappings you can move them around in the list by dragging and dropping them with the mouse. The order of mappings is important because once a spot color or layer name matches a mapping, the other mappings below the matching one are not checked against that name. To ensure correct matching it is best to move mappings with more unique names higher in the mapping tables, with general catch-all names like 'cut' further down in the list.
# Mark Presets
Mark Presets can help streamline your workflow by defining commonly needed marks once and reusing them. When paired with Substrates, marks are added automatically to layouts using the substrate, further reducing time and possible errors.
To add, edit, and remove mark presets from your library, go to the Window menu and select 'Mark Presets'. This will open the Mark Presets dialog that displays a list of all current mark presets and their properties.
Mark presets are separated into two categories: Artwork and Layout. To change between artwork and layout mark preset lists, go to the upper-left portion of the dialog about the mark preset list and click on the dropdown to select 'Artwork' or 'Layout'.
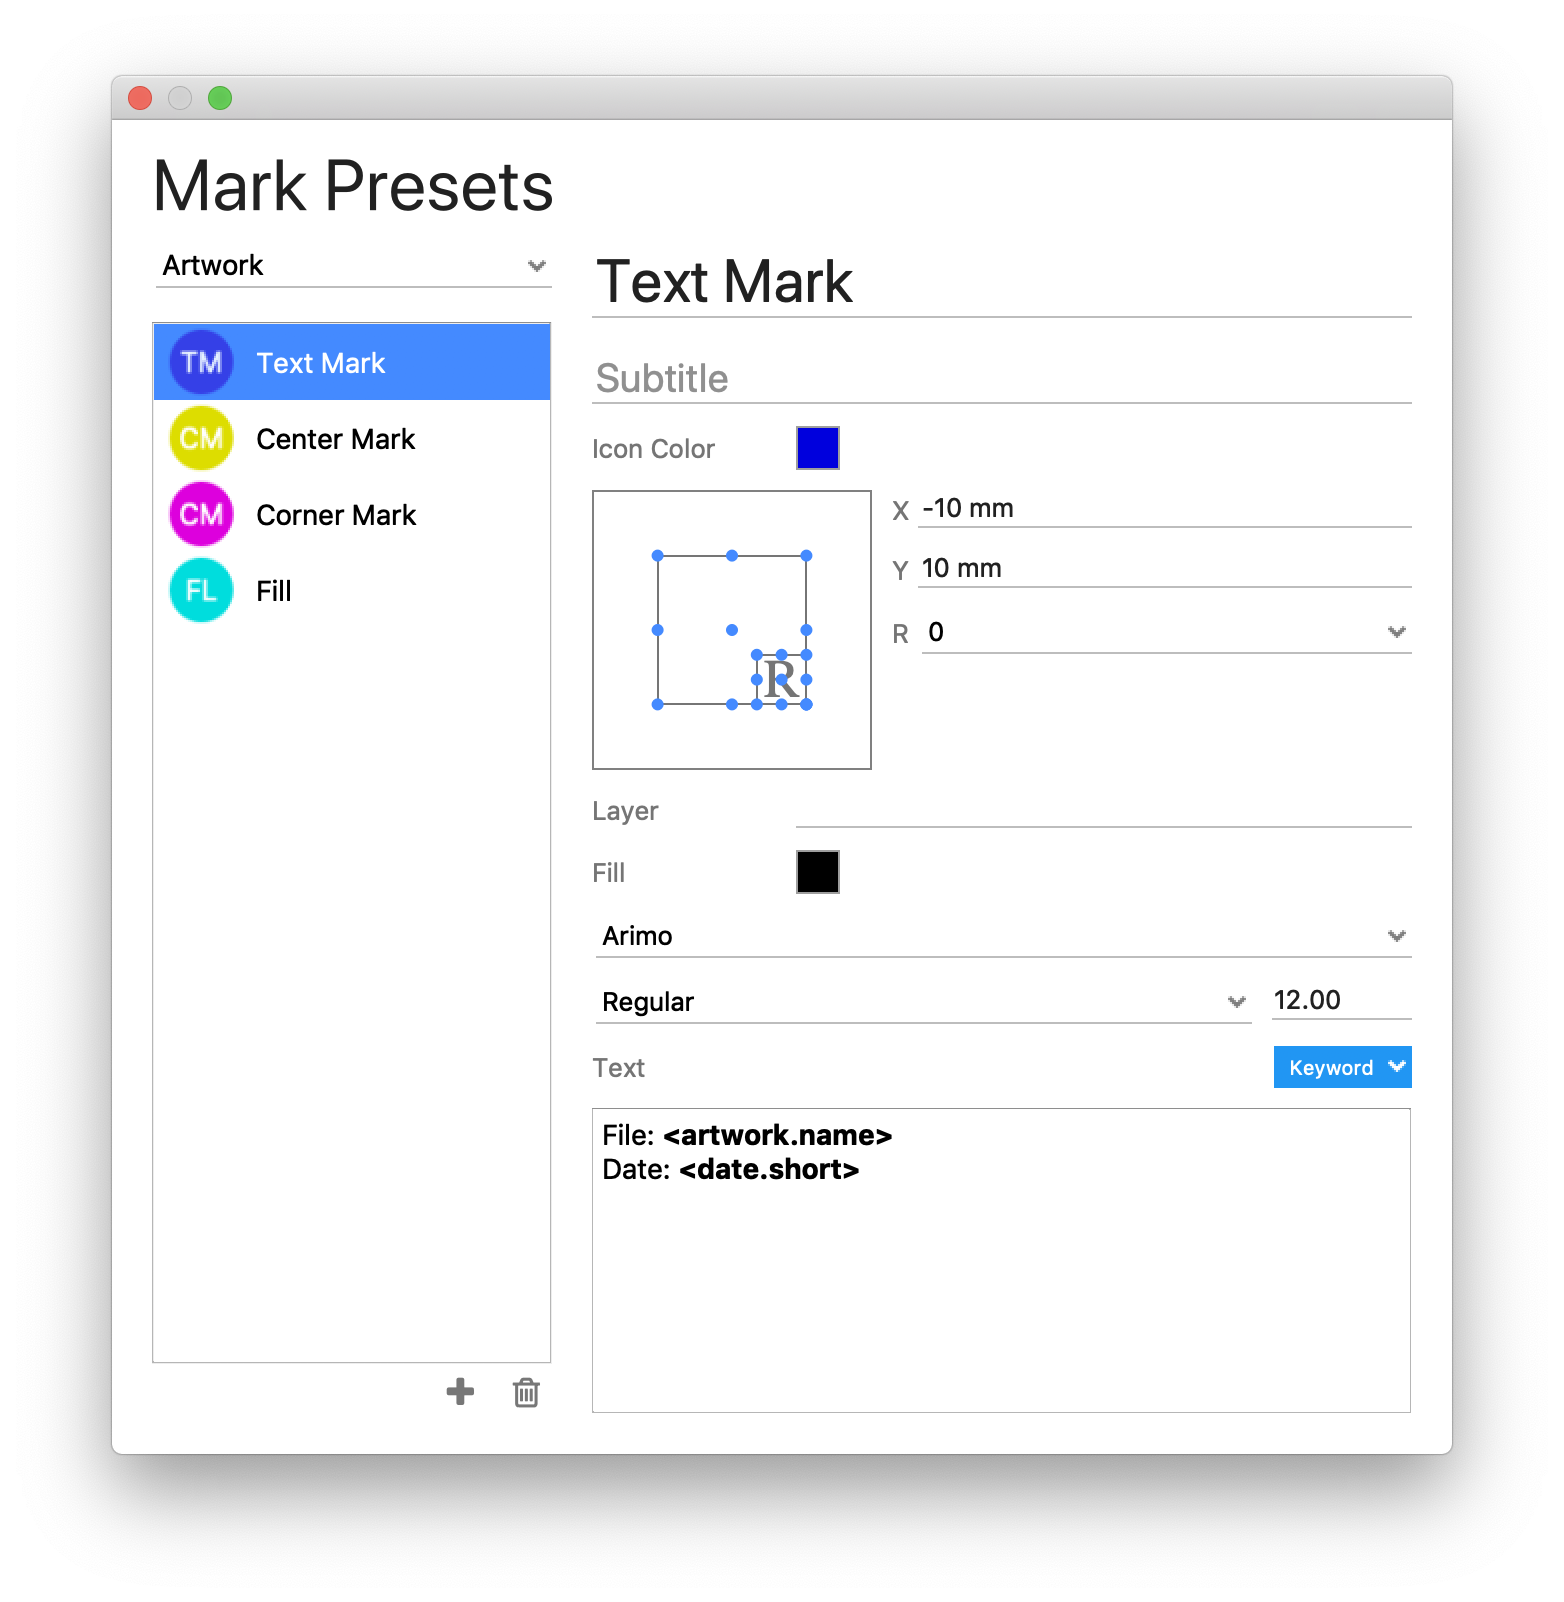
To add an artwork or layout mark preset, click on the plus + icon below the mark presets list on the left side of the dialog. You will be presented with a menu with all supported mark types depending on whether you are adding Artwork or Layout mark presets. To edit a mark preset, simply select it in the mark presets list and edit its properties on the right side of the dialog. To remove a mark preset, select it in the mark presets list and click on the trash can icon below the list.
For more info on Marks, see Working with Marks in Aries.