#  Folding Carton Quick Start
# Overview
If you're strapped for time and just want a quick, step-by-step introduction to some Phoenix basics, follow the Folding Carton Quick Start guide below. For more info, check out the complete user guide, or try out the search bar to find a particular term.
For this Quick Start Guide, you'll need a few files to get started. Grab those here, and we'll tell you where to use them later on in the guide. Download these files to your desktop and unzip.
This .zip contains
- Folder containing example artwork
- Phoenix Quickstart Library
- Example Order CSV file
⚠️ Note
Preserve the names and structure of the contents of this folder. Changing names or folder structure will disrupt the flow of this guide.
# Installation
To install Phoenix, double-click the .dmg (on a Mac) or .exe (on a PC) file, and follow the installation wizard prompts. Installation is a breeze!
# Licensing
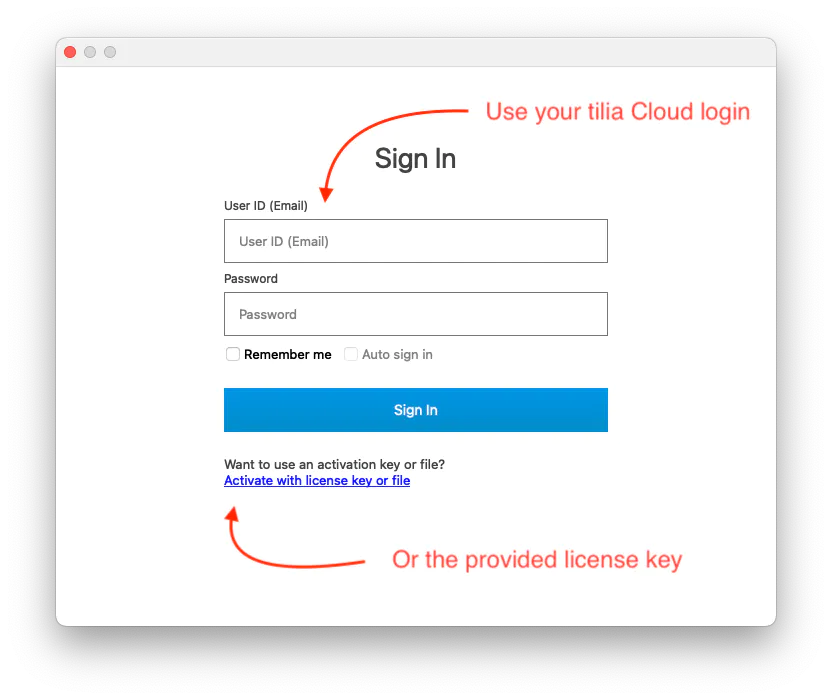
Use the provided license key or tilia Cloud credentials to license Phoenix.
# Basic Concepts
There are some basic concepts you need to understand about Phoenix. The ones below are very brief, so for more detailed info, check out Key Concepts.
# Products
A Product is a piece of artwork or CAD file that needs estimated, planned, imposed, or printed. Products come in different types, like a flat, folded, tiled, or bound. Folding cartons are considered flat products so we will focus on those for this guide.
Products have specific properties, like quantity, height, width, and what stock it needs to be printed on.
# Layouts
A layout is a representation of the actual production form. This is what will be exported to go to the RIP. Layouts are assigned a stock and can also be assigned a press. The layouts in Phoenix are interactive, meaning you can always edit what is on a layout to add, remove, edit, and rearrange products and marks.
# Projects
Projects are the native files that are used in Phoenix. Everything in Phoenix starts as a project, which then contains one or more layouts containing one or more products. A project consists of everything involved in that particular order/job/project, including the products, layouts, marks, and any assigned properties.
# Things and Stocks
You model your production environment, including the presses, stocks, plates, and die cutting equipment, in Phoenix. This allows your production capabilities, including costs, to be factored in to determine the most cost effective layout and stock choices.
# Creating your first project
# Importing the Library
Phoenix stores configurations in Phoenix Libraries. Let’s load a pre-built library so that you can follow along with this guide.
Open Phoenix, and navigate to Preferences. On a Mac, Preferences can be found in the menubar under the Phoenix menu. On a PC, navigate to the Edit menu and then select Preferences. From there, click on Diagnostics, and then Import Libraries.

Select OK, choose the .phxlib file you downloaded earlier, and click OK once it's loaded. Phoenix will shut down once the libraries have been imported. Open Phoenix back up, and now we're ready to create a project!
# Create a project
To create a new project, go to File > New project (or press Command or Control and "N"). This will create a new project, and prompt you for additional project information. It is best-practice to fill out the project properties.
Set the filename to "GettingStarted" and leave the rest of the fields blank. These fields can be used to add additional information to the project, but are not necessary. Now click "OK". You should now see a blank layout like the screenshot below.
# Add Products
Let’s start adding products to this project. We can do this by simply dragging and dropping the products you downloaded earlier into Phoenix.
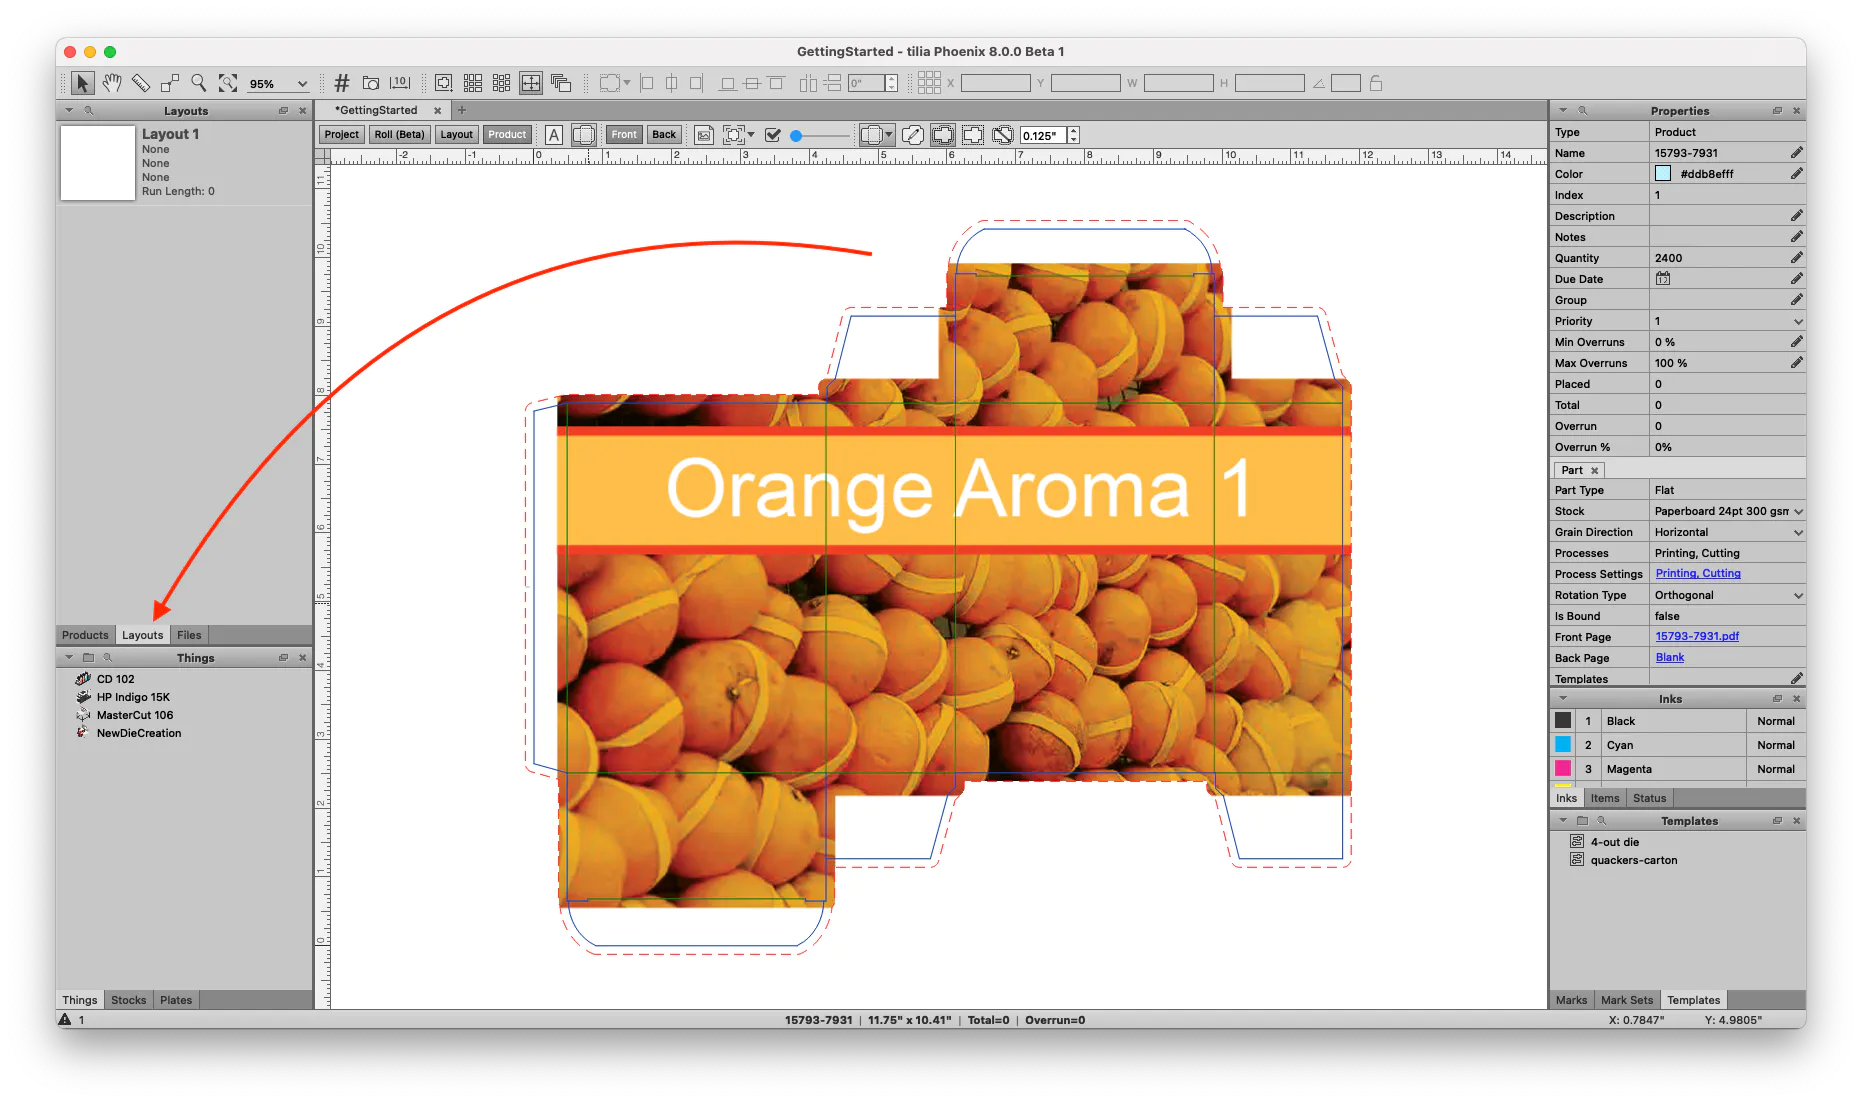
After dragging and dropping, you will see the products displayed in the Products panel on the left side of the window. The products have been given some default properties, so let's modify them to make sure they're set properly.
Click on the first product to select it. Notice the Properties panel on the right side of the screen. It now is displaying the properties for the product you have selected. Let's specify a quantity of 2400.
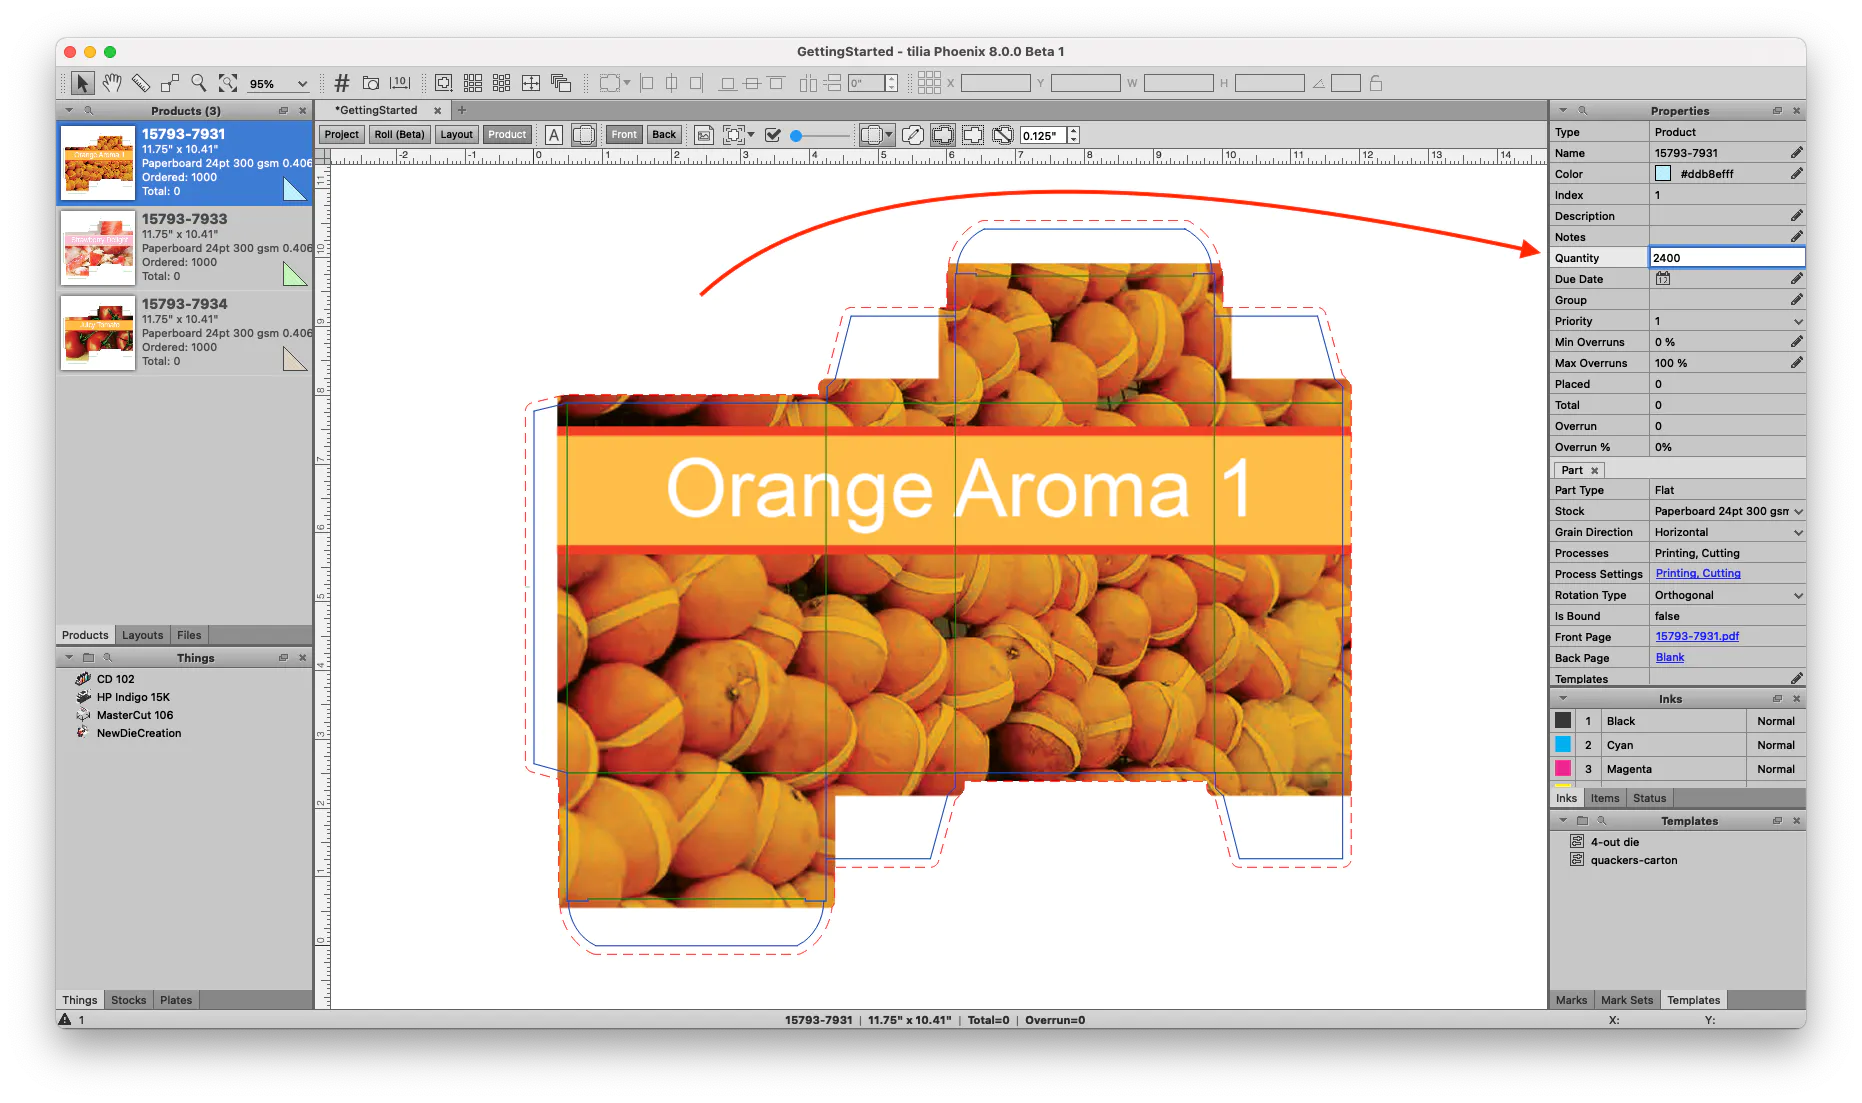
Product Properties with the “✎” pencil icon are editable. For a full list of product properties, visitGeneral Properties in the full user guide.
Change the quantity ordered for the second carton. Note that you can also select multiple products at once to change parameters for multiple products at the same time. Now the products have been added to the project, and we're ready to create a layout.
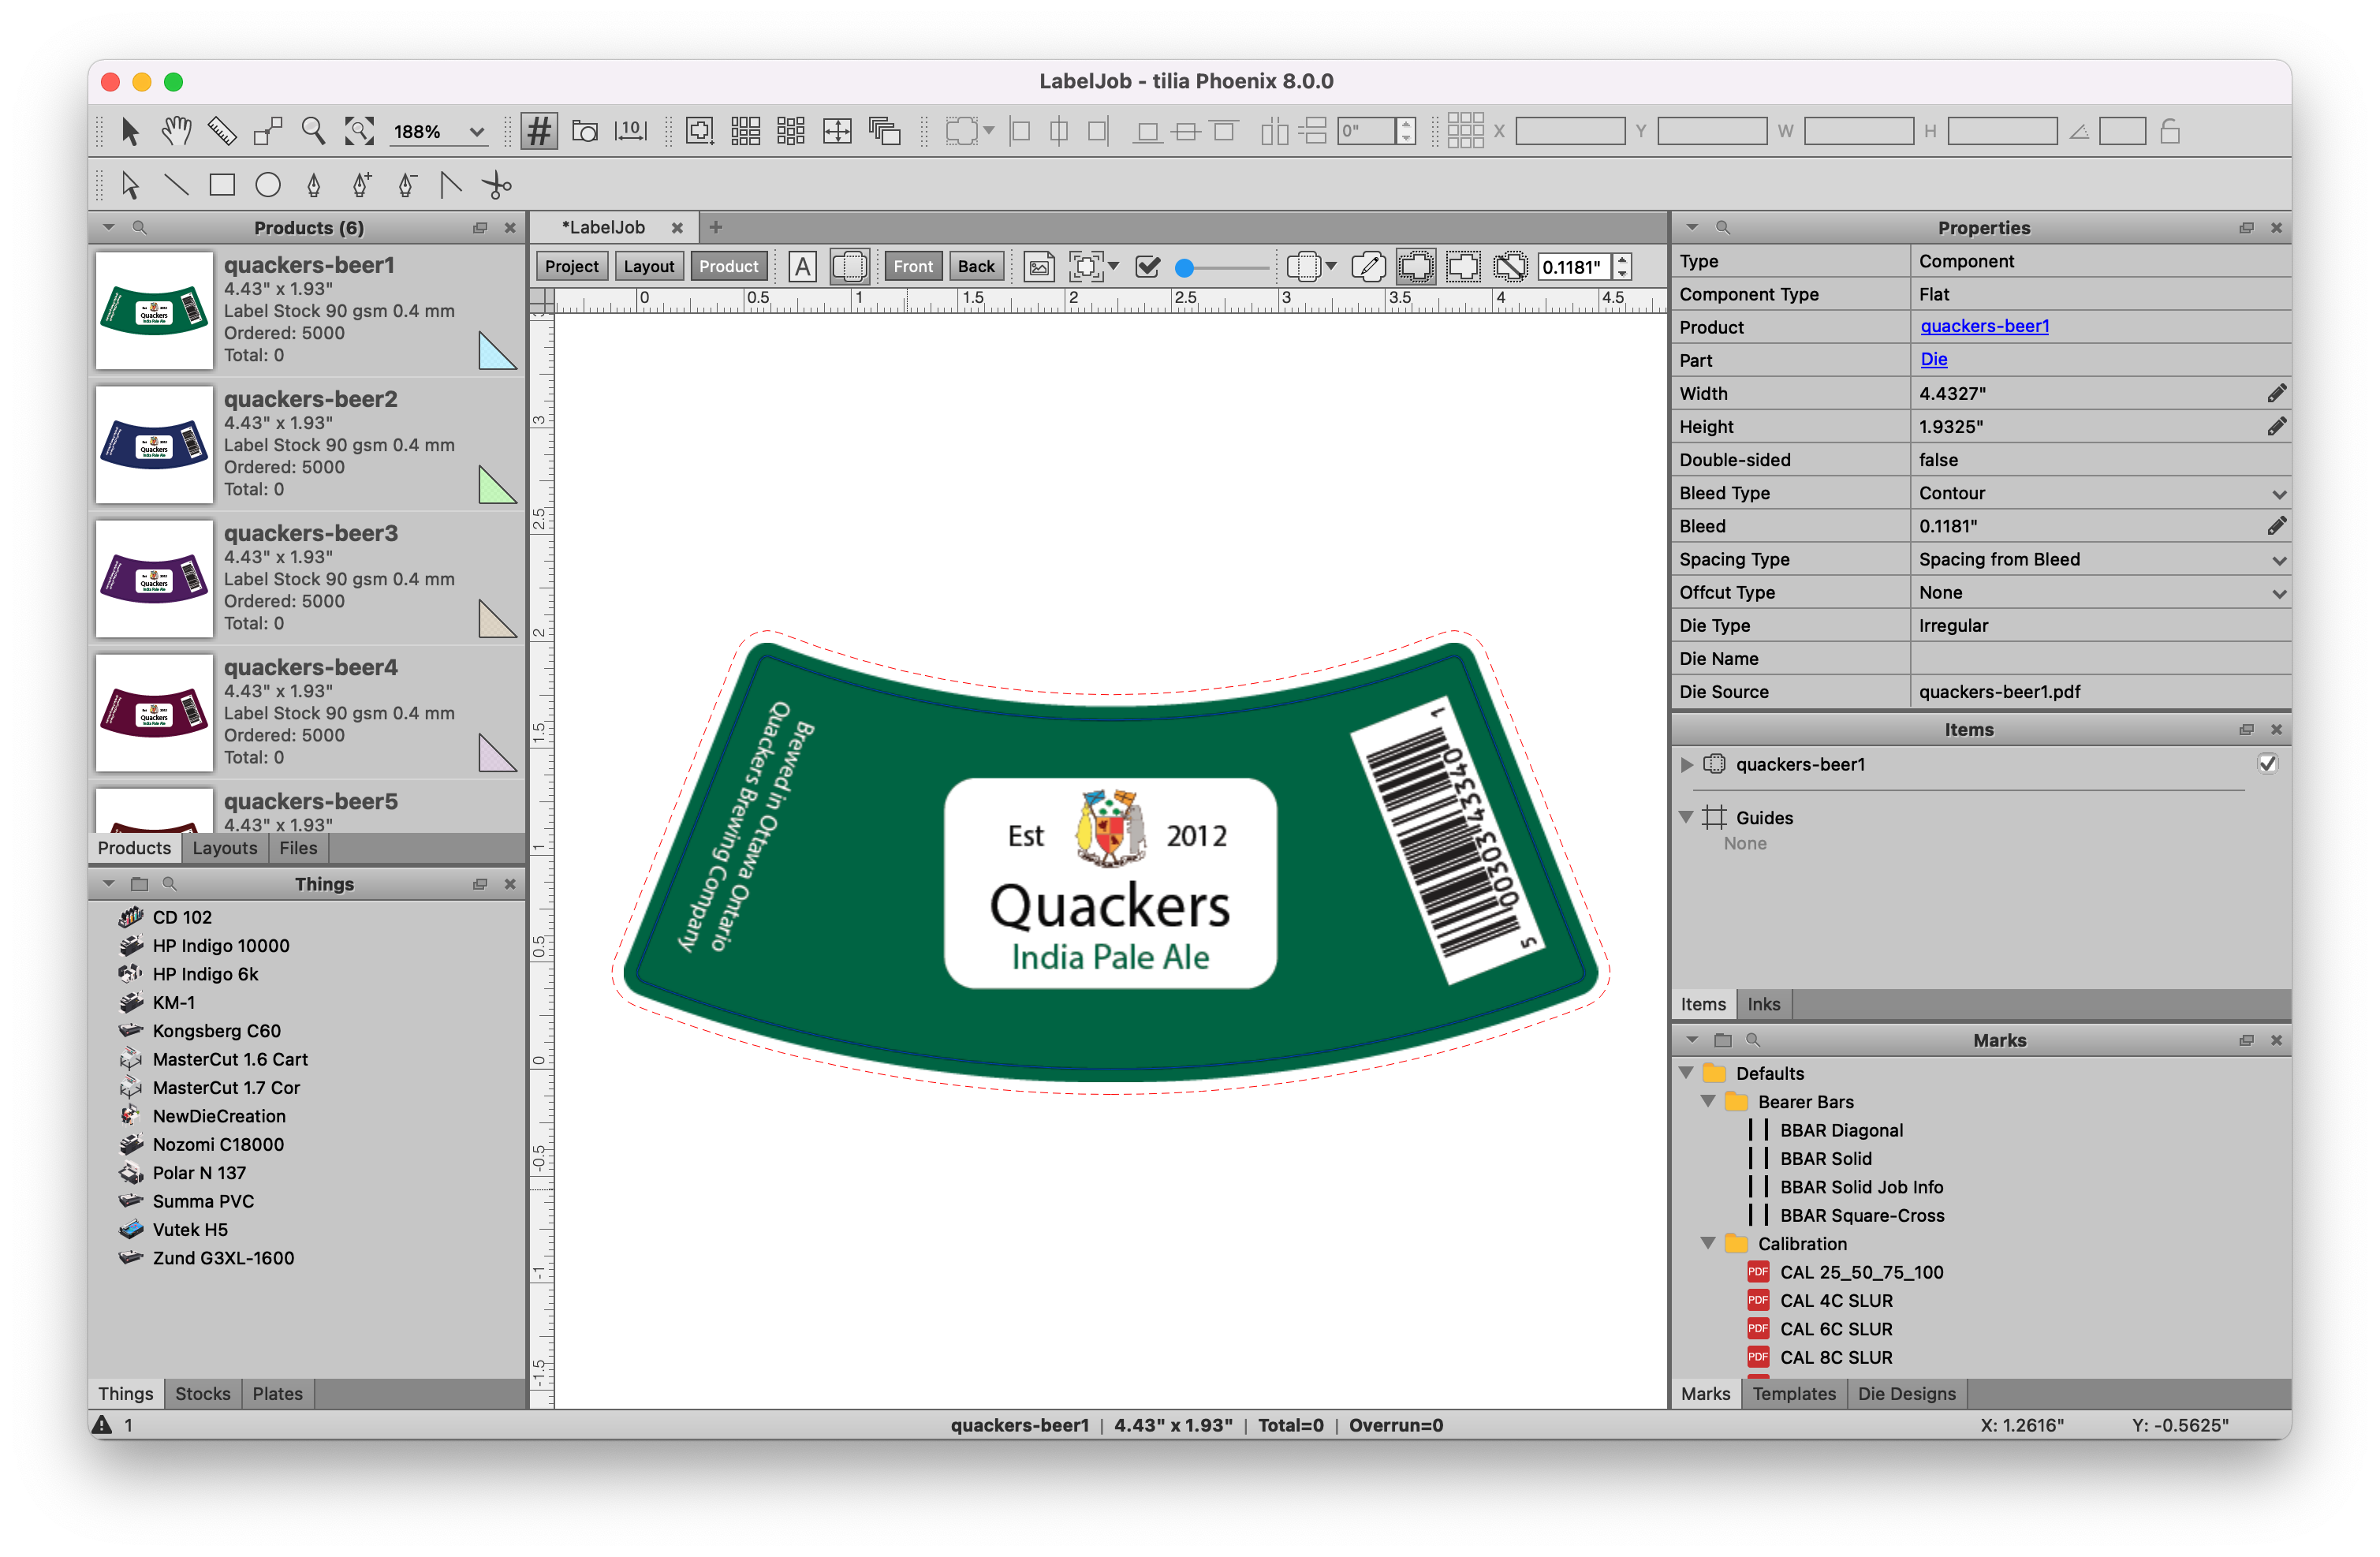
# PDF Spot Color and Layer Mapping
Did you notice how Phoenix automatically created a shape for our products? This happened behind the scenes using a process called Tool Type Mapping (more on that here). Phoenix is looking for inks or layers in the PDF to define things like cut and crease lines.
You can see how Phoenix mapped the layers in our files by visiting Libraries > Tool Types... in the menu bar.
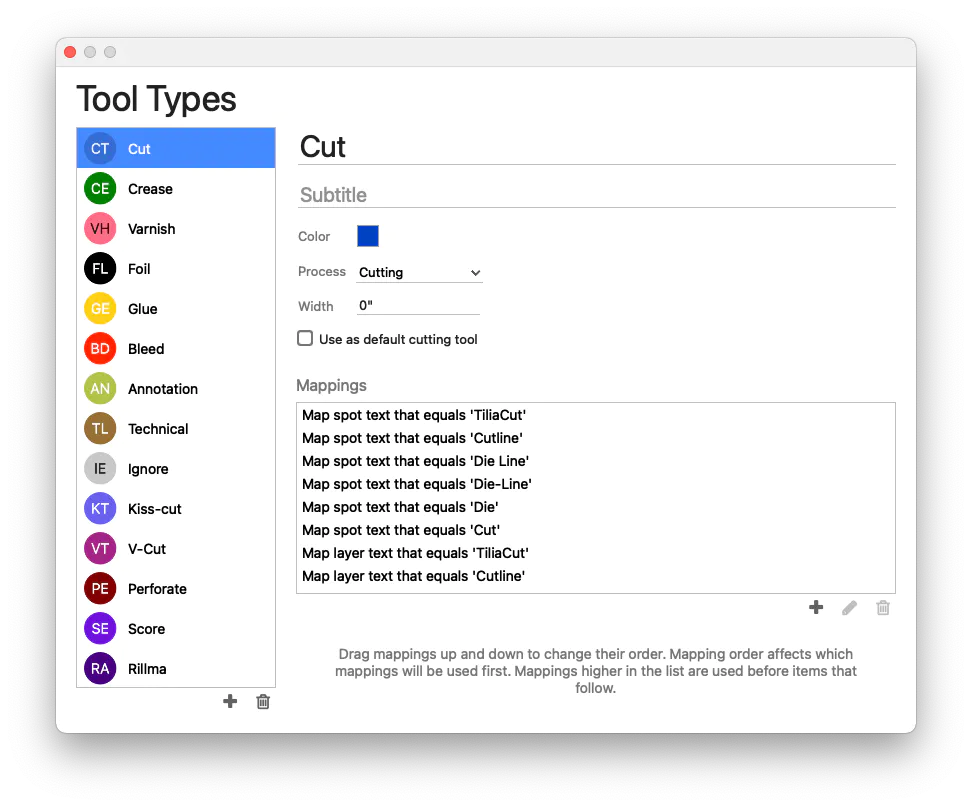
Phoenix found a layer called “Cut” and a layer called “Crease” in our example PDFs and automatically mapped those for us. Use the Tool Types Library in your own workflow when you need to add, delete, or edit these mappings.
# Create a layout
Let’s start building a layout by hand. Click the Layout Panel tab to view the project’s layouts.
When the project was created, a blank layout was automatically added. You can see this in the Layouts panel as "Layout 1."
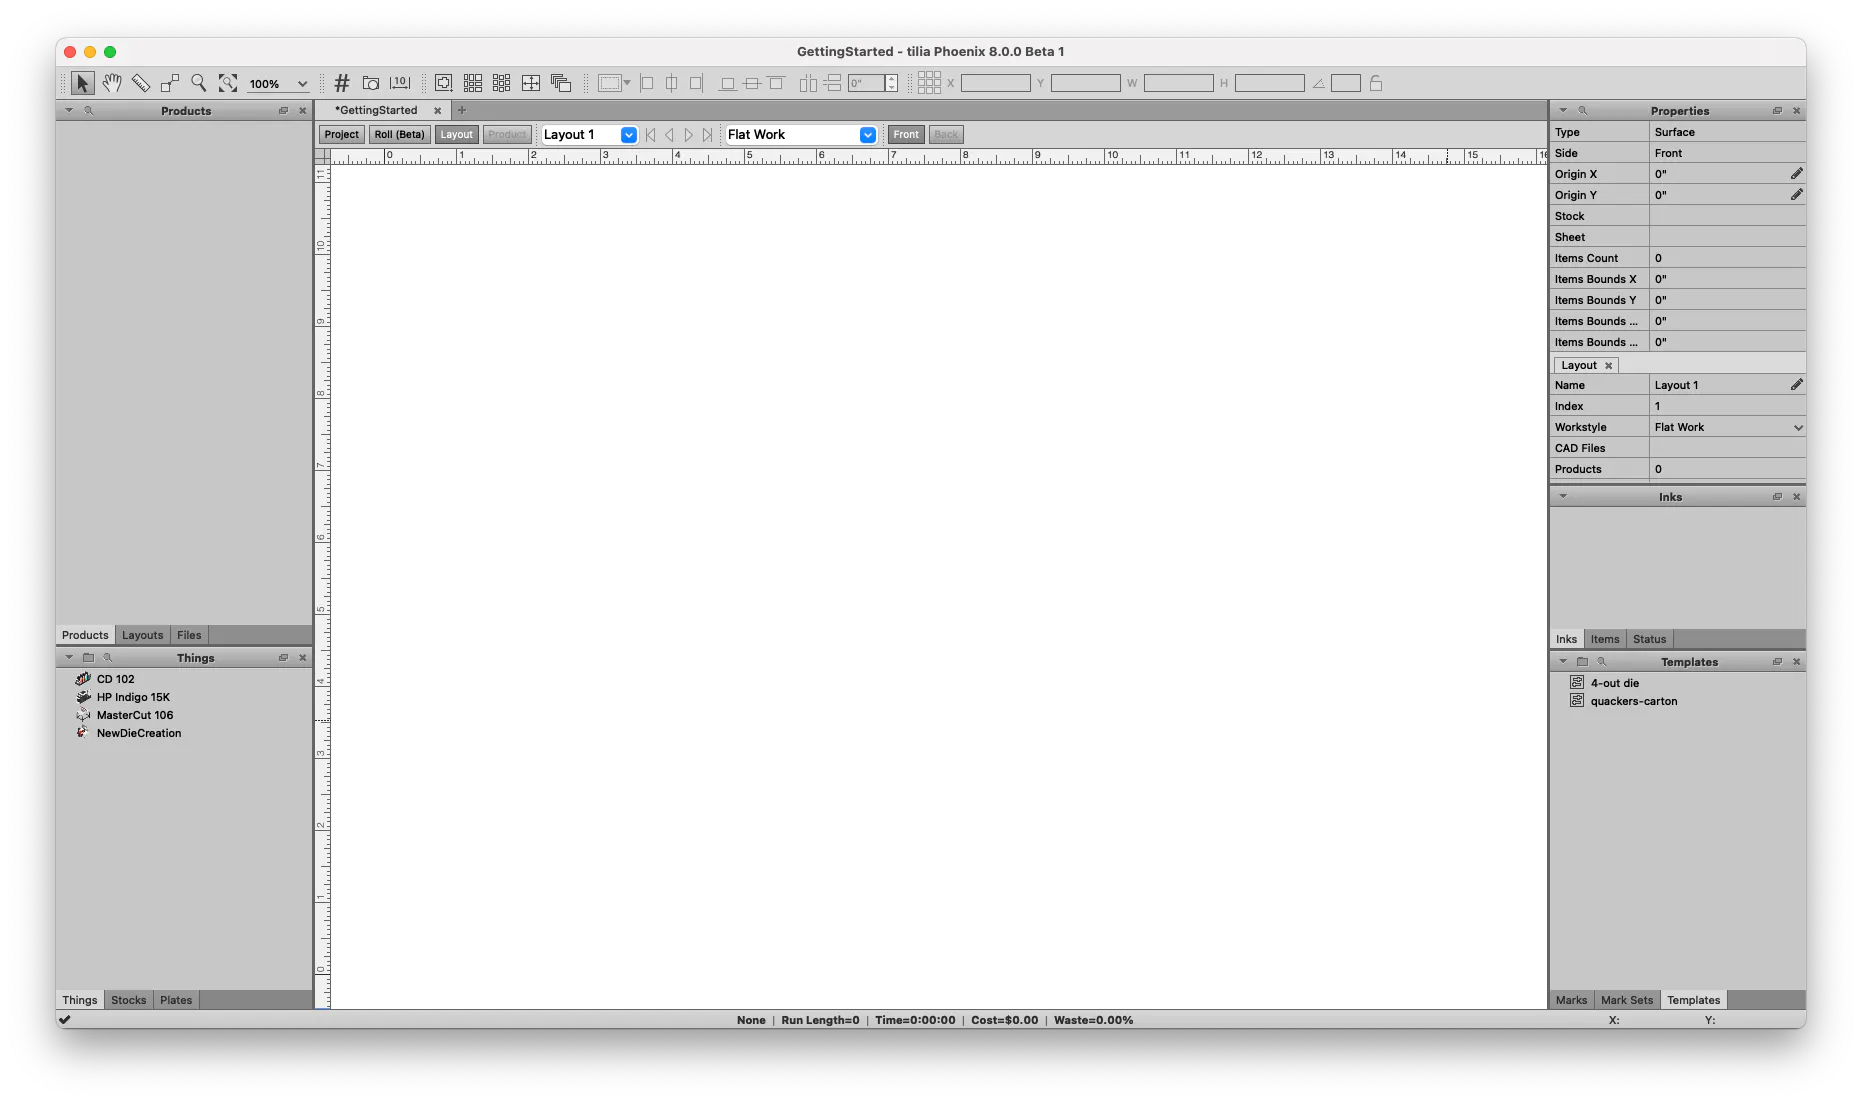
Double click Layout 1 in the Layout Panel. Your screen should now look like this:

Notice that in the staus bar at the bottom of the window, there is no sheet size or press specified, and it shows "None." This means that there is a layout, but no actual stock size defined, and no press assigned. Let's fix that.
Navigate to the Things panel in the bottom left of the Phoenix window. Click and drag the CD102 press from the Things panel onto your artboard.

A few things happened:
- A press is assigned. You can see this in the status bar at the bottom, where it shows "CD102"
- A stock and sheet is assigned. This press had a default sheet assigned, which was a 40x28 sheet of Paperboard.
- You can also see the layout itself looks different, as we can see the plate, gripper margin, and some default marks.
Our default sheet size is 40 x 28" but let’s change that.
Everything in Phoenix is drag-and-drop. Select the “Stocks” panel and drag a different sheet size onto the artboard. Notice how the sheet size changes?

Now drag our 40 x 20” sheet back onto the artboard. We will continue with this size for now.
# Where did our default press settings come from?
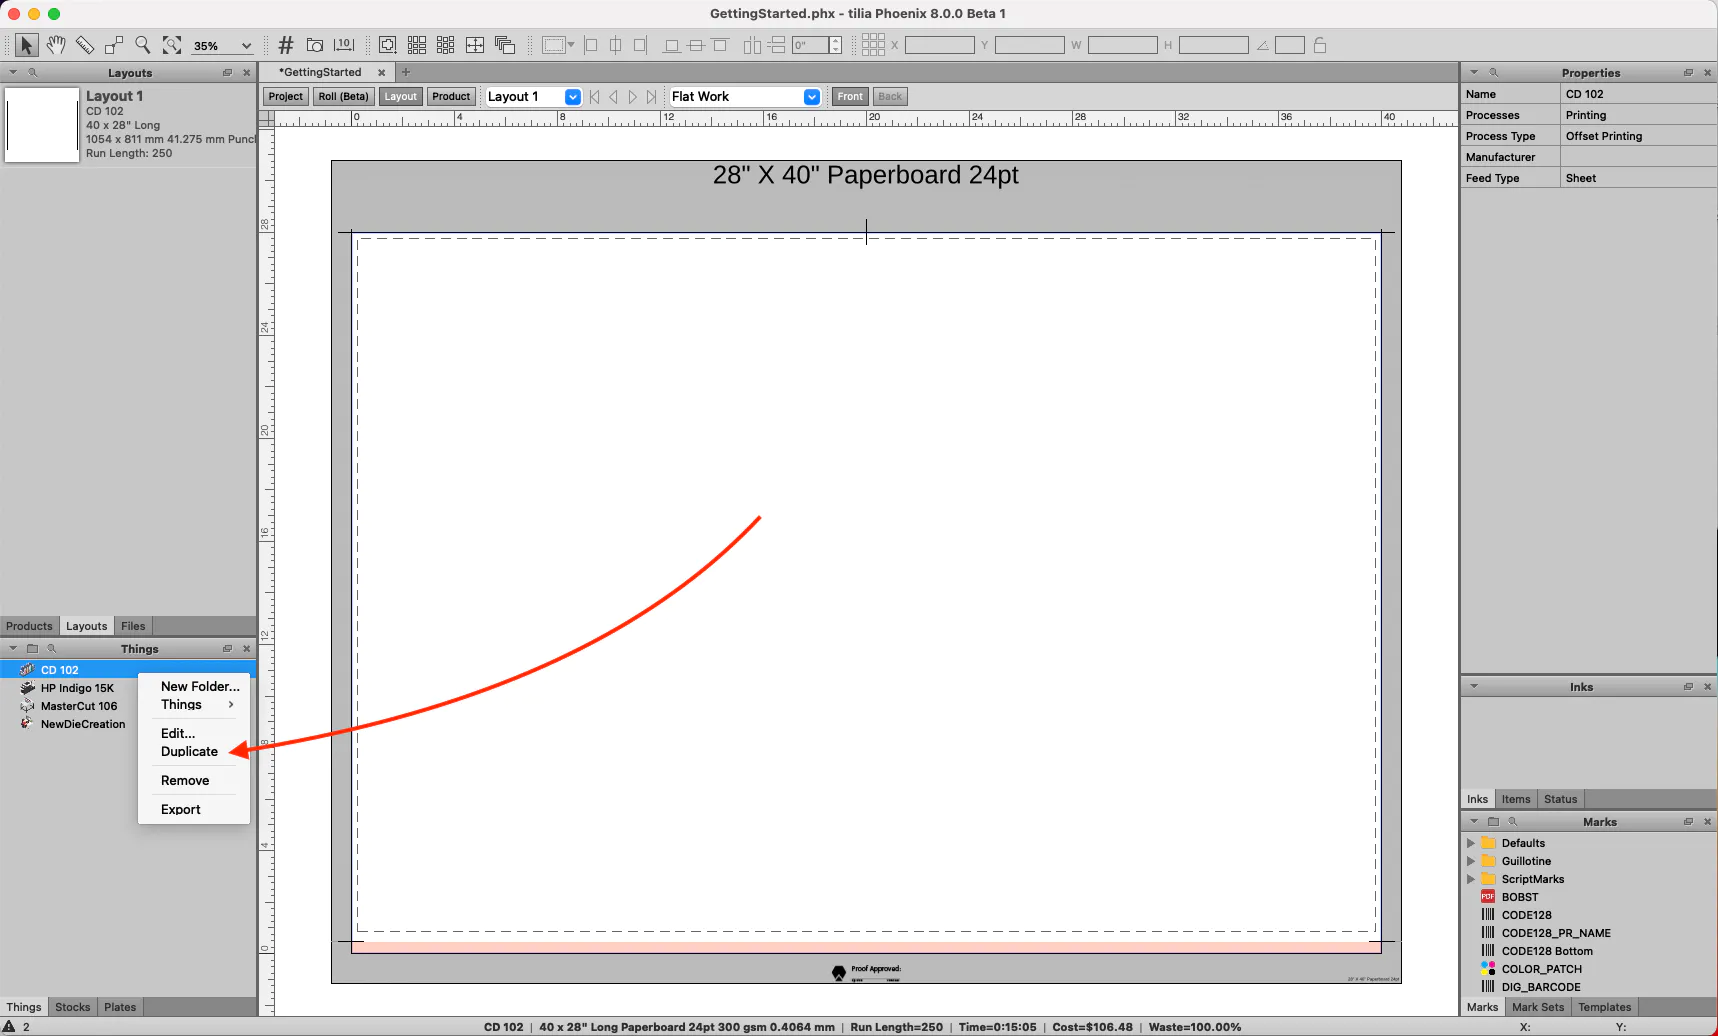
Phoenix has a library of Things that include presses, finishing devices, and processes (a lot more about Things here). Double clicking on a Thing will open the configuration menu. From here, you can preset information about the Thing such as minimum and maximum sheet sizes, speeds, margins, marks, and more.
Right clicking on a Thing in the Things panel will duplicate it. Try duplicating the CD 102 and playing around with the settings to get a feel for how to make changes to the press.
# Add your products to the layout
Back in the Products Panel, select on the first product and drag it onto the Layout.
Tilia Labs is a full imposition editor. Move products around, hold option and drag to duplicate, or delete products as you please. Many of the keyboard shortcuts for Phoenix are the same as those found in applications like Adobe Illustrator.
# Creating a new Step-and-Repeat or Die Template
Let’s use Phoenix to create a step-and-repeat of a product. Delete all but one product from our artboard.
Now, right-click on the product, or go to the Tools menu, and select “Step-and-Repeat” to show the Step-and-Repeat panel.
You can click the “Apply” button on the Step-and-Repeat panel to create a repeat of the selected product with the current settings.
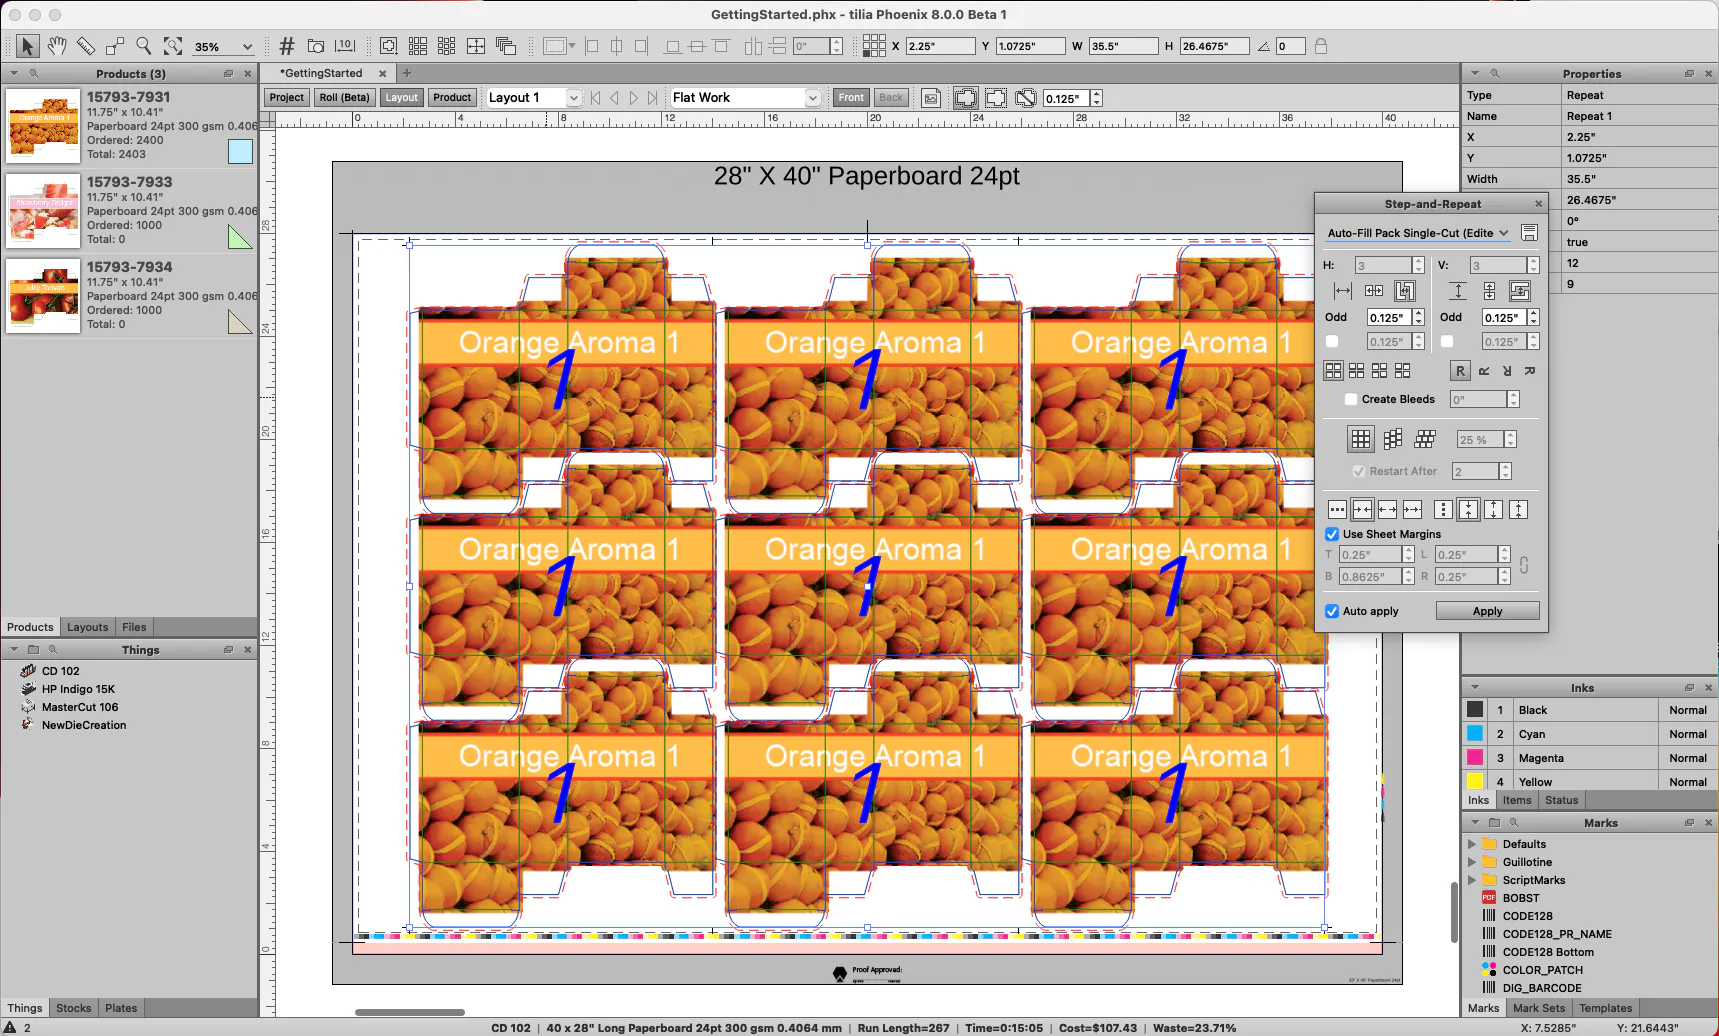
Click the drop down and choose “Auto Fill Pack Single-Cut” to turn on Auto Apply. This will use a preset to automatically fit as many products as can be placed on the sheet both horizontally and vertically, using the cut path of the artwork and no gap distance. Since this artwork has 3mm bleed, change the step distance to 3mm both horizontally and vertically.
If you'd like, play around with the other settings in the Step and Repeat tool to get a feel for what they do.
At this point the layout is complete with one product and should look like this:
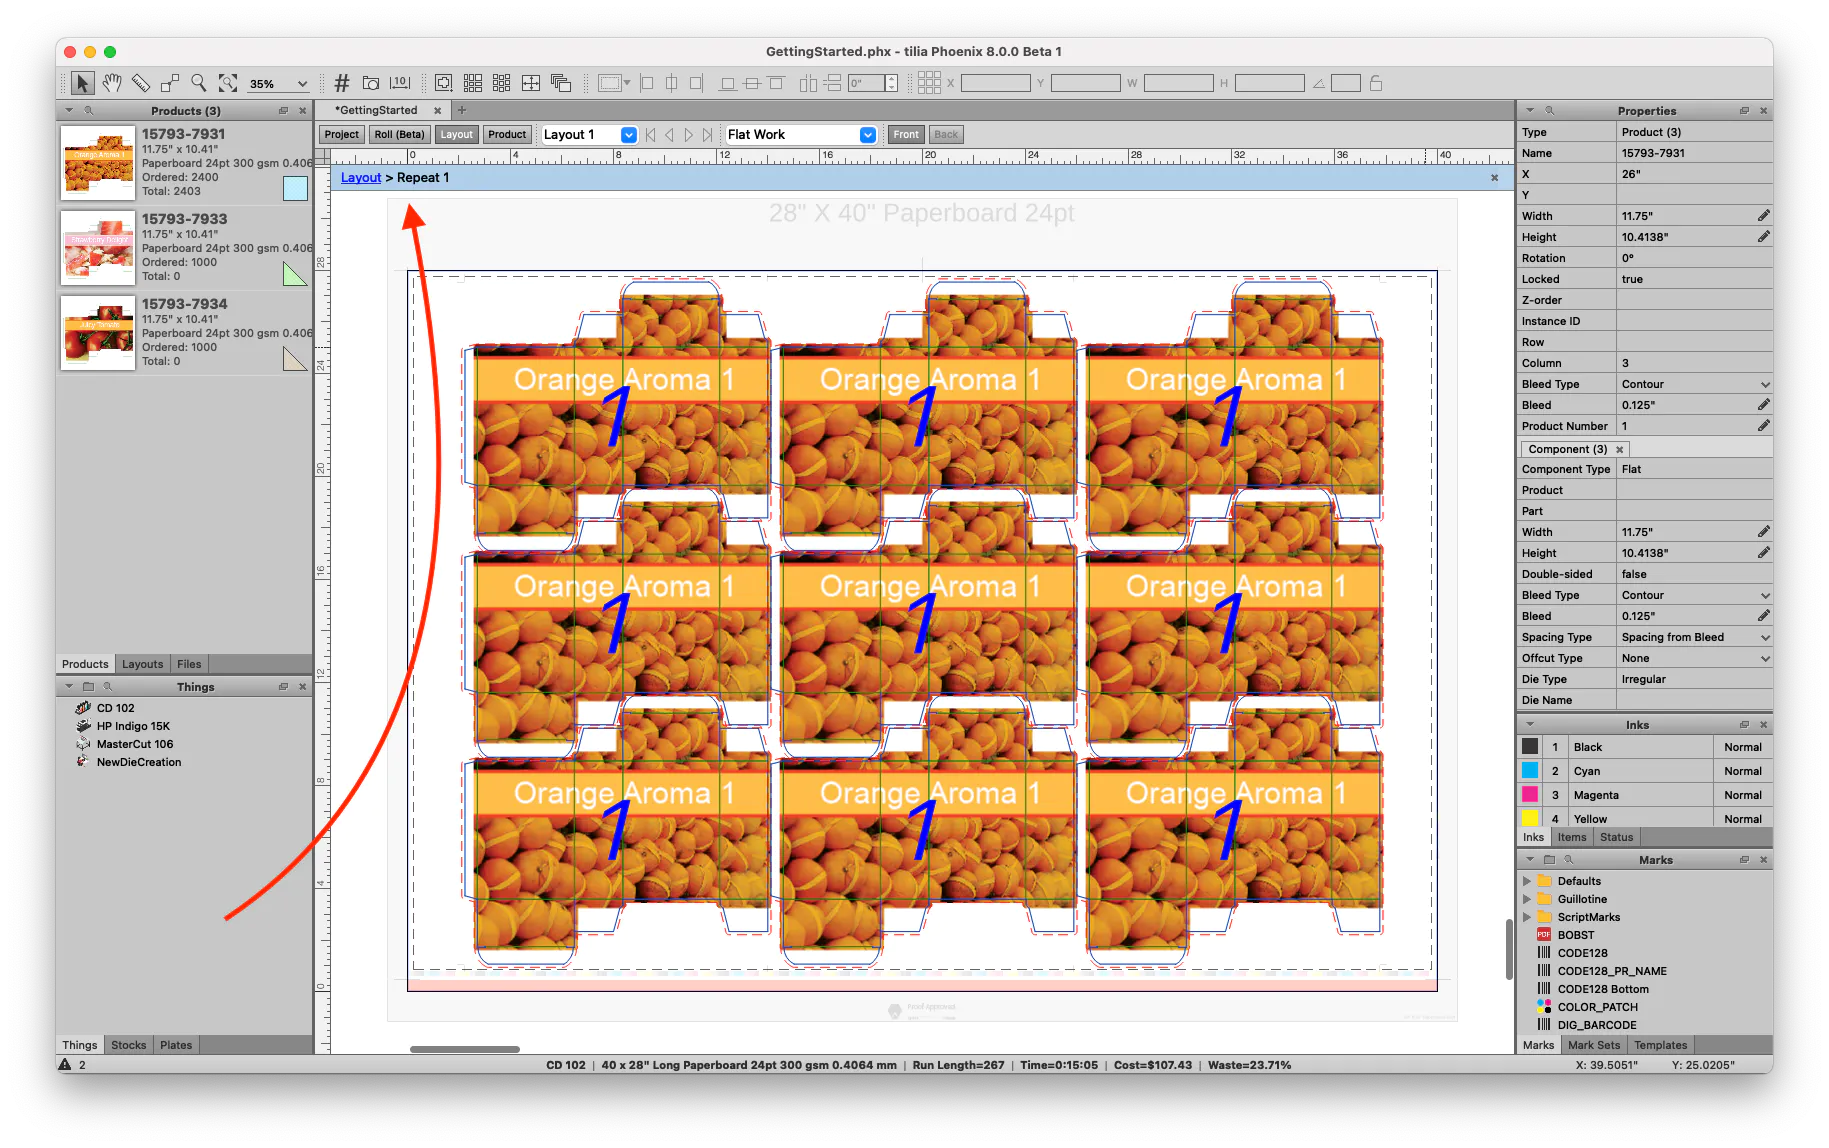
Now let's add another product to our step and repeat. Double click on the repeat to enter the repeat context so you can select individual items in the repeat.
Hold the SHIFT key while selecting individual products inside the step-and-repeat. Now, drag and drop the another product on top of the selected products, but before releasing, hold down the Command (on a Mac) or Control (on a PC) key. Now release, and you'll see that the selected products have been replaced by the new product.

Important!
If selecting a product in the step-and-repeat isn’t working it may be because you have not first double-clicked on the step-and-repeat to get inside the group. Notice if you see a blue bar at the top of the artboard. This indicates you have selected into the step-and-repeat group.
# Already have an existing die template?
Phoenix allows you to import existing die templates from CFF2 files, DXF files, or even PDF with vector dies lines! Let’s give this a try to see how it works.
From inside our current project, navigate to the menu bar to File > Export for Cutting > CFF2...
This prompts us with the export dialogue. For now, let’s just click “OK” and save a CFF2 file to our desktop.
Note
Despite the fact that we are generating this example CFF2 file right from Phoenix, the next few steps will work with any CFF2, DXF, or PDF file that was created in an external CAD program such as ArtiosCAD or Cimex.
Next, navigate to the Templates panel in the bottom right set of panels. If you do not see a Templates tab, navigate to the menu bar Window > Template.

Click the small triangle icon on the top left corner of the Templates panel to open up our die import tools. Select “Import using Die Import Wizard...”
Select the .cf2 file we just created and saved to your desktop. This will open our CFF2 in the Die Import Wizard.
Luckily, since we created this CFF2, all the lines map perfectly! But if you needed to remap lines from a file created in another program, notice that you can use this tool to assign line types to different tools. Much more on the Import Dies tool here.
For now, let’s click “Done”. Notice that this adds a new die template to our die design library!
Navigate to the Layouts panel and click the triangle icon in the top left corner. Select “Add Layout”.
We now have a new empty layout. Drag your CD102 onto the artboard from the Things panel. Drag our new die from the Templates panel onto the layout.

From here, we can add products to the template the same way we did for the Step-and-Repeat. Simply double click a die cavity to select it. Drag and drop products and hold the Command key (Control on Windows) to snap into the die cavities.
# Export your project
Now that the layout is finished, we need to export it.
Go to the File menu, click on "Export for Printing" and choose "Imposed PDF..." In the resulting export dialog, choose the Factory Default PDF Export and click OK. Now choose where to save your PDF.
Let’s also export a PDF report of the project. Go to the File menu, click on Export Report and choose PDF... You can modify the settings if you'd like, and then click OK to create a report. Save the report, and then open it.
Here you can see the details of the project. On the first page you can see total run length, cost, waste, sheet usage, and more, along with a breakdown of each layout. After the overview, there is a layout by layout breakdown with a preview of the layout, followed by an overview of each product in the project.
# Creating your first project with Imposition AI
Now that you have a basic overview of creating a project manually, we'll go through a much faster and efficient method using Imposition AI.
# Create a project
Go to the File menu and select New Project, or press Command + N or Control + N to create a new project.
# Add Products with CSV
This time, instead of dragging and dropping the PDF artwork directly into Phoenix, we'll use a CSV. This CSV has the product parameters already predefined, making for fewer steps in Phoenix. Phoenix can map data from the CSV into any product parameter. So much more on the data you can import from a CSV file here!
Find the provided CSV file called “orders.csv” and drag into Phoenix to import the products. You'll notice the parameters are all mapped correctly, and the order quantity, file name, and stock are properly assigned.
Click “OK” in the CSV import dialogue and notice that thirteen products are automatically imported including their stock and variety of order quantities - 120,000 all the way down to 5,000.
# Run Imposition AI
Now, Phoenix knows what stock the product needs to be placed on since the information was in the CSV. It also knows your production capabilities since the presses and stocks are predefined. Phoenix is now equipped to automatically find the best layout for you!
Navigate to the Window menu at the top of the screen and choose Imposition AI. Click the "Plan" option at the top of Imposition AI, and then choose the following settings:
- Profiles: Use Existing Tooling - Combo Forms
- Products: Select All
- Devices: CD102
- Sheets/Rolls: Select All
Now click Run. Phoenix uses the parameters above to find the best possible layout using all the sheets of that stock and the possible options onto our existing tooling that we imported earlier.
You can play around with other settings here if you'd like. Try running different profiles and different presses to see what is possible!
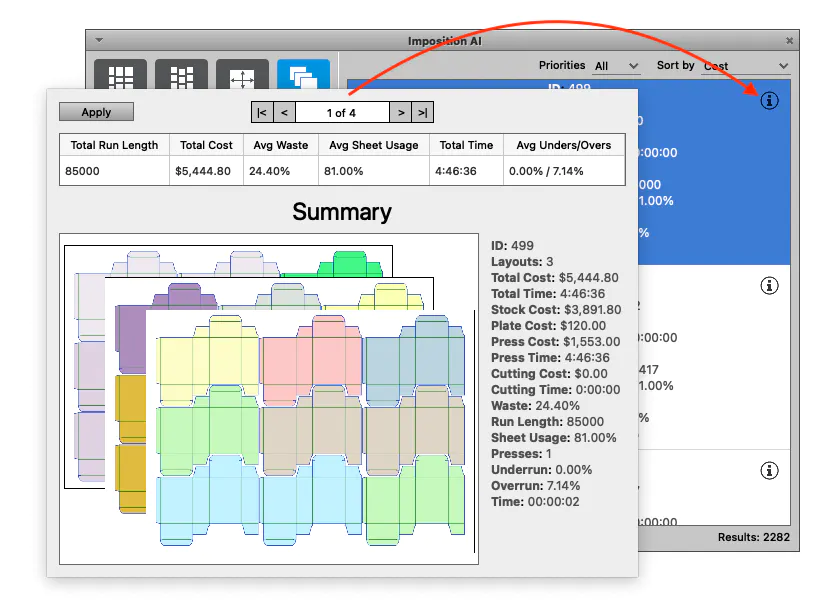
When you find a plan you like, click on the (i) to view more information about the result, or double click in the Impostition A.I. window to apply.
Now you will see that Phoenix shows you the Project view, which is similar to the exported Project Report from earlier. This shows you the details about the Project. You can navigate back to the Layout View by clicking on the "Layout" button. This layout is still editable, so you can add or remove marks, or change the products in the layout however you see fit.
Finally, you can export your project by navigating to the File menu and choosing Export for Printing, Imposed PDF... as you did earlier.
# Learn more in our complete user guide
We hope you learned something in this quick overview, but there is so much more to Phoenix! Here are some suggestions for where to look next:
- Decorate your layouts with tons of production marks
- Dive deeper into Imposition A.I. with this short explainer video
- Learn about how Phoenix handles bleed overlaps.
- Explore our Youtube page for great webinars and feature videos.
- Contact sales for a personalized demonstration or additional training.
- ...and so much more!
Get a jump start on Phoenix with our demo library and files!
| Demo Library | Download .phxlib (opens new window) |
| Demo Files | Download .zip (opens new window) |
Check out our Phoenix Webinars (opens new window) to see how we use these demo files.