# Templates
Templates are used to specify a pre-defined position for one or many product when being imposed on a sheet. In many cases, templates are physical steel rule dies used in finishing.
Phoenix uses templates to intellignetly 'snap' artwork to die templates by using shape-detection algorithms, taking the guess-work out of impositioning and eliminting human errors when imposing to existing tooling. Phoenix ensures graphics snap to the dieline (automatically handling front & back artwork) and even notifies the end-user when the artwork does not match the dieline perfectly.
Templates can be built manually, or imported (requires CAD module) from industry standard CAD file formats (ARD, MFG, PDF, AI, CF2, DXF, DDES, etc...). This allows you to store existing tooling direclty inside of Phoenix to be used and detected automatically during the imposition process.
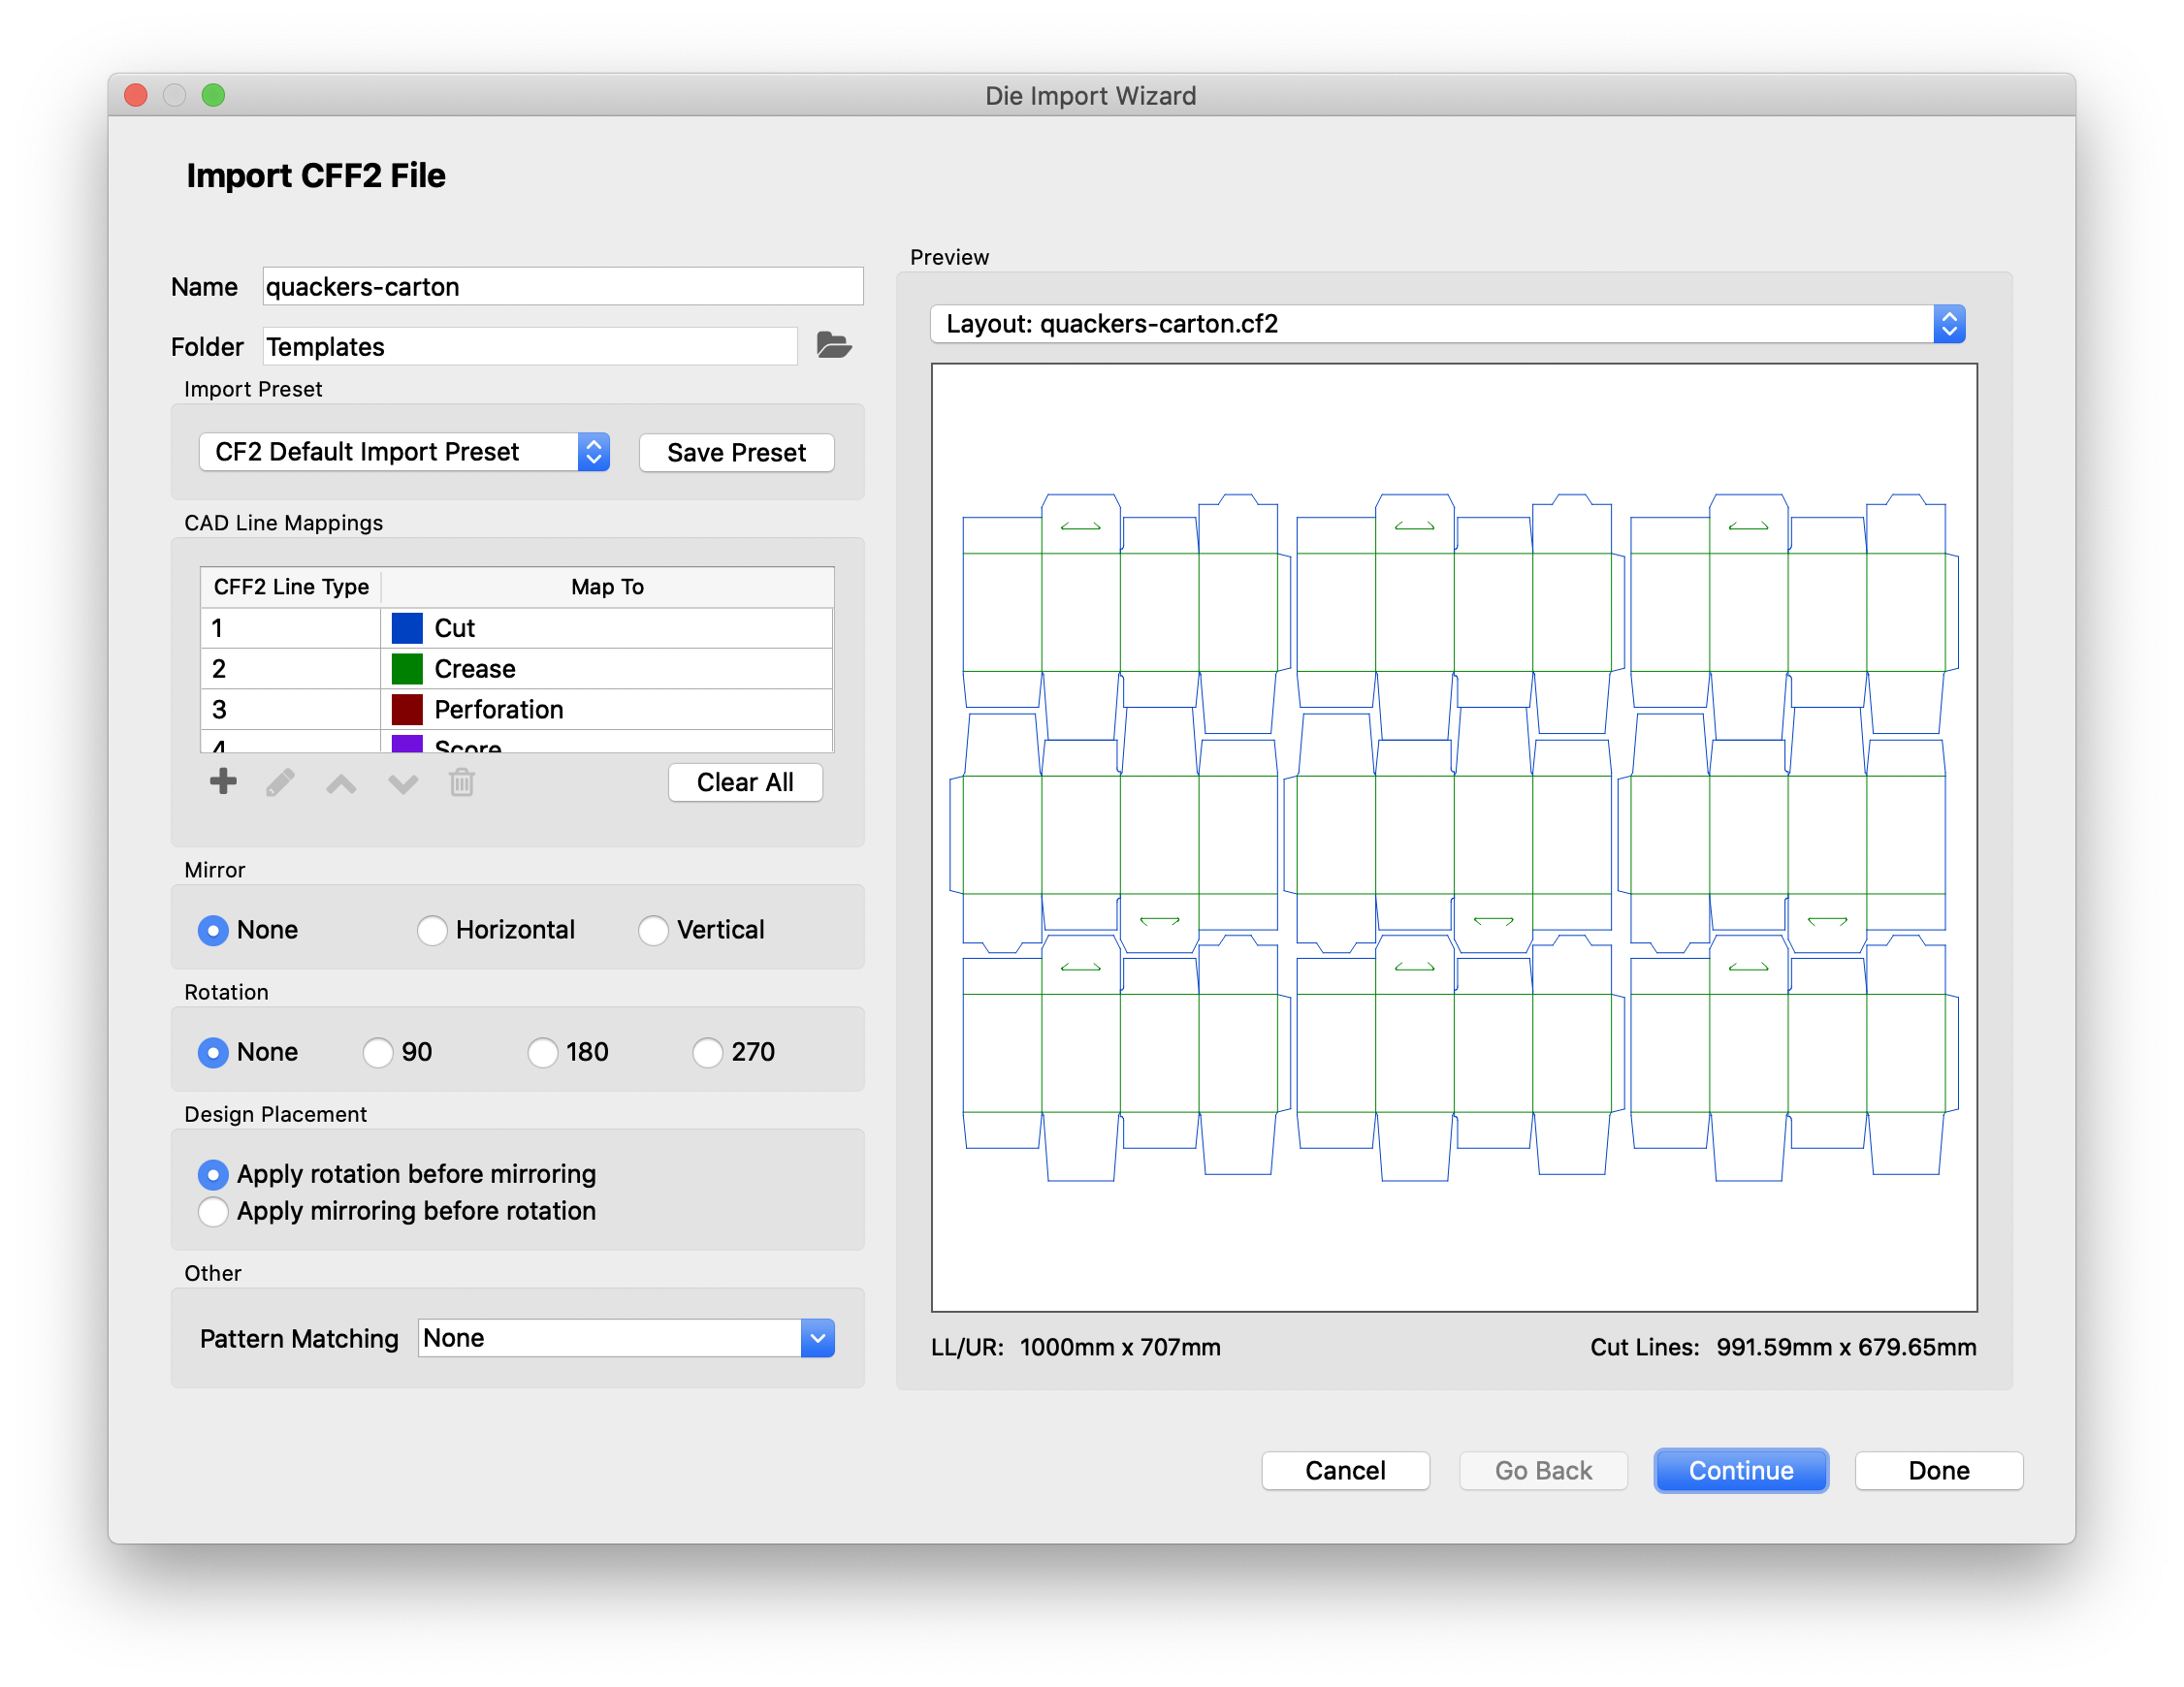
| Field | Description |
|---|---|
| Name | Name given to the imported template which will be displayed in the 'Templates' library. |
| Folder | Templates Library folder which the imported template will be stored. Default is 'Templates' folder which stores the imported template in the Root of the Templates library. |
| Import Preset | CF2 import preset to be used during the import. The Import Preset specifies CFF2 line type mappings. |
| CAD Line Mappings* | Editable list of mappings to map CFF2 line types to Phoenix Tool Types. |
| Mirror | During template importing, you can Mirror the imported geometry Horizontally or Vertically. This is useful for scenarios when you want to create inside or outside layouts without needing to create a new CAD file. |
| Rotation | Rotation allows the import wizard to rotate the imported geometry 90, 180, or 270 degrees if required for your imposition needs. |
| Design Placement | When mirroring and rotating during import, use 'Design Placement' to specify the order of operations. 'Apply rotation before mirroring' or 'Apply mirroring before rotation' |
| Pattern Matching** | None: Do not run any special pattern matching processes during import Merge Similar 1-ups: Find 1-ups that are defined separately in the CAD file but are identical and treat them as the same during import. Advanced Pattern Matching: Searches all paths that are not clearly defined in a 1-up die to find common elements and infer 1-up dies from them. Before 6.1, this algorithm was used only with PDF die import where there are no clearly defined 1-ups. This option is useful when all paths in the CAD file are lumped together instead of being properly defined as stepped up dies. Advanced Shape Detection: Shape detection will run pattern matching first on any non-die paths, and then do an additional step of finding die candidates from closed paths. This step can be significantly more time consuming but has the ability to find single instances of 1-ups in the CAD layout that cannot be found using Advanced Pattern Matching. Fix Common Knife Cuts For CAD files with common knife cut path segments, some or all dies can be defined with the common section omitted, instead relying on neighboring dies or lines defined in the main section of the CAD format to define common cuts. Commonly, this can result in holes in the imported die. The Fix Common Knife Cuts option will auto-detect common knife cut segments in CAD files and ensure that that all missing common segments are included in the imported dies so they can be processed correctly. |
| Preview | The Preview window displays a preview of the imported die template. At the top of the Preview Section, click on the dropdown and select the 1-up Design to make it easier to change line mappings of the die. |
*You can also right-click on lines in the 'Preview' window to map CFF2 line types interactively.
**Note: all five options are available for all CAD formats except for in the case of PDF where advanced pattern matching is always needed to infer the CAD structure since the PDF specification does not define 1-up dies, which means only Advanced Pattern Matching and Advanced Shape Detection options are available during PDF die import.
# Import Die Designs (next window)
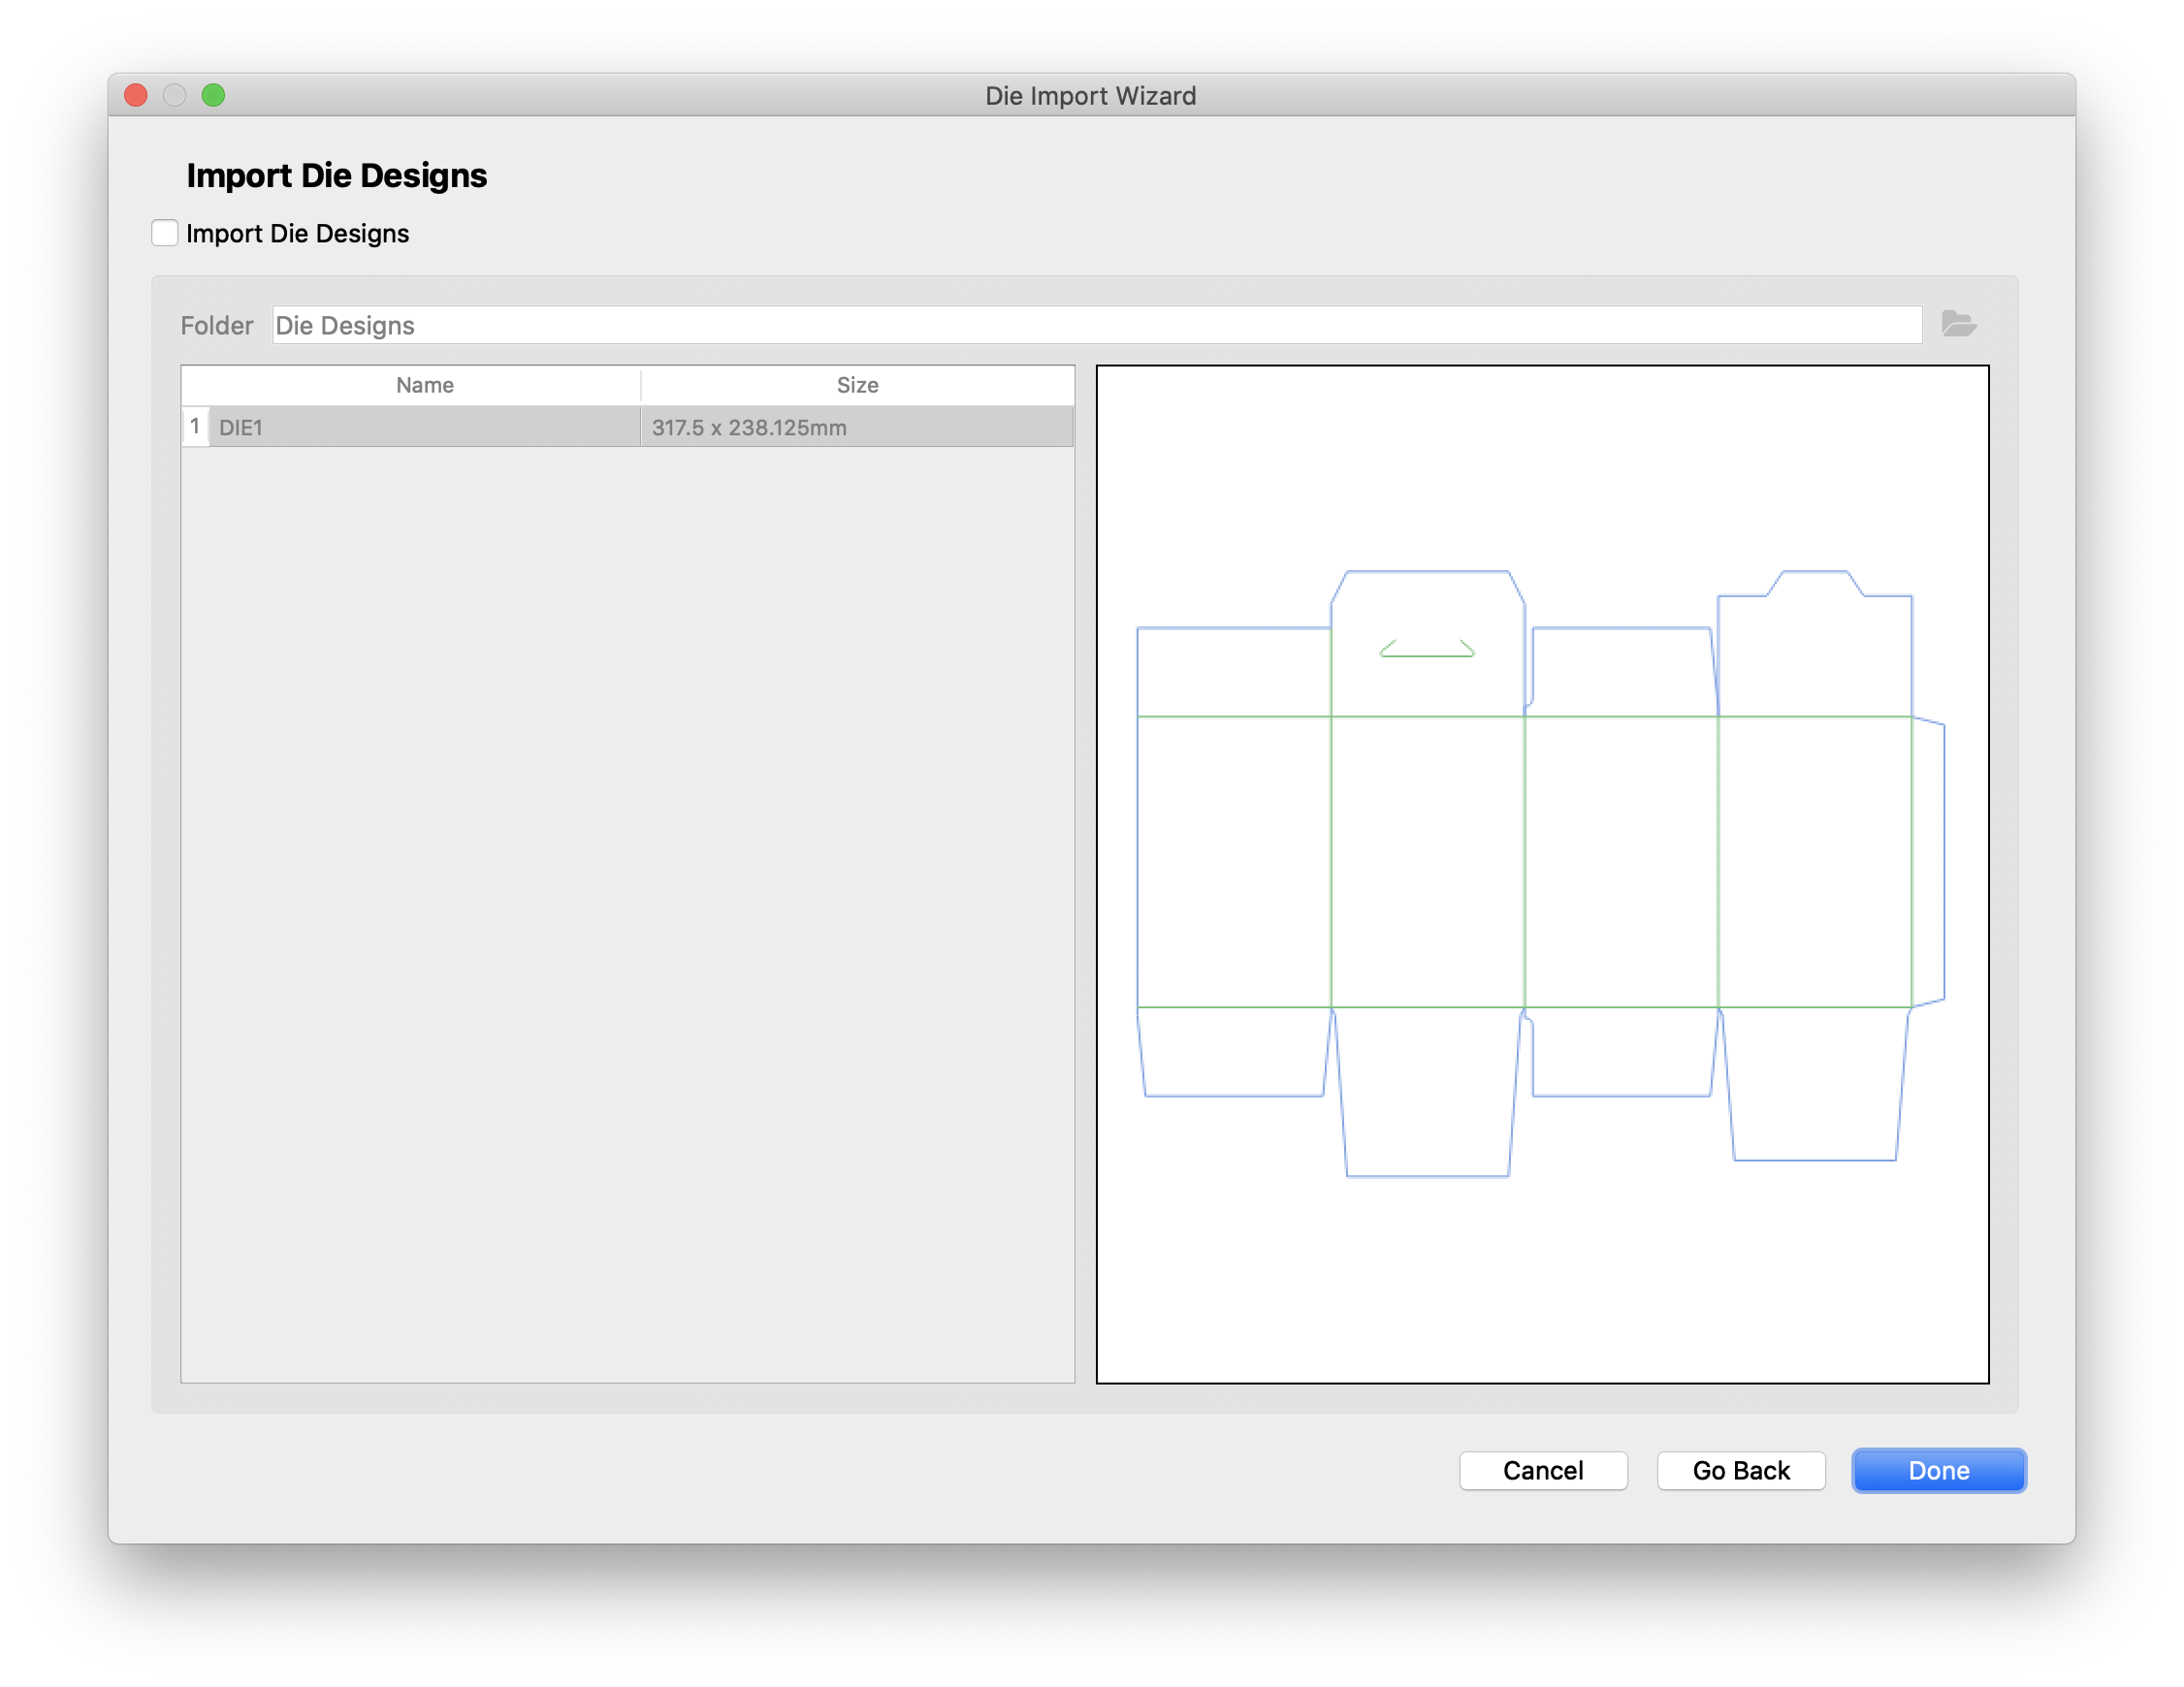
| Field | Description |
|---|---|
| Import Die Designs | If checked, you can optionally import the 1-up designs to the Phoenix 'Die Designs Library' that were identified inside the die template. |
| Folder | Die Designs Library folder where the imported 1-up die design will be stored. Default is 'Die Designs' folder which stores the imported 1-up die design in the Root of the Die Designs library. |
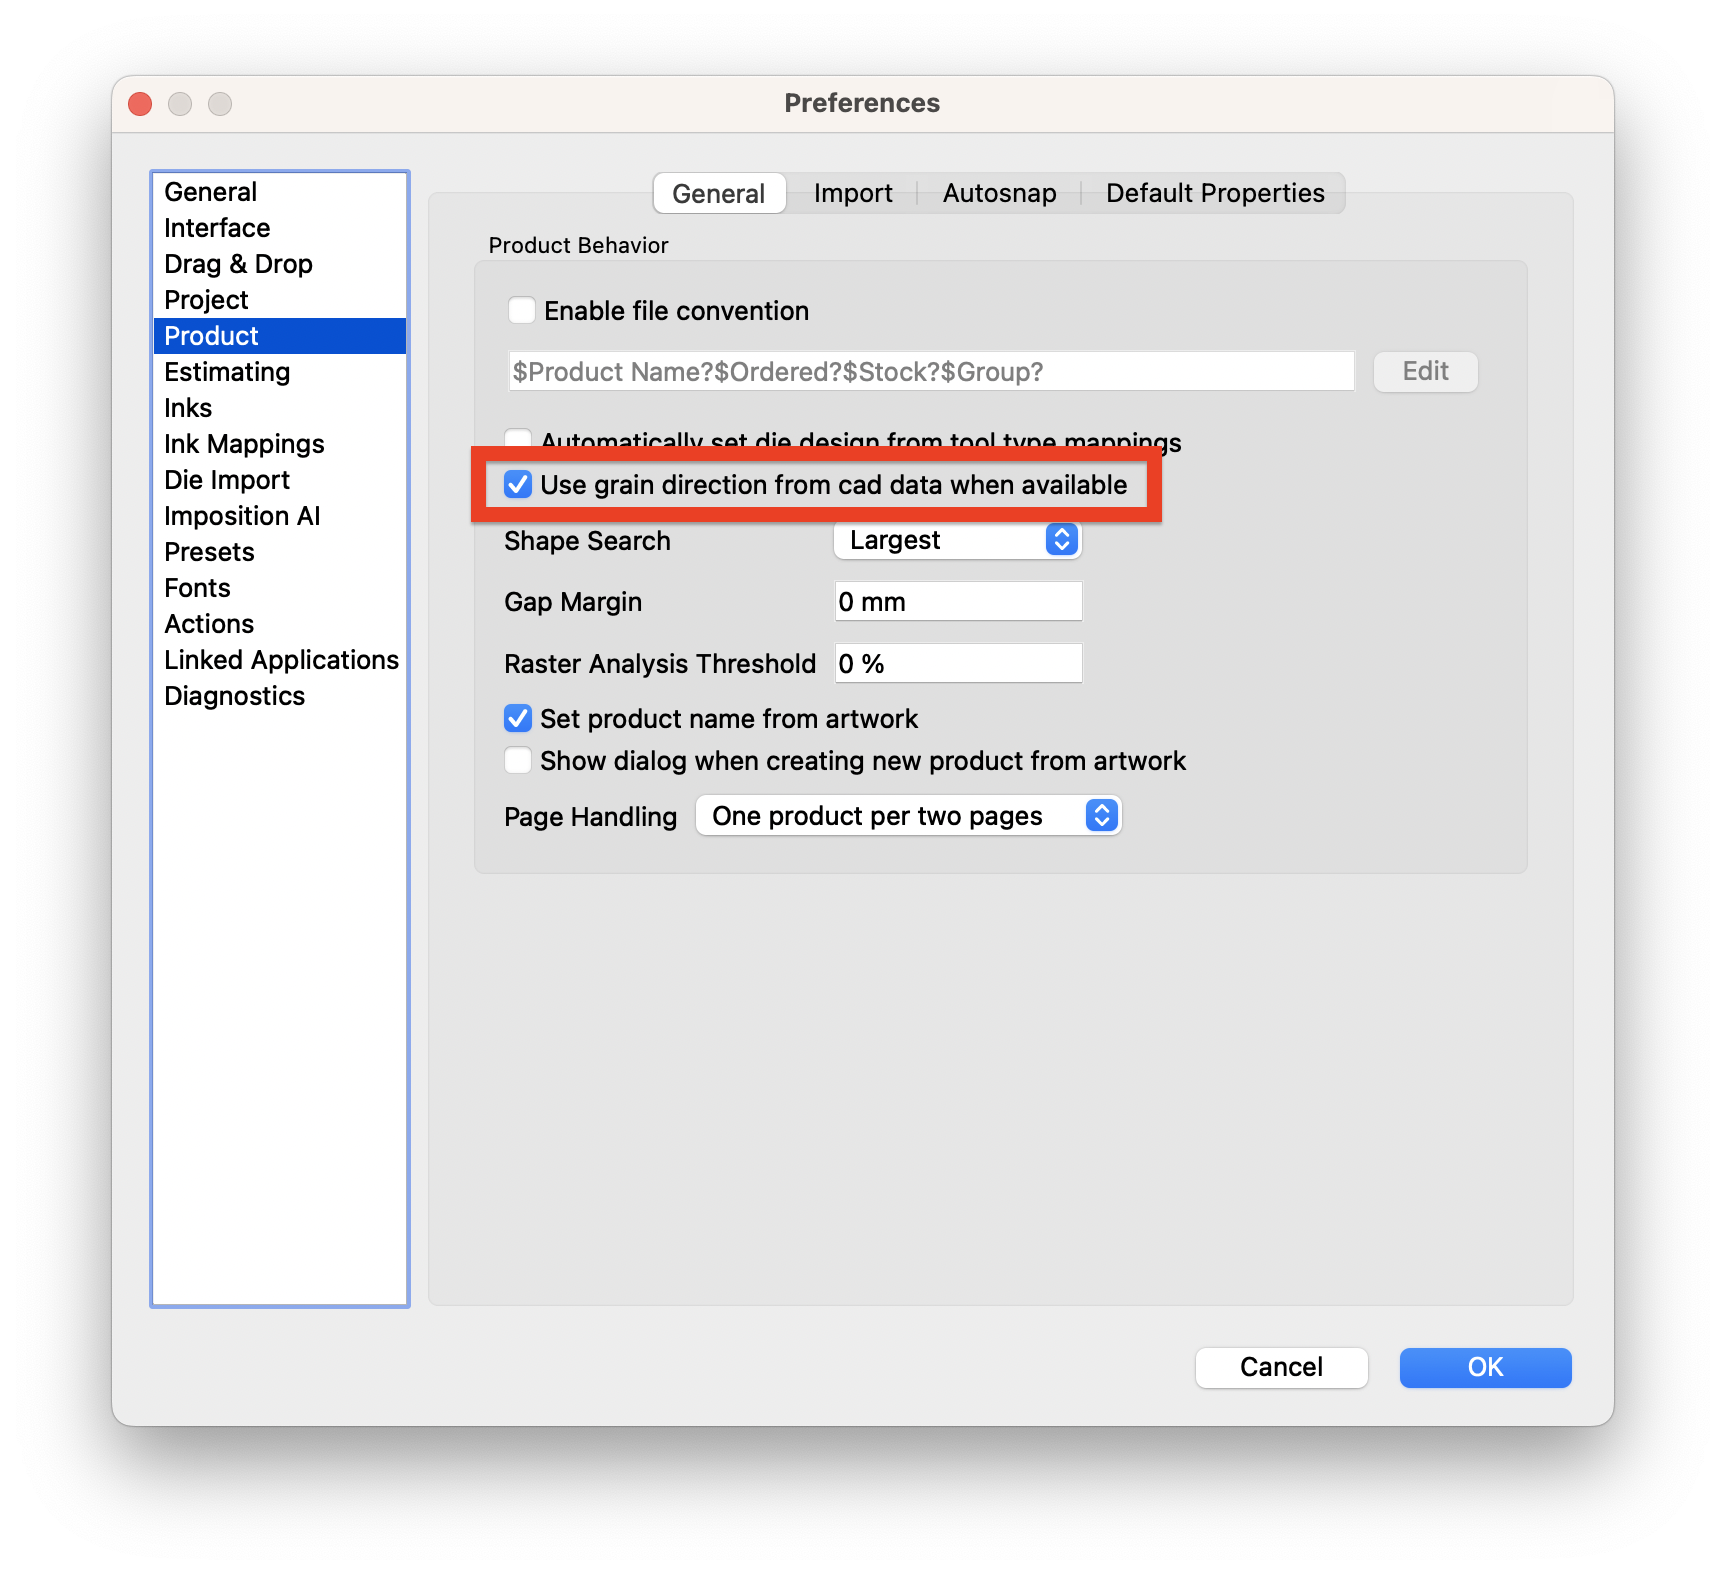
# Use Grain Direction From MFG/ARD
New in version 23.3, Phoenix can detect the grain direction within ArtiosCAD files. To use this grain direction, enable the preference "Use grain direction from cad data when available" within Preferences > Product.
After enabling this, any products created from or using a Die Design that had grain direction in the cad file will have that grain direction set.
# Import Die Template Shortcuts
Templates can be imported normally by using the File menu and selecting "Import Die Template…" to use the default import preset for the given CAD format defined in Preferences -> Die Import.
They can also be imported and placed into the current layout in a single action by selecting "Place Die Template…" instead, or by simply dragging and dropping a CAD file format (CFF2, DXF, DFS, etc...) on the new job canvas.
You can also import die layouts using the interactive Die Import Wizard to interactively define and confirm line mappings, choose a different import preset or define a new preset. To do this normally, select the "Import using Die Import Wizard" and "Place using Die Import Wizard" options from the File menu.
Import actions are also accessible from the action menu in the Templates panel (small triangle in the upper left corner).
# Place Die Template Shortcut
Shortcut: Drag and Drop CAD File
Description: Dropping a die layout CAD file directly into Phoenix while in Layout View will import the layout as a die template using the default import preset for the given CAD format and place it in the current layout being viewed. If no default import preset is defined for the CAD format the Die Import Wizard is launched.
# Place Using Die Import Wizard Shortcut
Shortcut: Control + Drag and Drop CAD File
Description: To force the Die Import Wizard to be used to import and place the CAD file, hold down the Control key while dropping the file into Phoenix.