# Preferences
Phoenix has a number of preferences that determine how Phoenix behaves in certain scenarios. To view and edit preferences, navigate to the Phoenix menu (on a Mac) or Edit (on a PC) and choose Preferences.
The Preferences are made up of General preferences, as well as preference tabs for Interface, Drag & Drop, Project, Product, Estimating, Inks, Ink Mappings, Die Import, Presets, and Diagnostics. See below for an explanation of each preference option.
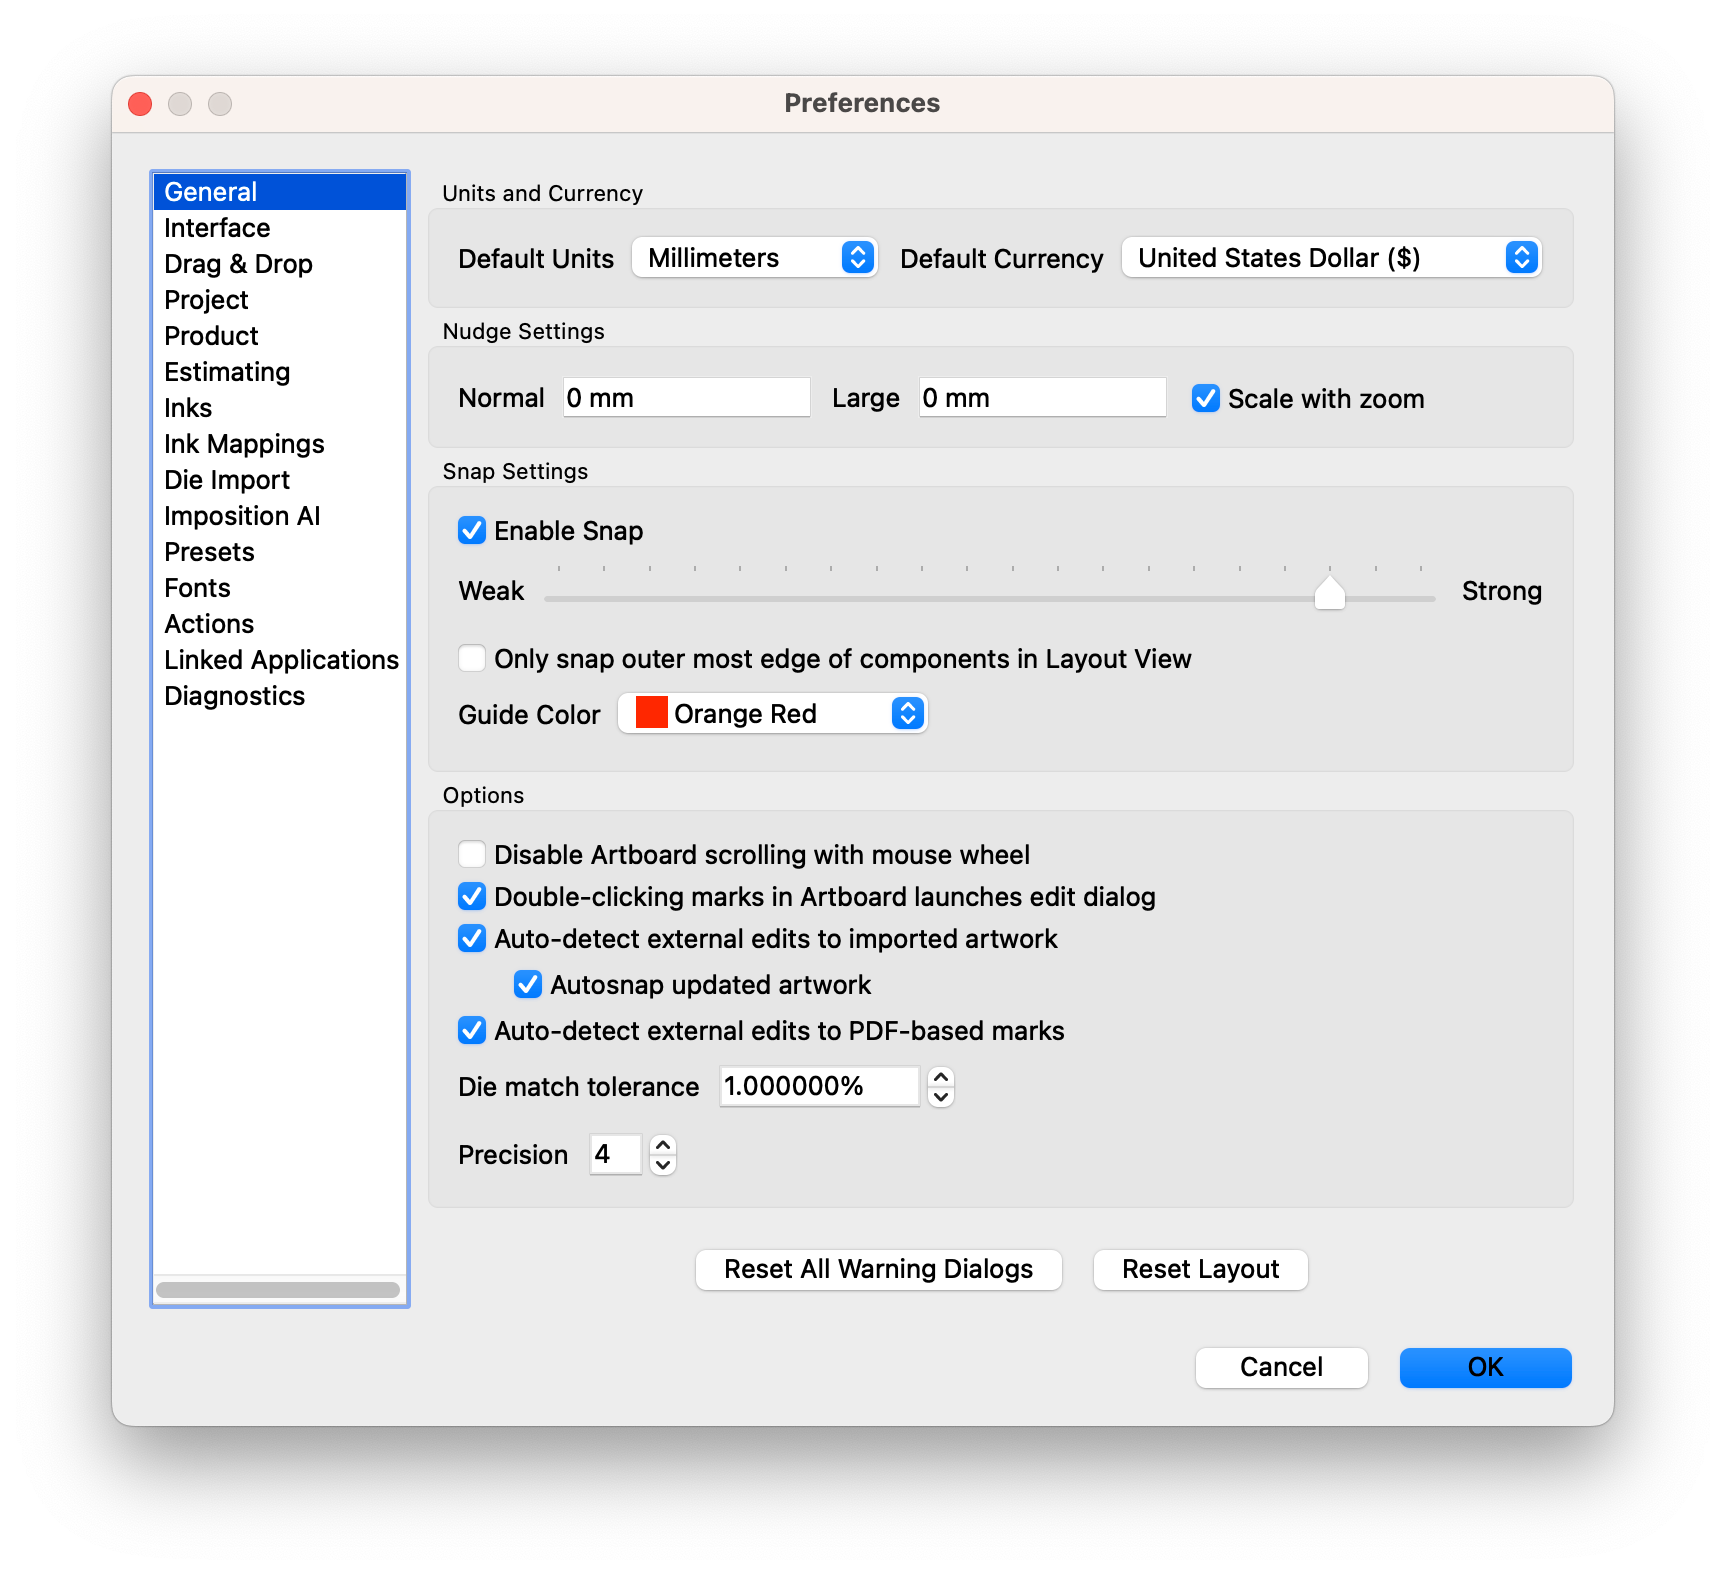
| Field | Description |
|---|---|
| Default Units | Set the units for Phoenix to use by default |
| Default Currency | Set the currency Phoenix should use for costing and estimating |
| Nudge | Defines the distance used for a "nudge," which is when an object is selected and the arrow keys are used to transform it up, down, left, or right. A large nudge is a nudge with the shift key depressed. The "Scale with zoom" option, when enabled, scales the nudge up or down depending on the zoom level. For instance, if you are zoomed in to a small area on a layout, and nudge, with this option disabled, the nudge would still move the default distance. With "Scale with zoom" enabled, however, the nudge would be scaled proportionately to the zoom level, so the nudge would be a smaller distance than default. |
| Enable Snap | Toggles whether snapping is enabled when dragging items |
| Snap Strength | Sets the level of intensity of snapping objects to other objects. The other strength options define how strong the snap is, which refers to the distance from another object before the snap occurs. |
| Only snap outer most edge of components in Layout View | When enabled, this limits what is snapped while dragging a product in the layout view. When disabled, snap includes cut path and bleed path |
| Guide Color | Sets the color of guides in Phoenix |
| Disable Artboard scrolling with mouse wheel | By default, if you have a mouse scroll wheel, the scroll wheel controls artboard scrolling. This option disables this feature. |
| Double-clicking marks in Artboard launches edit dialog | When enabled, you can edit a mark by double-clicking it in the Artboard |
| Auto-detect external edits to imported artwork | If enabled, Phoenix will monitor artwork to detect changes. If a change is detected, Phoenix will prompt the user to ask if the artwork should be updated in the project. |
| Autosnap updated artwork | If artwork is updated, this option enables autosnapping for the updated artwork. If disabled, autosnapping won't happen, and the dieline from the original file will remain unchanged. |
| Auto-detect external edits to PDF-based marks | If using a custom mark based on a PDF, this option will monitor for any changes to the original PDF and notify the user if changes are detected. |
| Die match tolerance | Sets the tolerance level for matching artwork to die templates. A larger number equates to a looser tolerance, and a smaller number means a tighter fit. It is recommended to leave this value at the default level, however, if your template does not match your die line well, you can adjust this value to compensate. |
| Precision | Defines the precision of values displayed within the Phoenix UI. This does not affect the precision of any calculations or values within Phoenix, it only truncates the displayed value. |
| Reset All Warning Dialogs | Resets any warning dialog windows that have previously been dismissed and instructed to not warn the user again |
| Reset Layout | Phoenix retains the size, and configuration of your Phoenix panels to make for a consistent user experience. If you want to reset the layout to the default, you can click the Reset Layout button. |
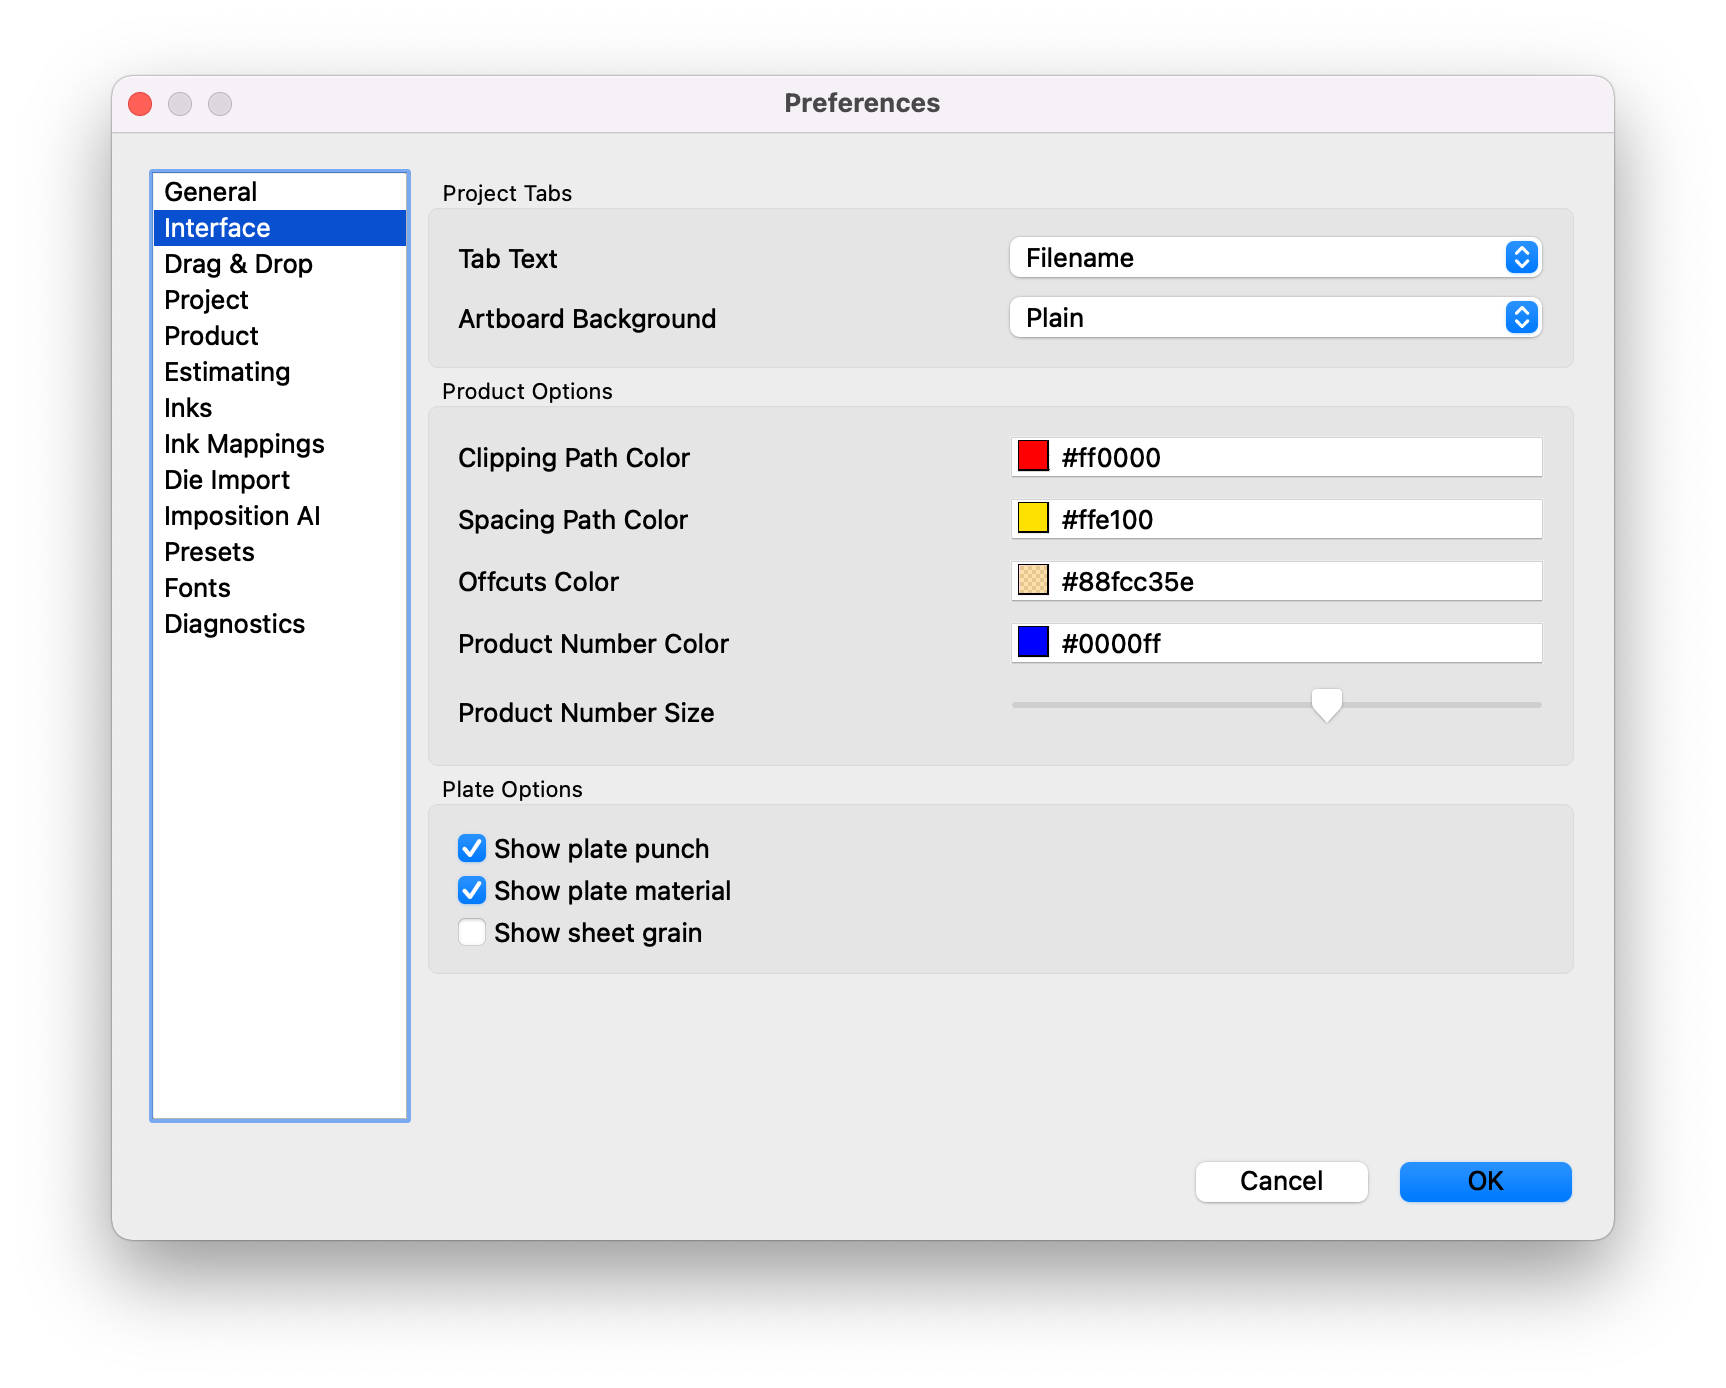
| Field | Description |
|---|---|
| Tab Text | Choose what should be displayed in each project's tab. Options are Filename, Project Name, or Project ID |
| Artboard Background | Choose your artboard background. Options are Plain (no background), Origin lines, or Grid. |
| Clipping Path Color | Set the color of product clipping paths in Phoenix |
| Spacing Path Color | Set the color of product spacing paths in Phoenix |
| Offcuts Color | Set the color of product offcuts in Phoenix |
| Product Number Color | Set the color of product numbers in Phoenix |
| Product Number Size | Set the relative size of product numbers |
| Show plate punch | If using plates, define whether to show plate punch |
| Show plate material | If using plates, define whether to show plate material |
| Show Sheet grain | Choose whether to display sheet grain |
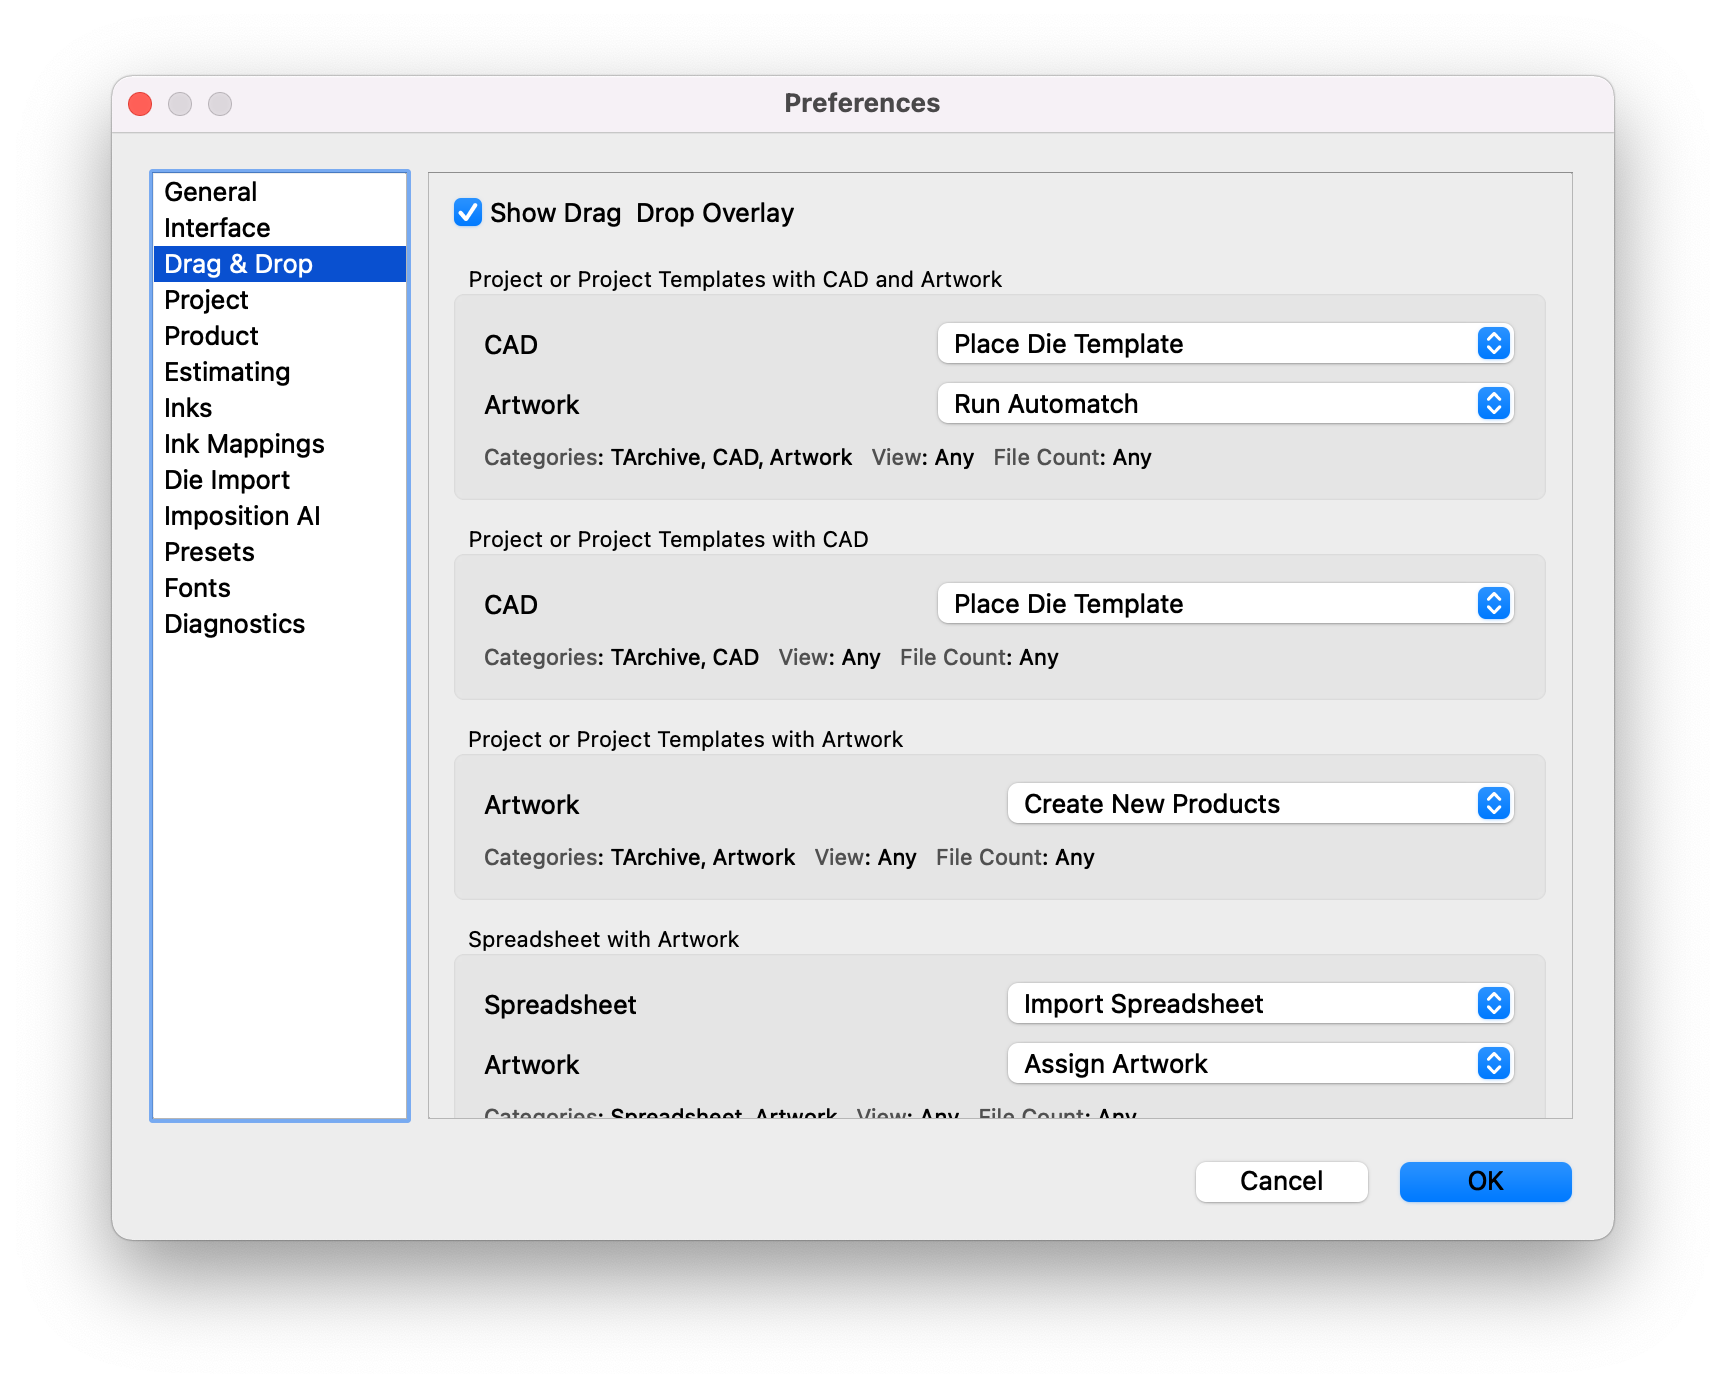
Phoenix 8.0 introduces new drag and drop behavior, where you can customize exactly what happens and what options are available when dragging and dropping files into Phoenix.
Each drag and drop behavior is completely customizable through the Preferences in the Drag & Drop pane. For each category in the preferences, a scenario is described, and the type of item being dropped is listed. Next to each item is a dropdown where you can sepcify the desired behavior.
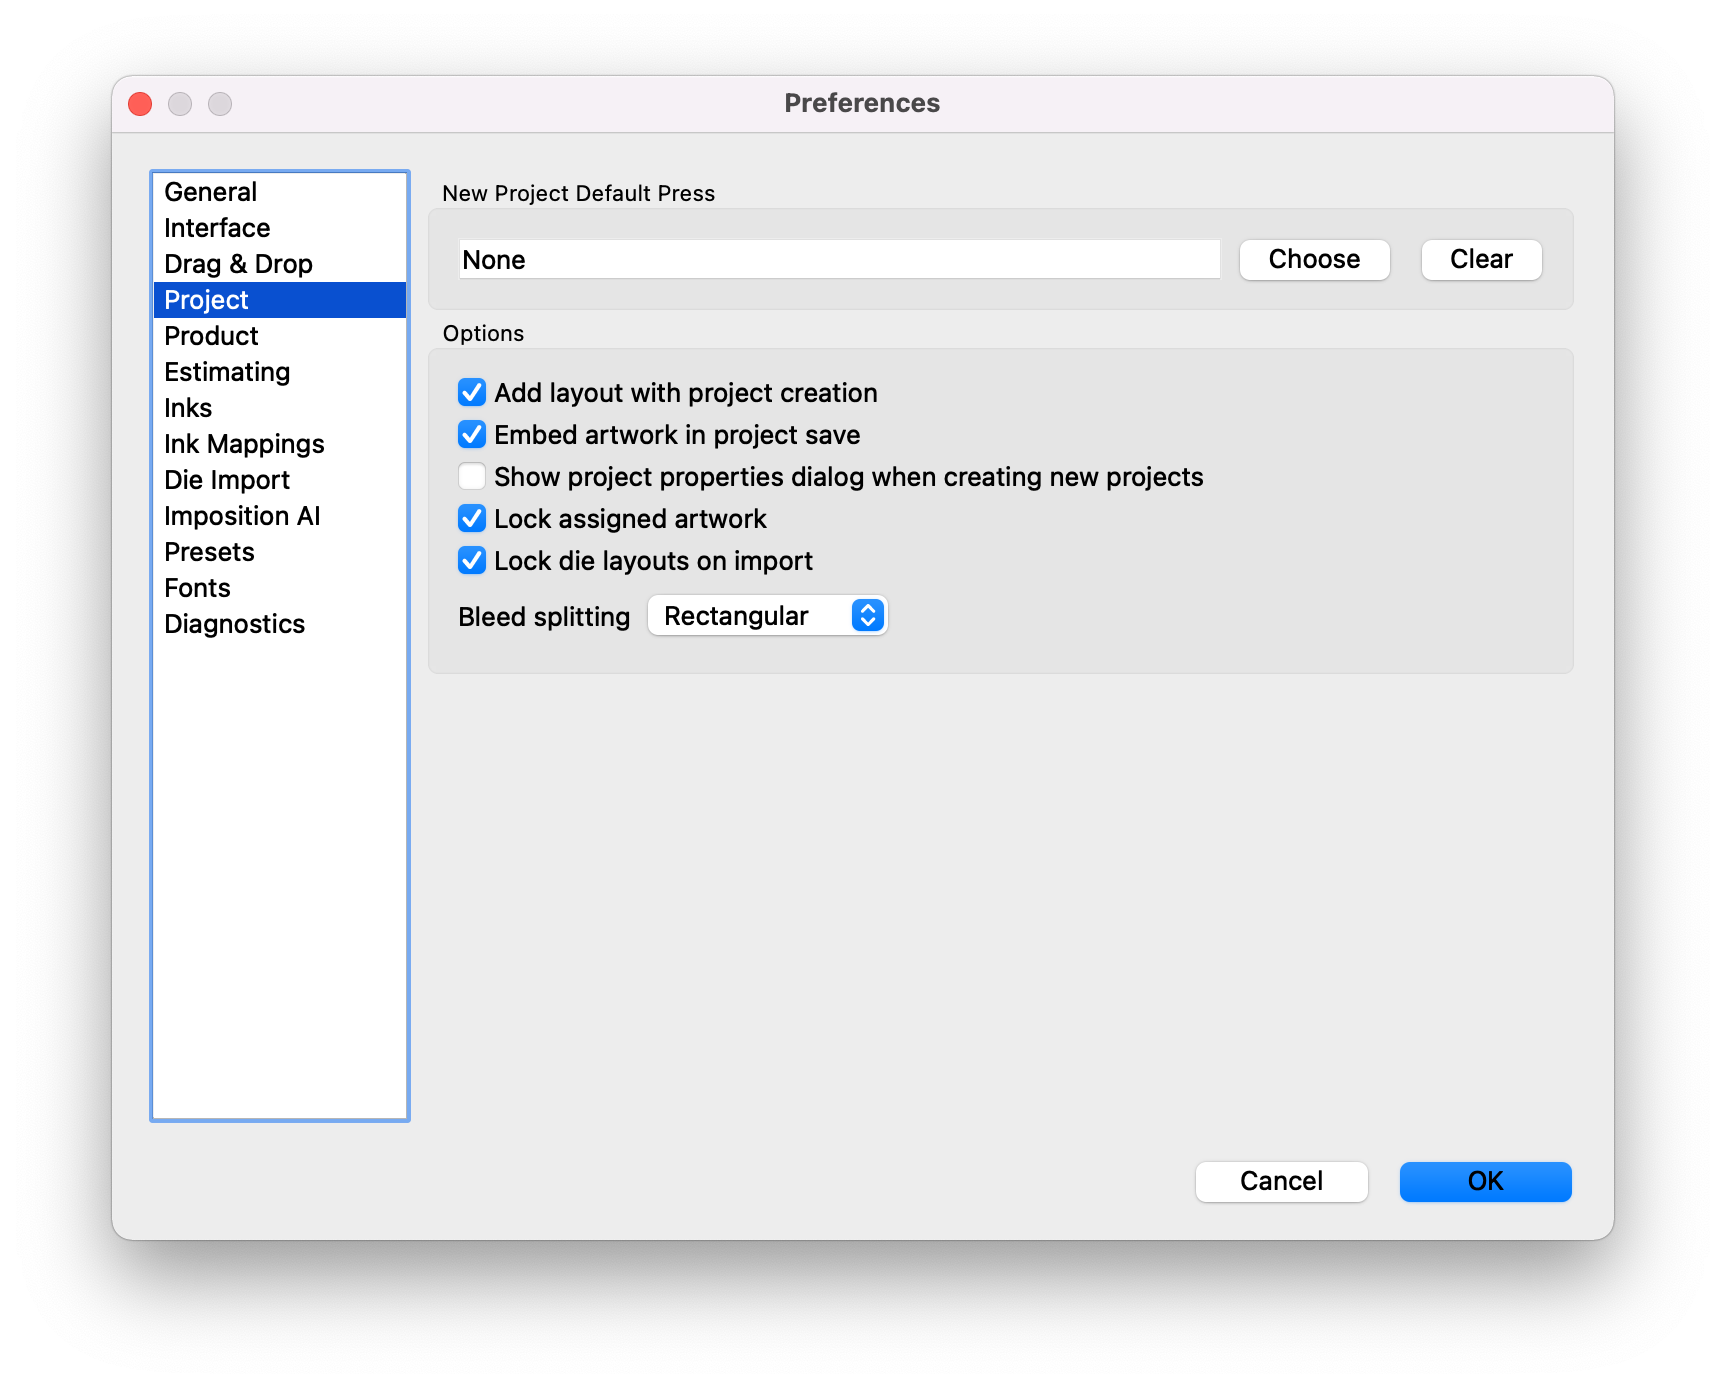
| Field | Description |
|---|---|
| New Project Default Press | Optionally set a default press to be assigned when creating a new project. By having a default sheet set for the press as well, you can have a sheet and press automatically defined upon project creation. Note that this does not affect any layouts created via Imposition AI's Plan or Optimize modes. |
| Add layout with project creation | Optionally have a new layout create each time a project is created. When not selected, layouts will need to be created manually or via Imposition AI. |
| Embed artwork in project save | Optionally save artwork inside of projects upon save. This will increase the project file size, but make it much easier to share projects without breaking links to artwork. |
| Show project properties dialog when creating new projects | Option to display project properties dialog to allow the user to set the project name, ID, and other project properties when a new project is created |
| Lock assigned artwork | Option to lock assigned artwork so that it cannot be moved or modified on the artboard. Locked artwork can be unlocked manually using the lock icon in the top left of the Phoenix UI when a locked object is selected. |
| Lock die layouts on import | Option to lock die layouts so they cannot be moved or modified in a layout |
| Bleed splitting | Behaviour for component instances in layouts so that bleeds are automatically split. The possible choices are defined below: |
| None - No bleed splittings. Signatures - Only bound and folded components (signatures) will have bleed splitting applied. Rectangular - All rectangular components will have bleed splitting applied. This covers bound and folded signatures. And flat and tiled components that have a rectangular dieline. |
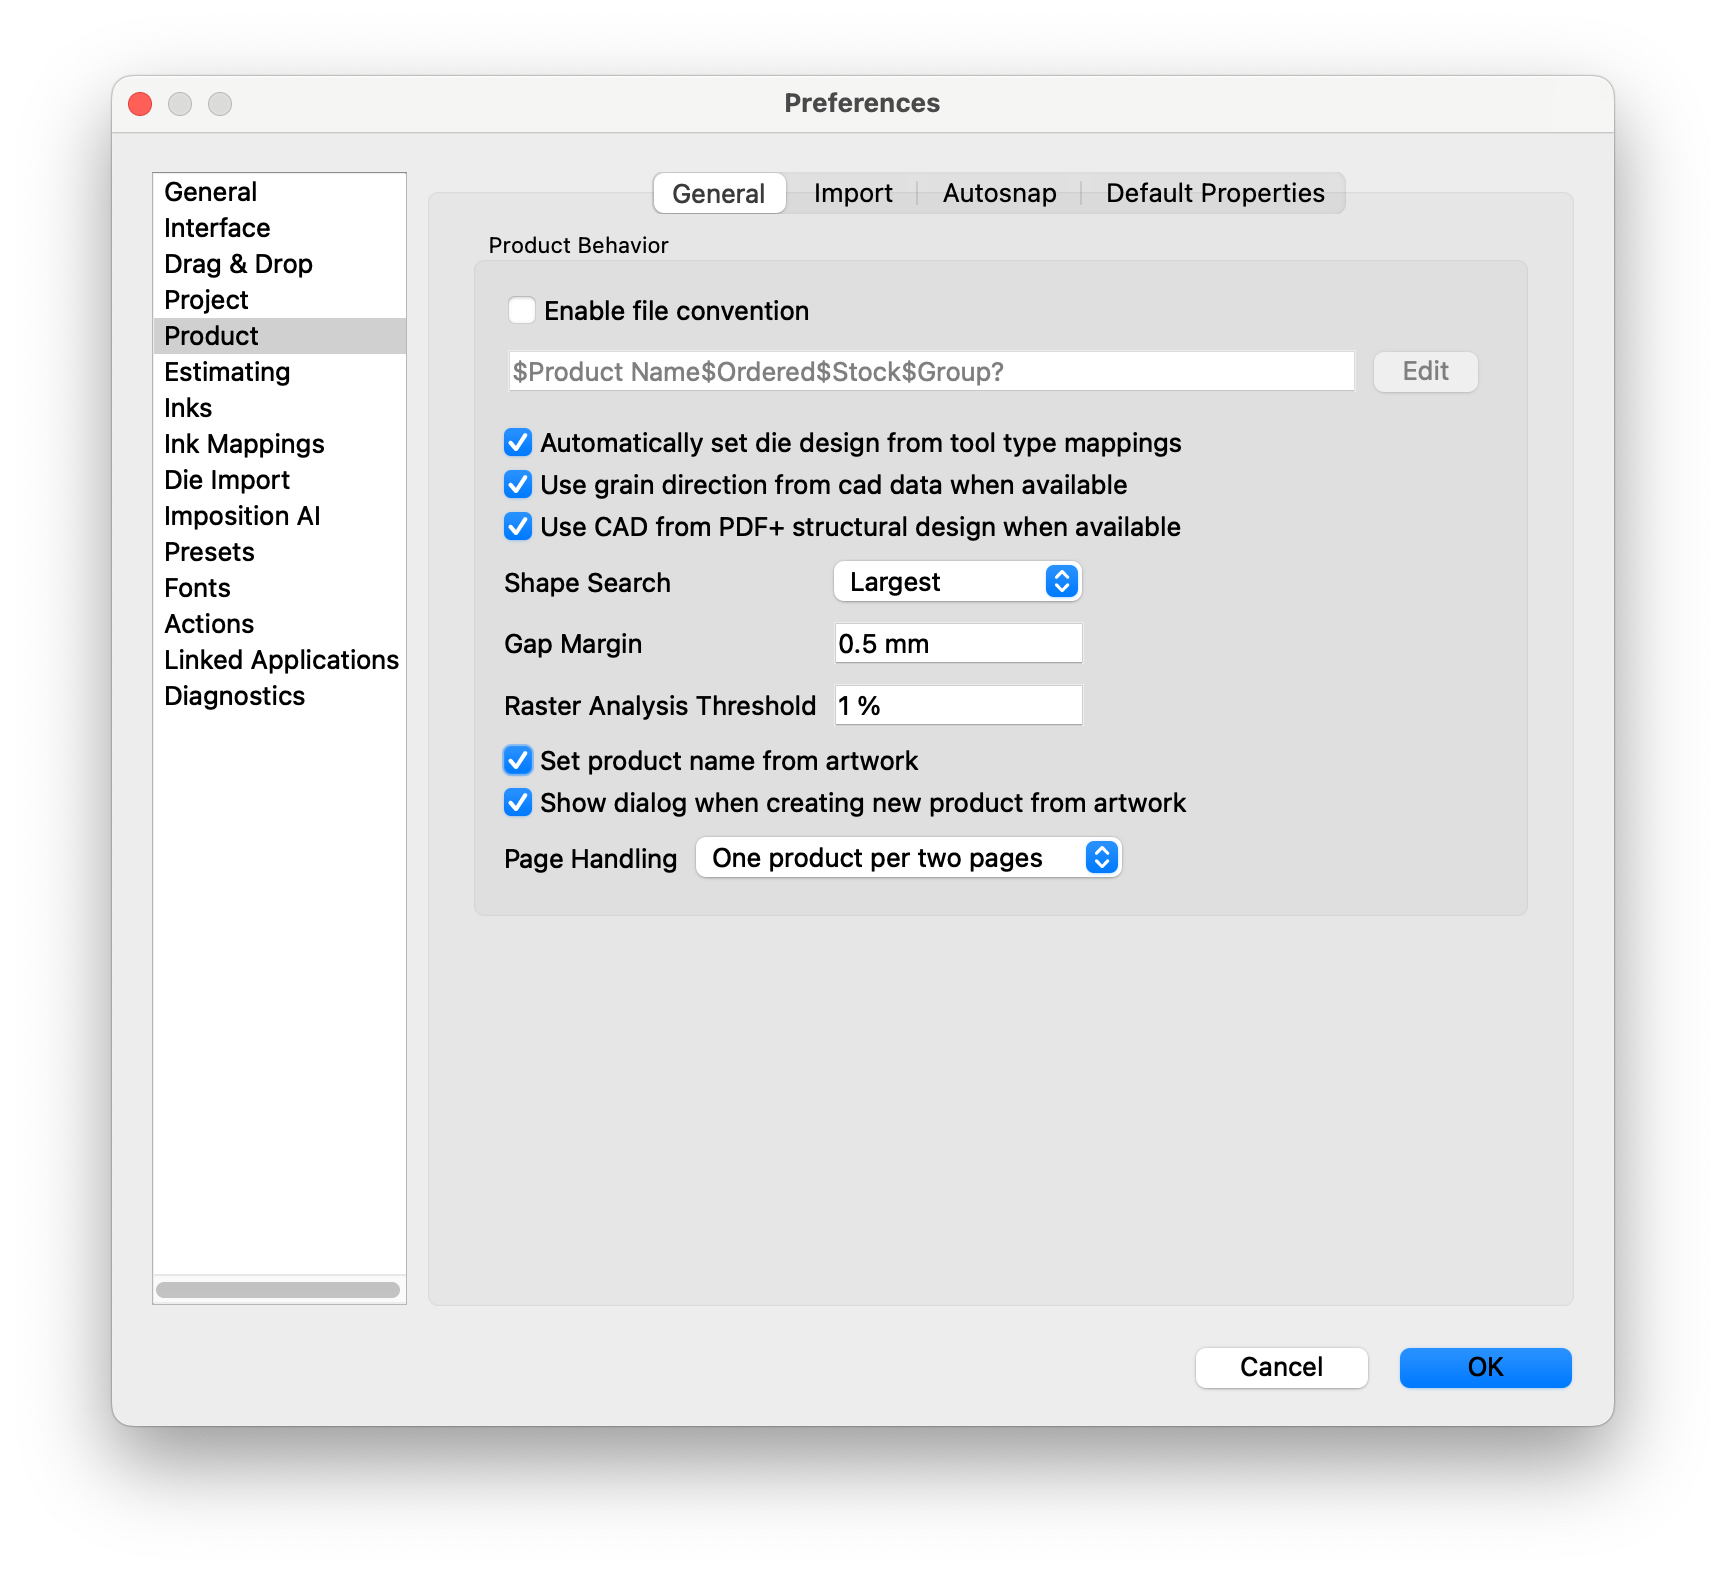
| Field | Description |
|---|---|
| Enable file convention | Enables Phoenix to extract product properties from a defined filename convention. See Filename Conventions for more info. |
| Automatically set die design from tool type mappings | Use autosnapping to create the die design in a product based on the tool type mappings in the Tool Types library. |
| Use grain direction from cad data when available | Enables automatically setting the grain direction on a product if the CAD file used to create it had a grain direction set. |
| Use CAD from PDF+ structural design when available | When enabled, products created from PDF+ files that contain structural design info will look for the referenced CAD data to set the product die shape. In the event that the CAD data cannot be found, Phoenix will revert to tool type mappings or the artwork trimbox. |
| Shape Search | When searching for a die design from lines in the artwork, this defines how Phoenix should search for shapes. Largest sets the largest continuous path that matches the tool type mappings as the die design. Merged sets the lines defined in the tool type mappings as the die design, but merged together into one path. Multiple splits up multiple cut paths into separate products |
| Gap Margin | When searching for a die design, defines the maximum gap margin that may appear in the die shape. Any gap larger than this amount will prevent that line from being considered as a potential die design. |
| Raster Analysis Threshold | Sets the ink coverage percentage required to consider a color as included on a page |
| Set product name from artwork | Sets the name of the product from the artwork file name |
| Show dialog when creating new product from artwork | Option to show the product dialog to set certain product parameters when a new product is created from artwork |
| Page Handling | Defines how multipage artwork is handled upon import. One product per two pages means that a multipage artwork will be split into multiple products, with odd numbered pages being the front of the product, and even numbered pages becoming the backside graphic. One product per page will create multiple single-sided products, with each page becoming a separate product. One product per file will create a single sided product from the first page of a multipage pdf. |
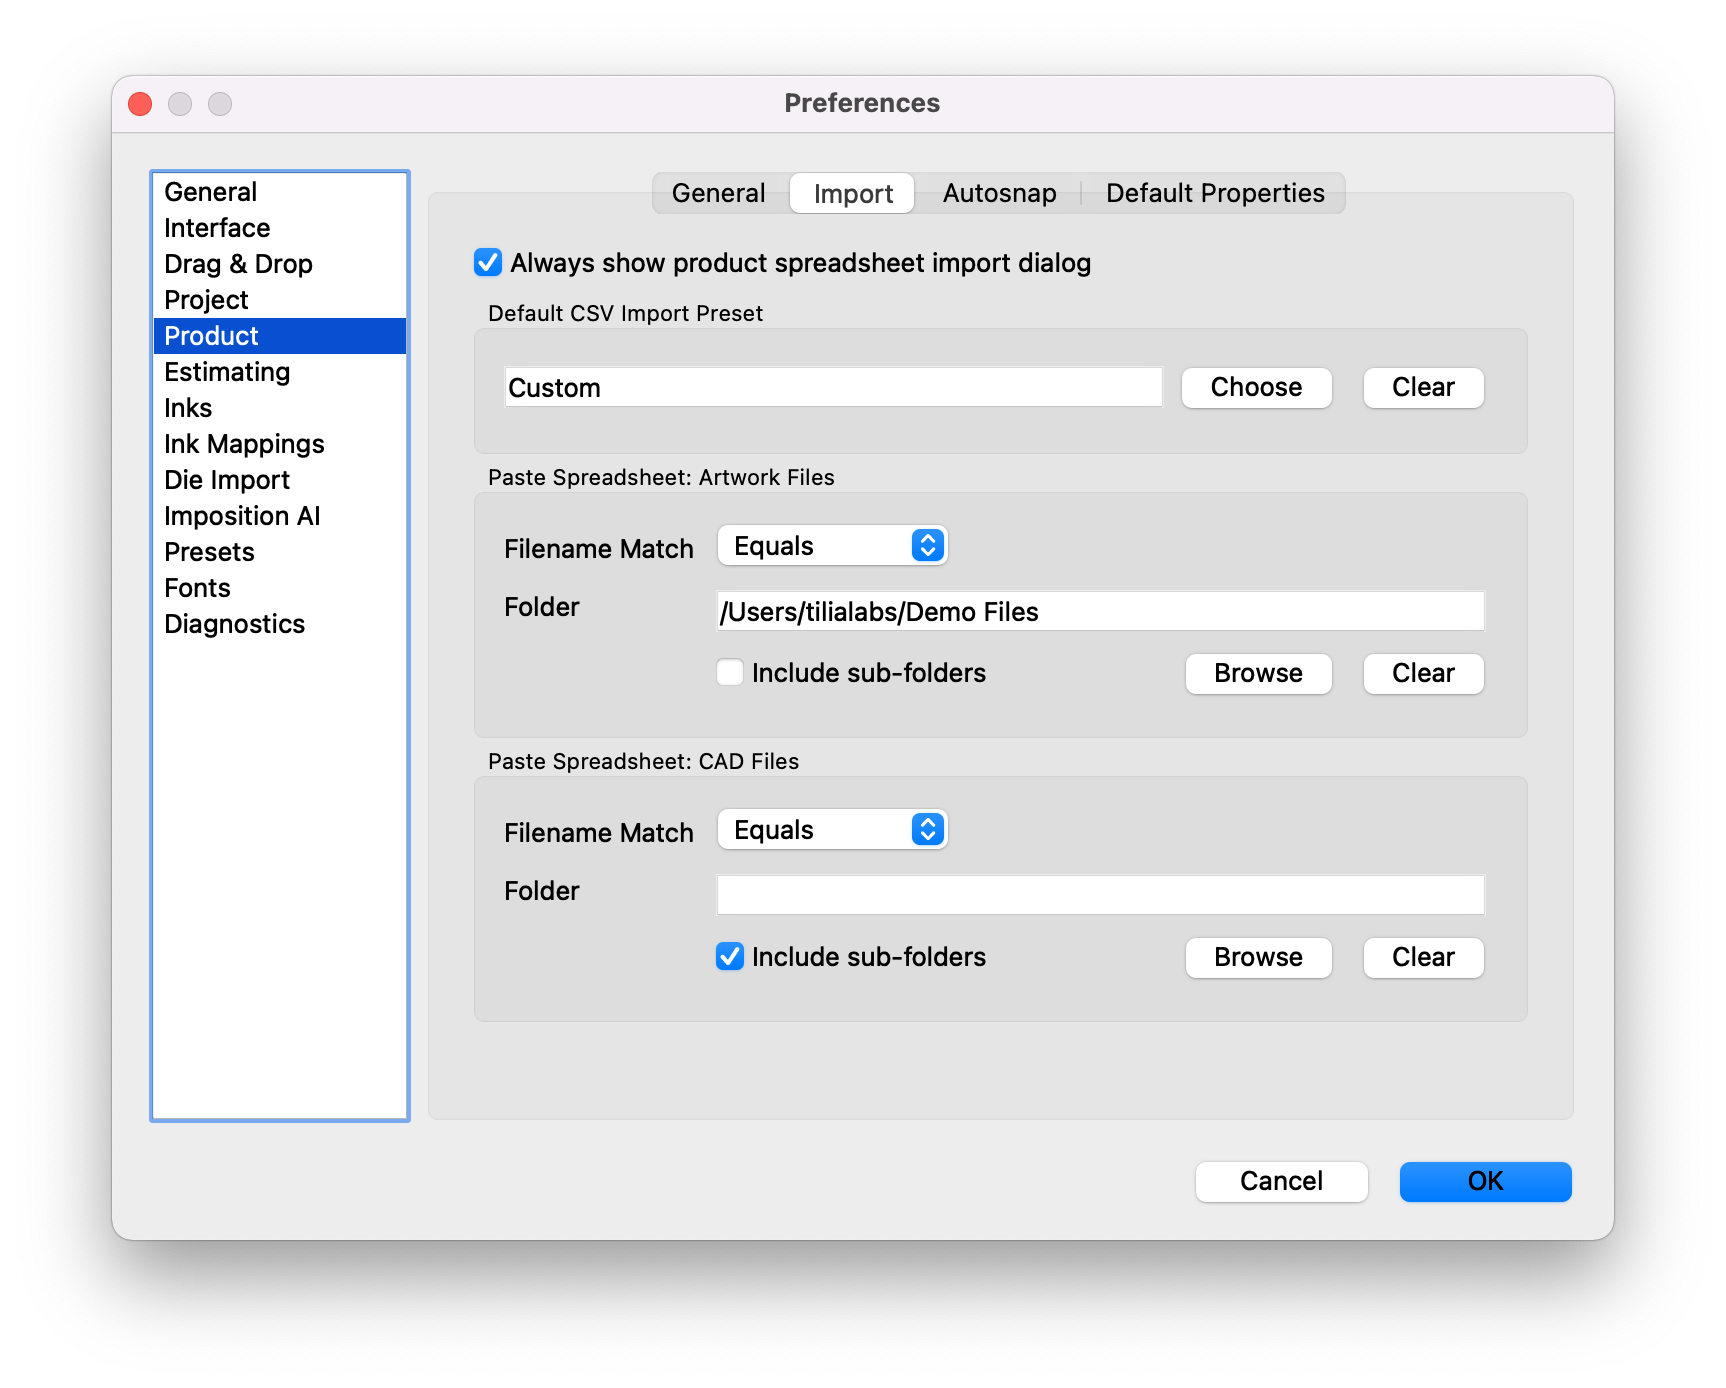
| Field | Description |
|---|---|
| Always show product spreadsheet import dialog | Option to always disaply the import dialog when a spreadsheet (csv) is imported to Phoenix. |
| Default CSV Import Preset | Set the default import preset. To learn more about import presets, see Presets |
| Filename Match | For Artwork and CAD files, you can set a default location to search for files referenced in spreadsheet import (if a full file path is not specified). Filename match defines whether the filename in the folder specified below has to Equal, contain, or start with the same text as specified in the spreadsheet. |
| Folder | Defines the disk directory where Phoenix should search for files referenced in an imported spreadsheet |
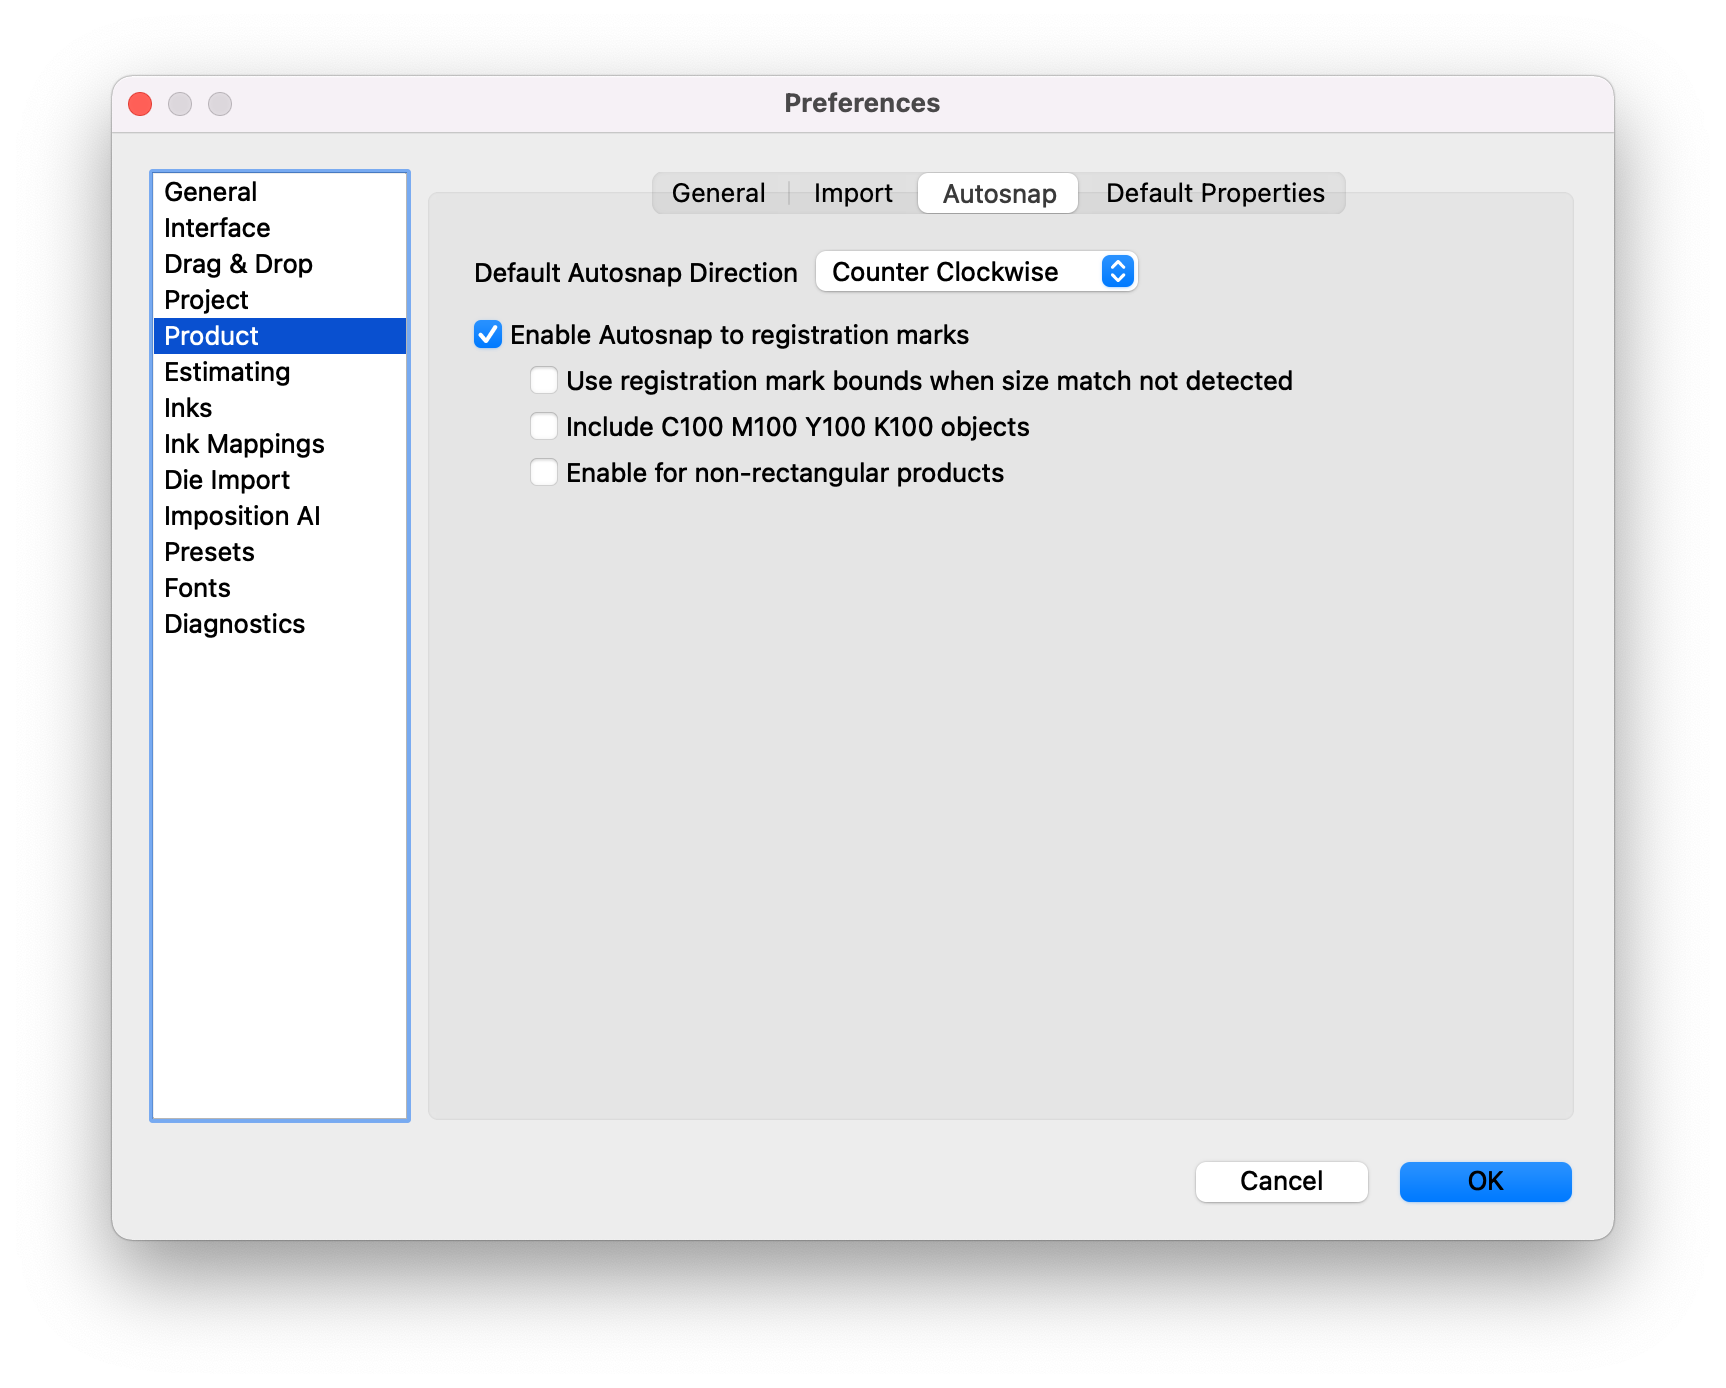
| Field | Description |
|---|---|
| Default Autosnap Direction | Sets whether autosnapping should first rotate products clockwise or counter clockwise (anti-clockwise) when autosnapping products |
| Enable Autosnap to registration marks | Option to have Phoenix search for registration marks in an imported product and autosnap to the registration marks |
| Use registration mark bounds when size match not detected | If the size match is not detected in a product, use the bounds of registration mark for the product |
| Include C100 M100 Y100 K100 objects | When searching for registration mark, include rich black objects |
| Enable for non-rectangular products | Choose to use autosnap to registration for irregularly shaped objects |
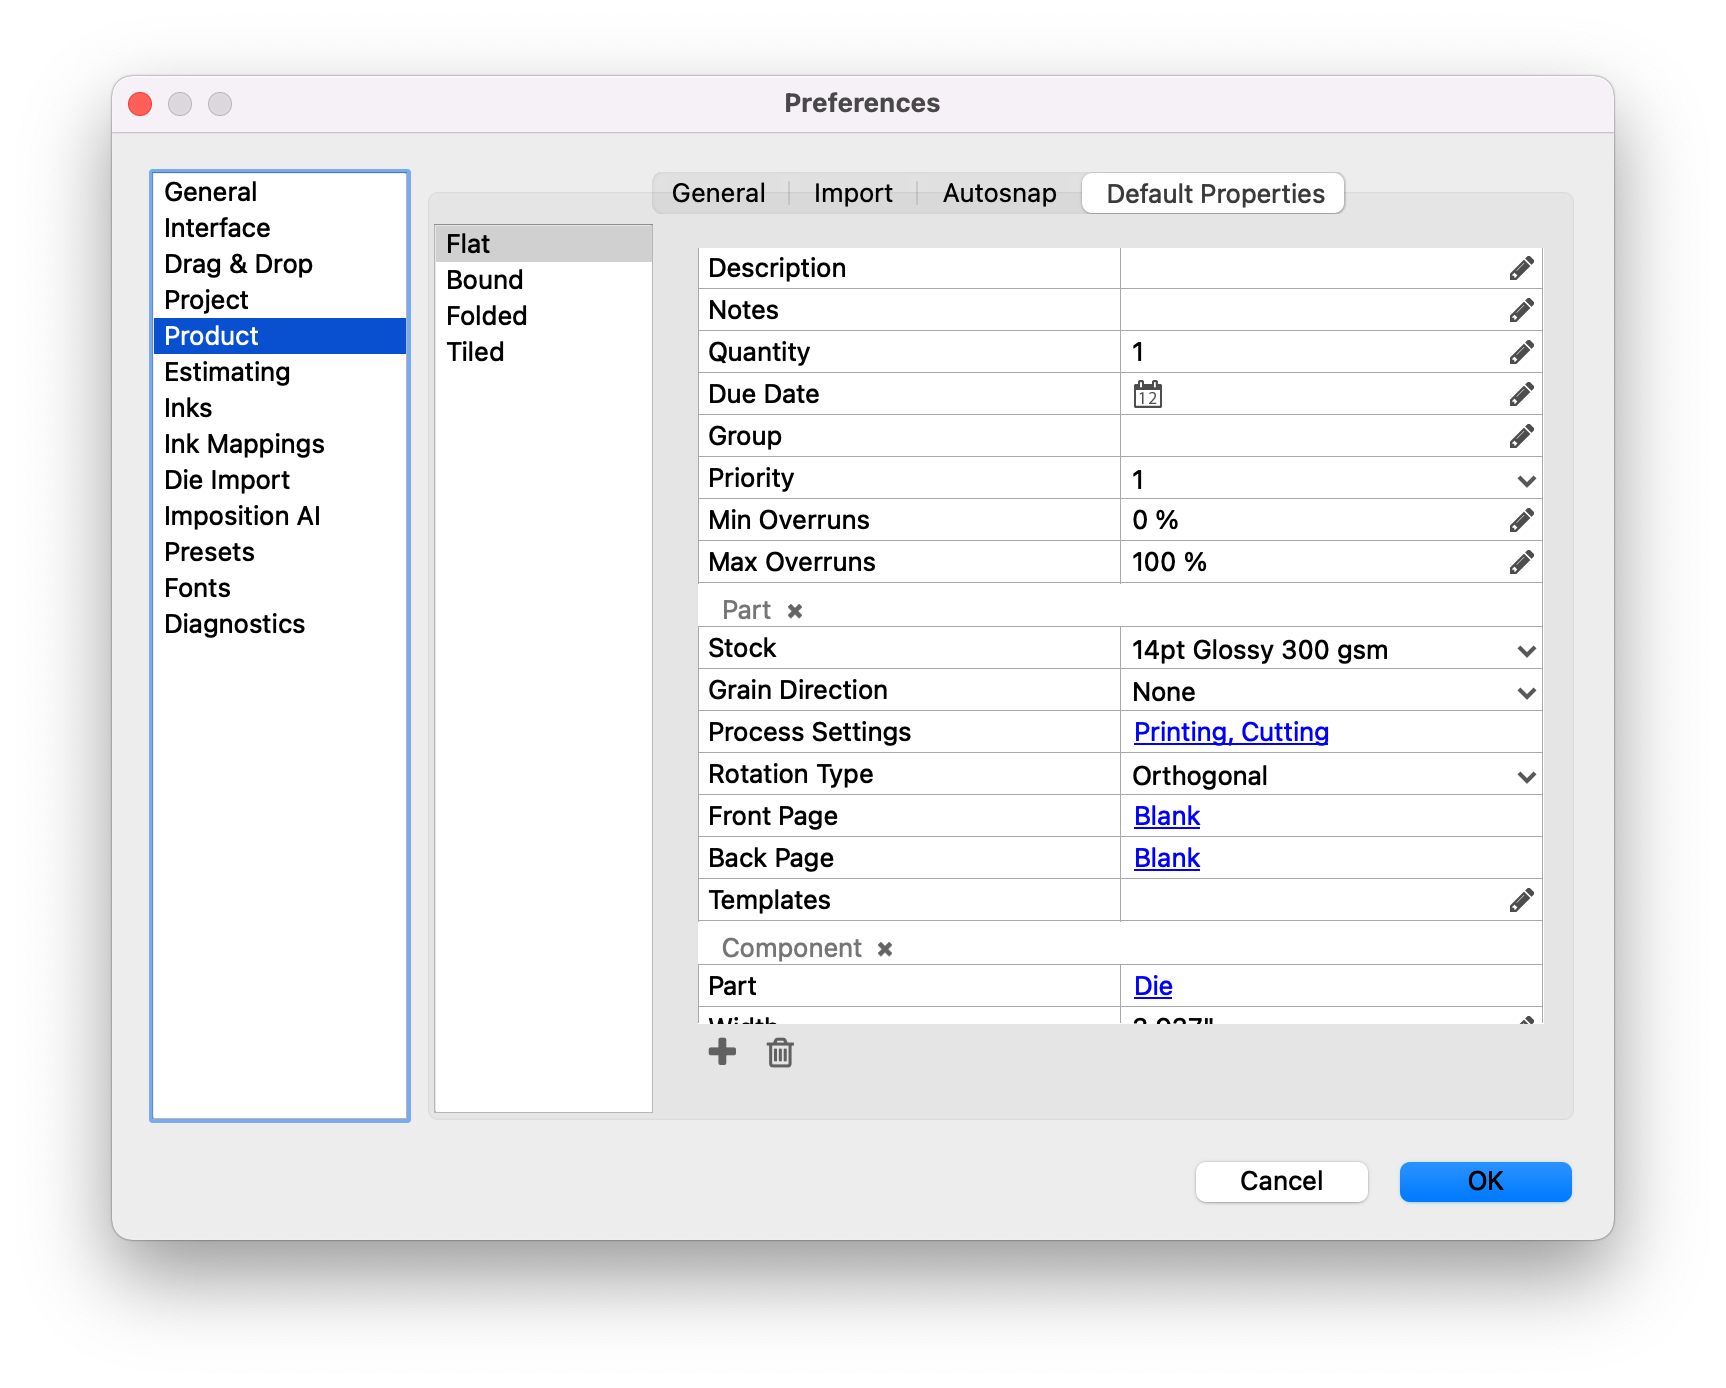
Define default properties for each type of product. The default values will be used unless a parameter is manually changed, or a different value is specified on import (whether through spreadsheet import, API call, or xml resource in a hot folder).
Simply select the product type (Flat, Bound, Folded, or Tiled) and then find the property you would like to modify. Click the value on the right side to assign a new value. You can add custom properties by clicking the + icon, or remove custom properties by clicking the trash icon.
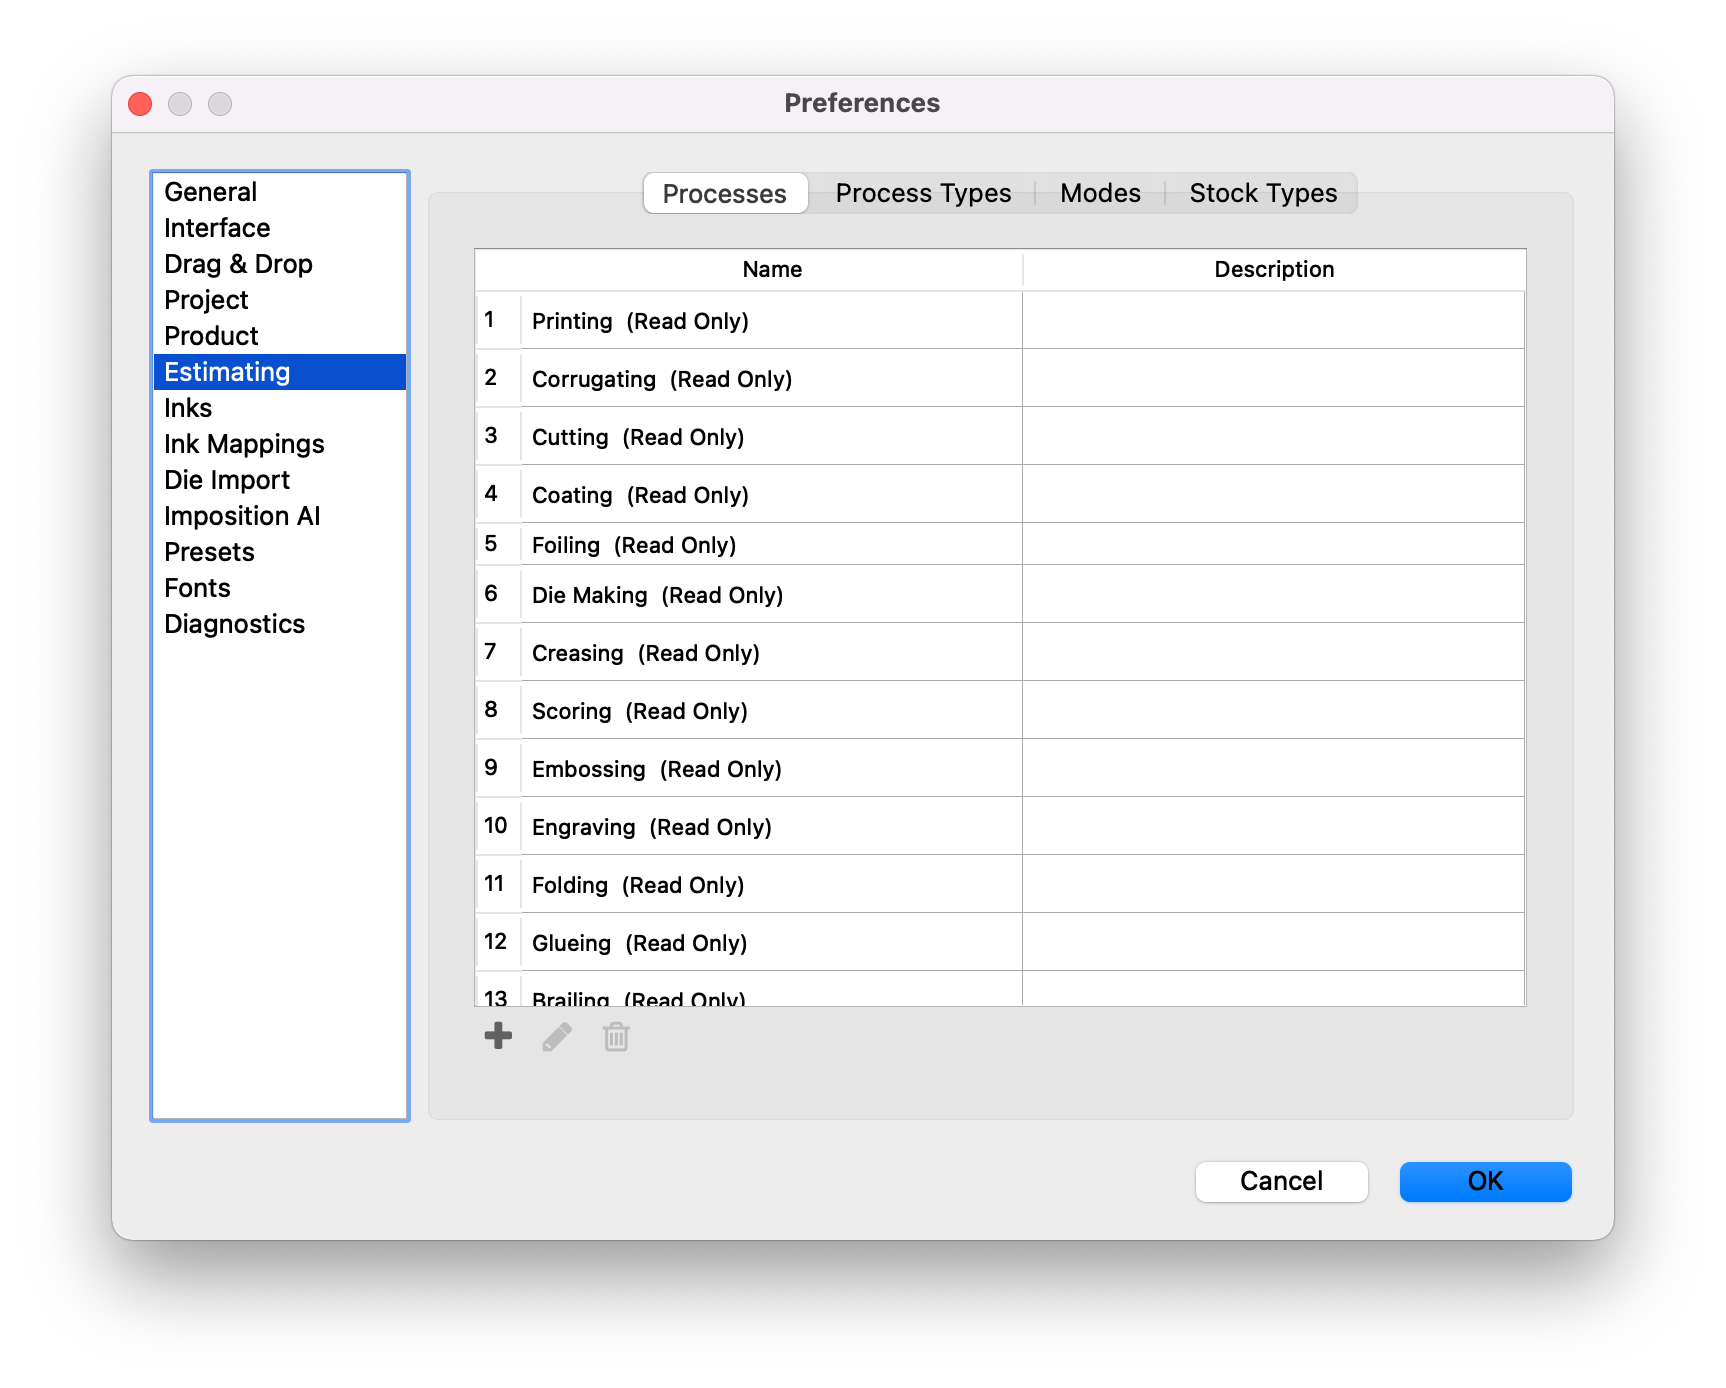
Customizable actions that can be assigned to a product via Tool Type Mappings.
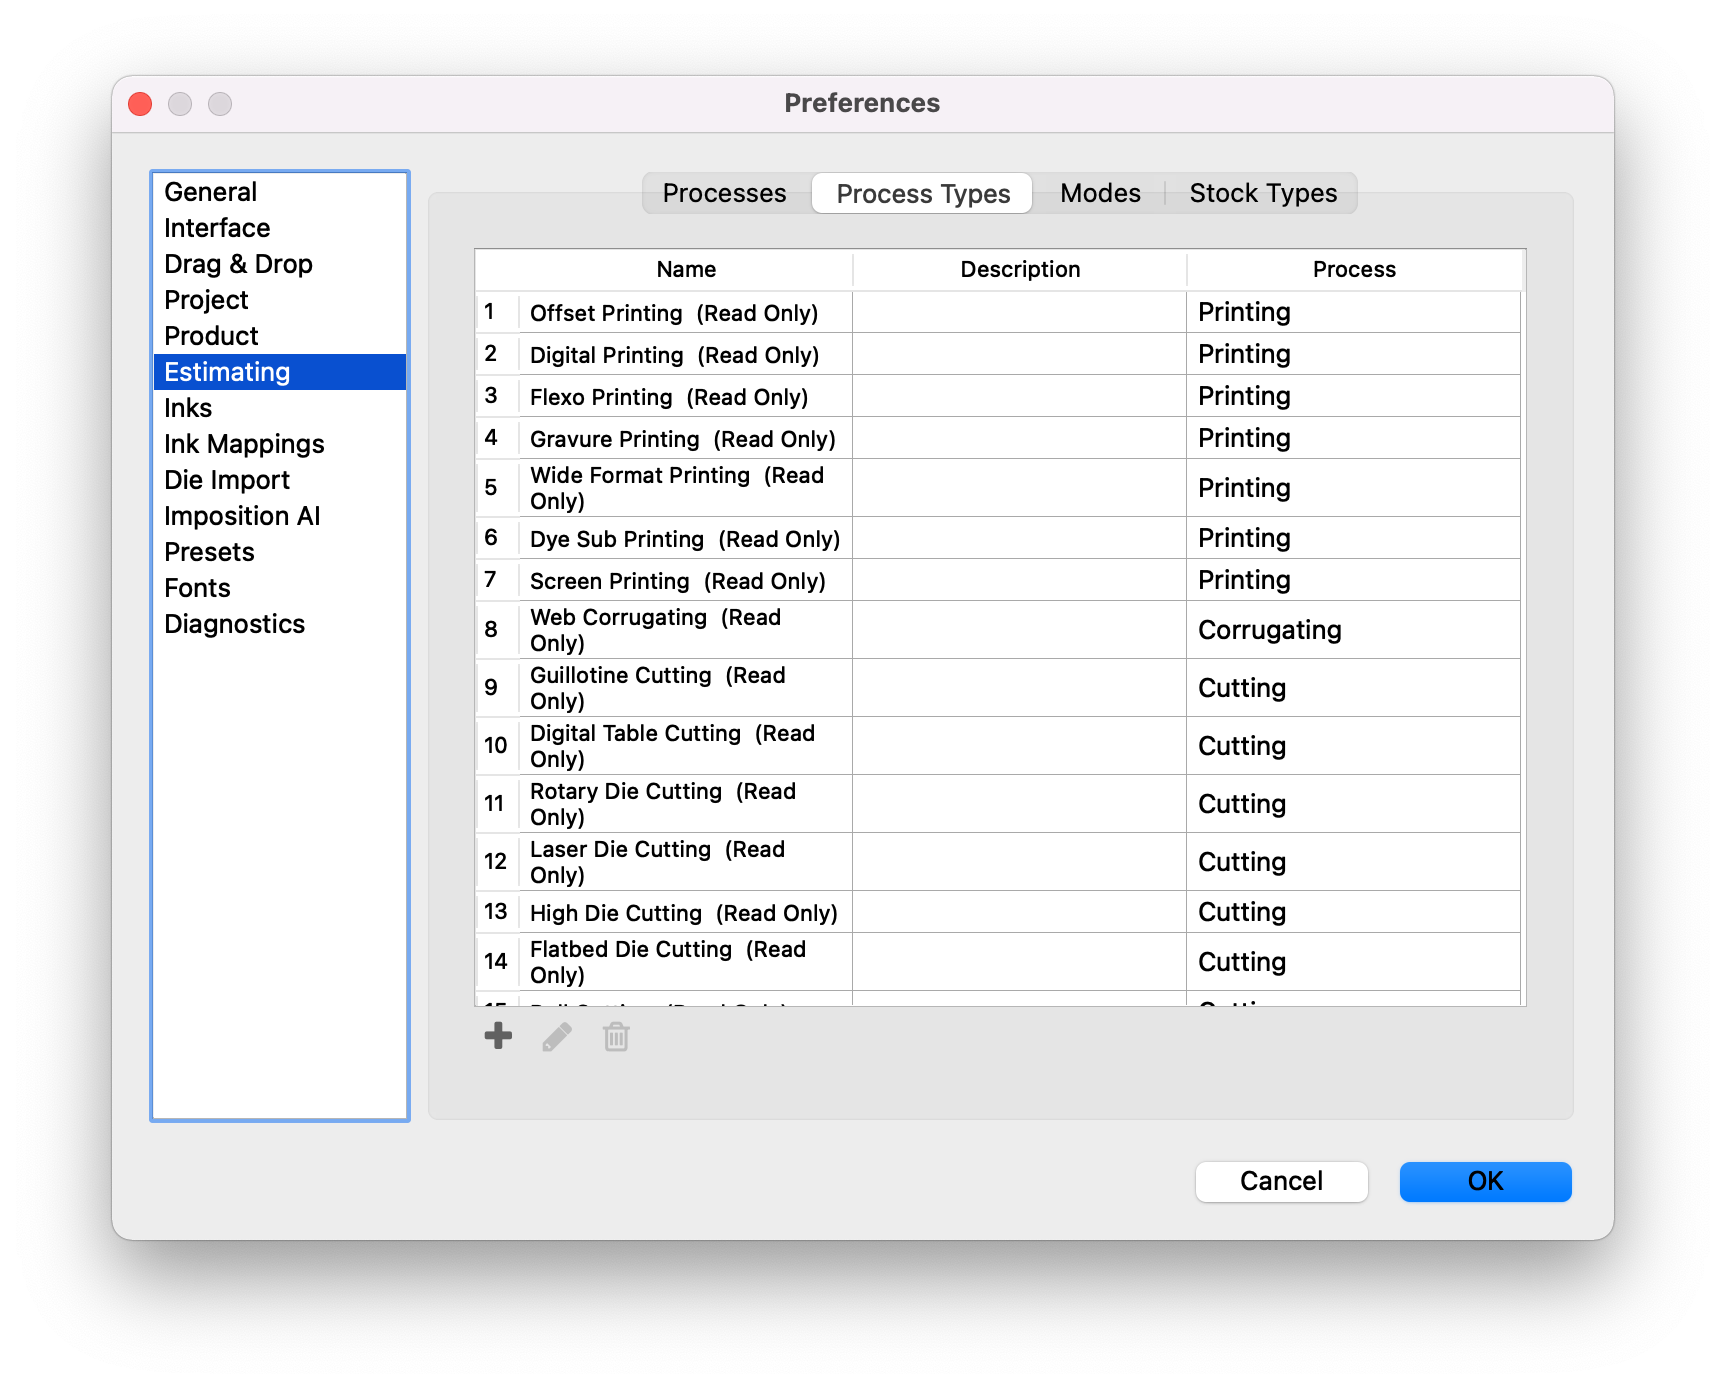
Process Types allow for further categorization of Processes.
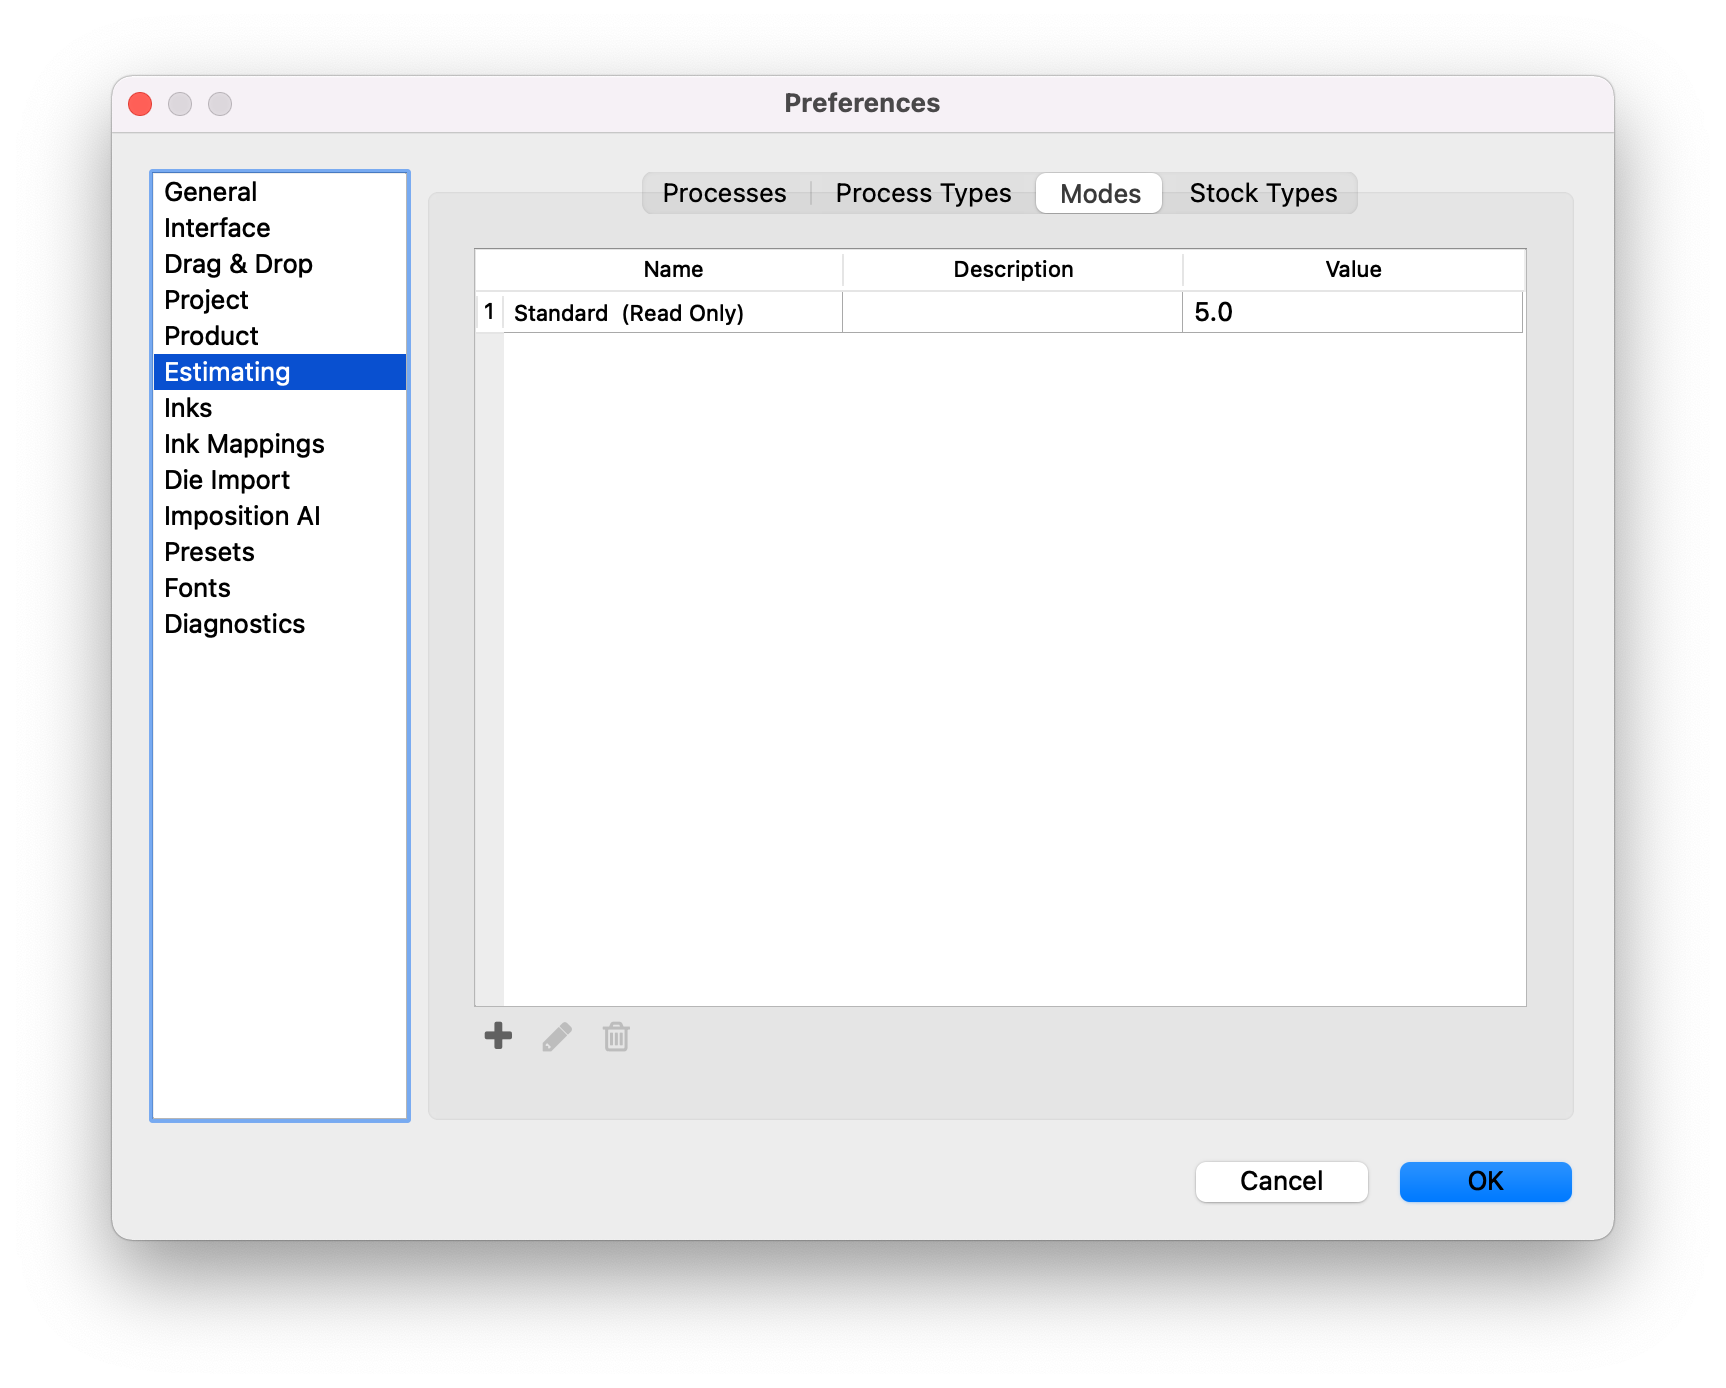
Modes allow for customizable operation settings for specific production processes and equipment. Adding a new Mode allows users to more accurately model real-world production speeds and costing per device.
Modes are defined by a Name, Description (optional) and Value. When creating a Product in Phoenix, a specific Mode can be set by using the Mode 'Name', or if there are many Modes across many devices, passing a mode 'Value' for the Product allows Phoenix to evaluate the most cost-effective device to use which meets the processing requirements and minimum Mode value.
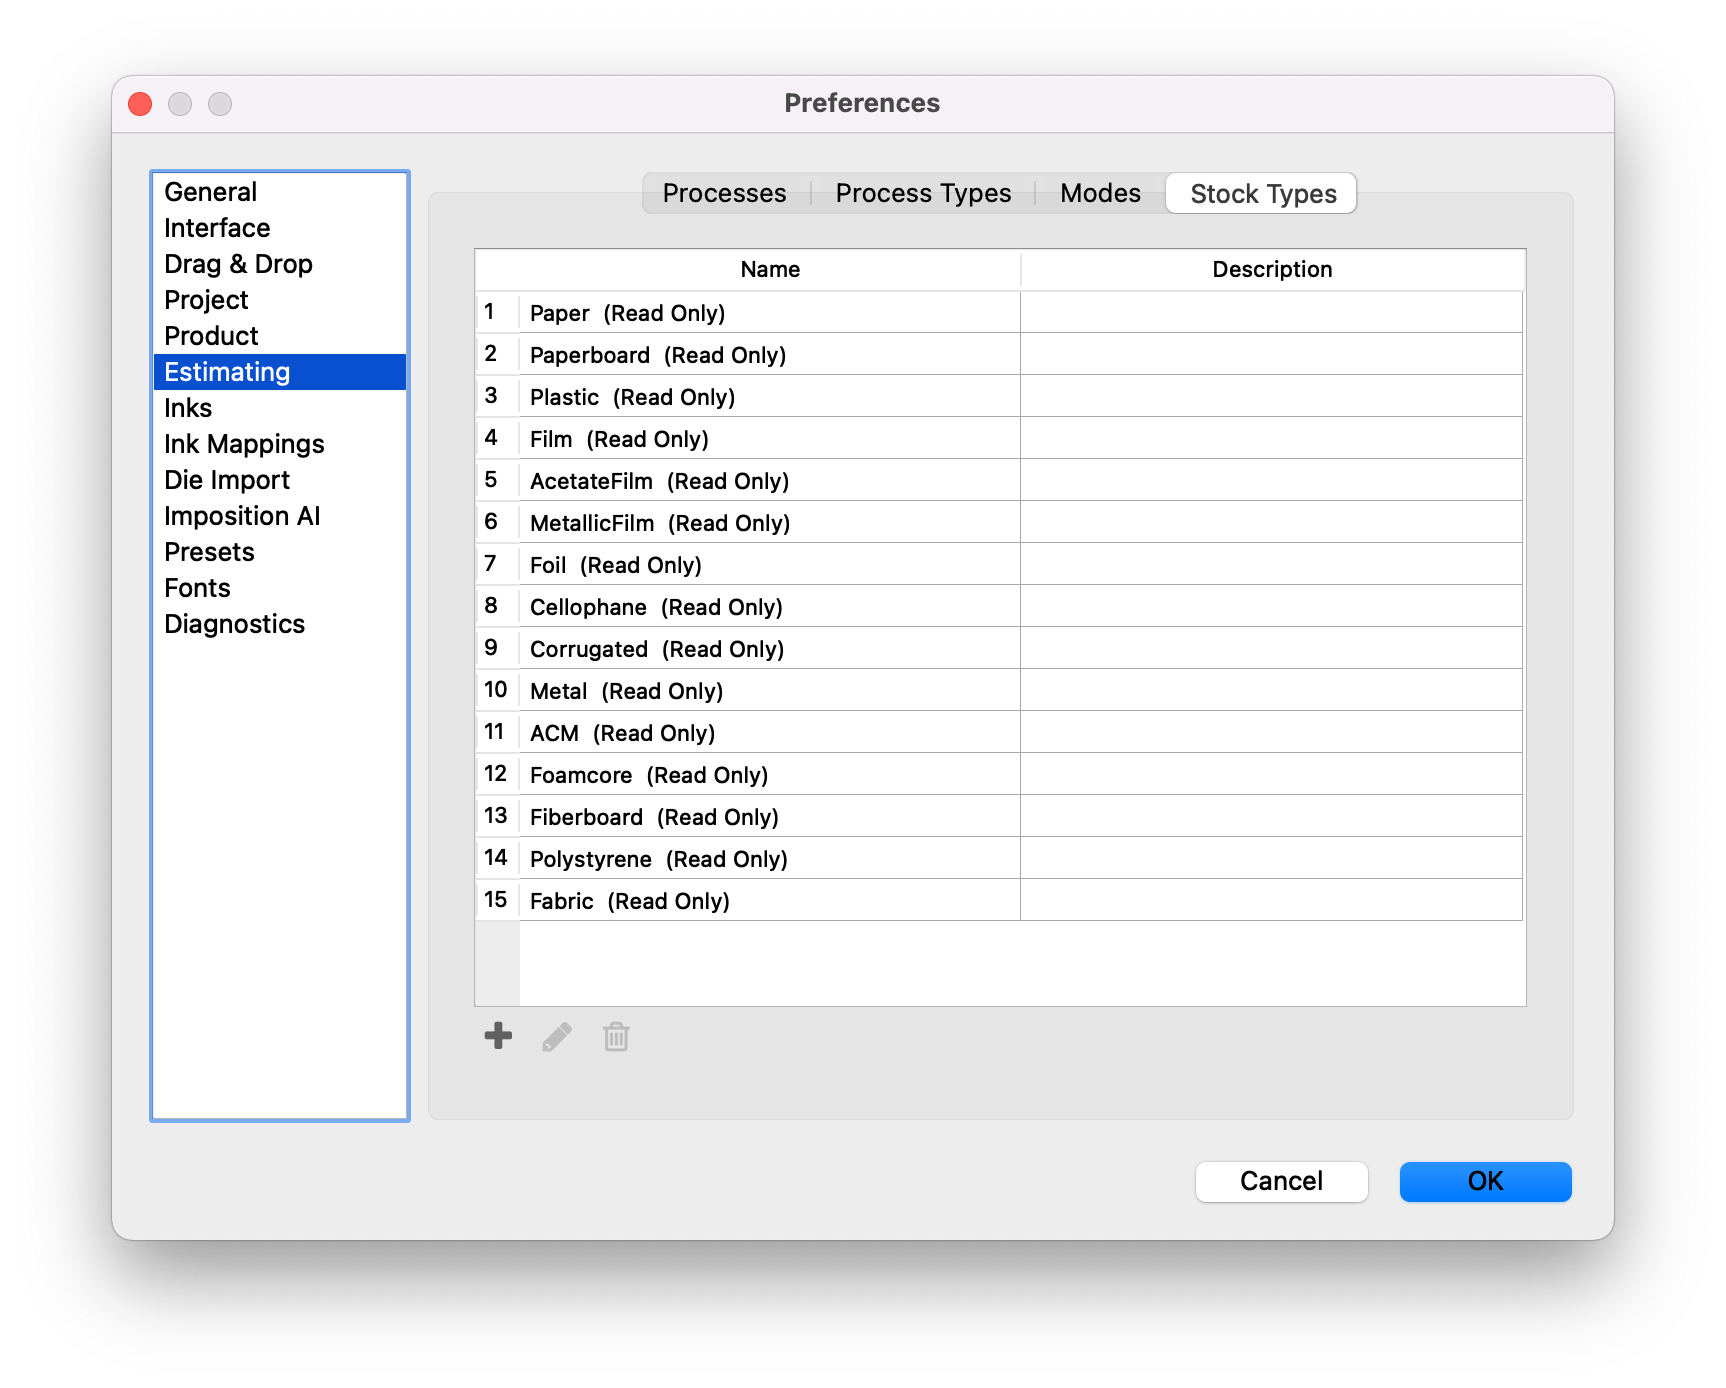
All stocks in Phoenix are categozied by their Stock Type. Stock Types provide a useful way of specifying whether devices can use a
group of stocks or not (via inclusion/exclusion rules).
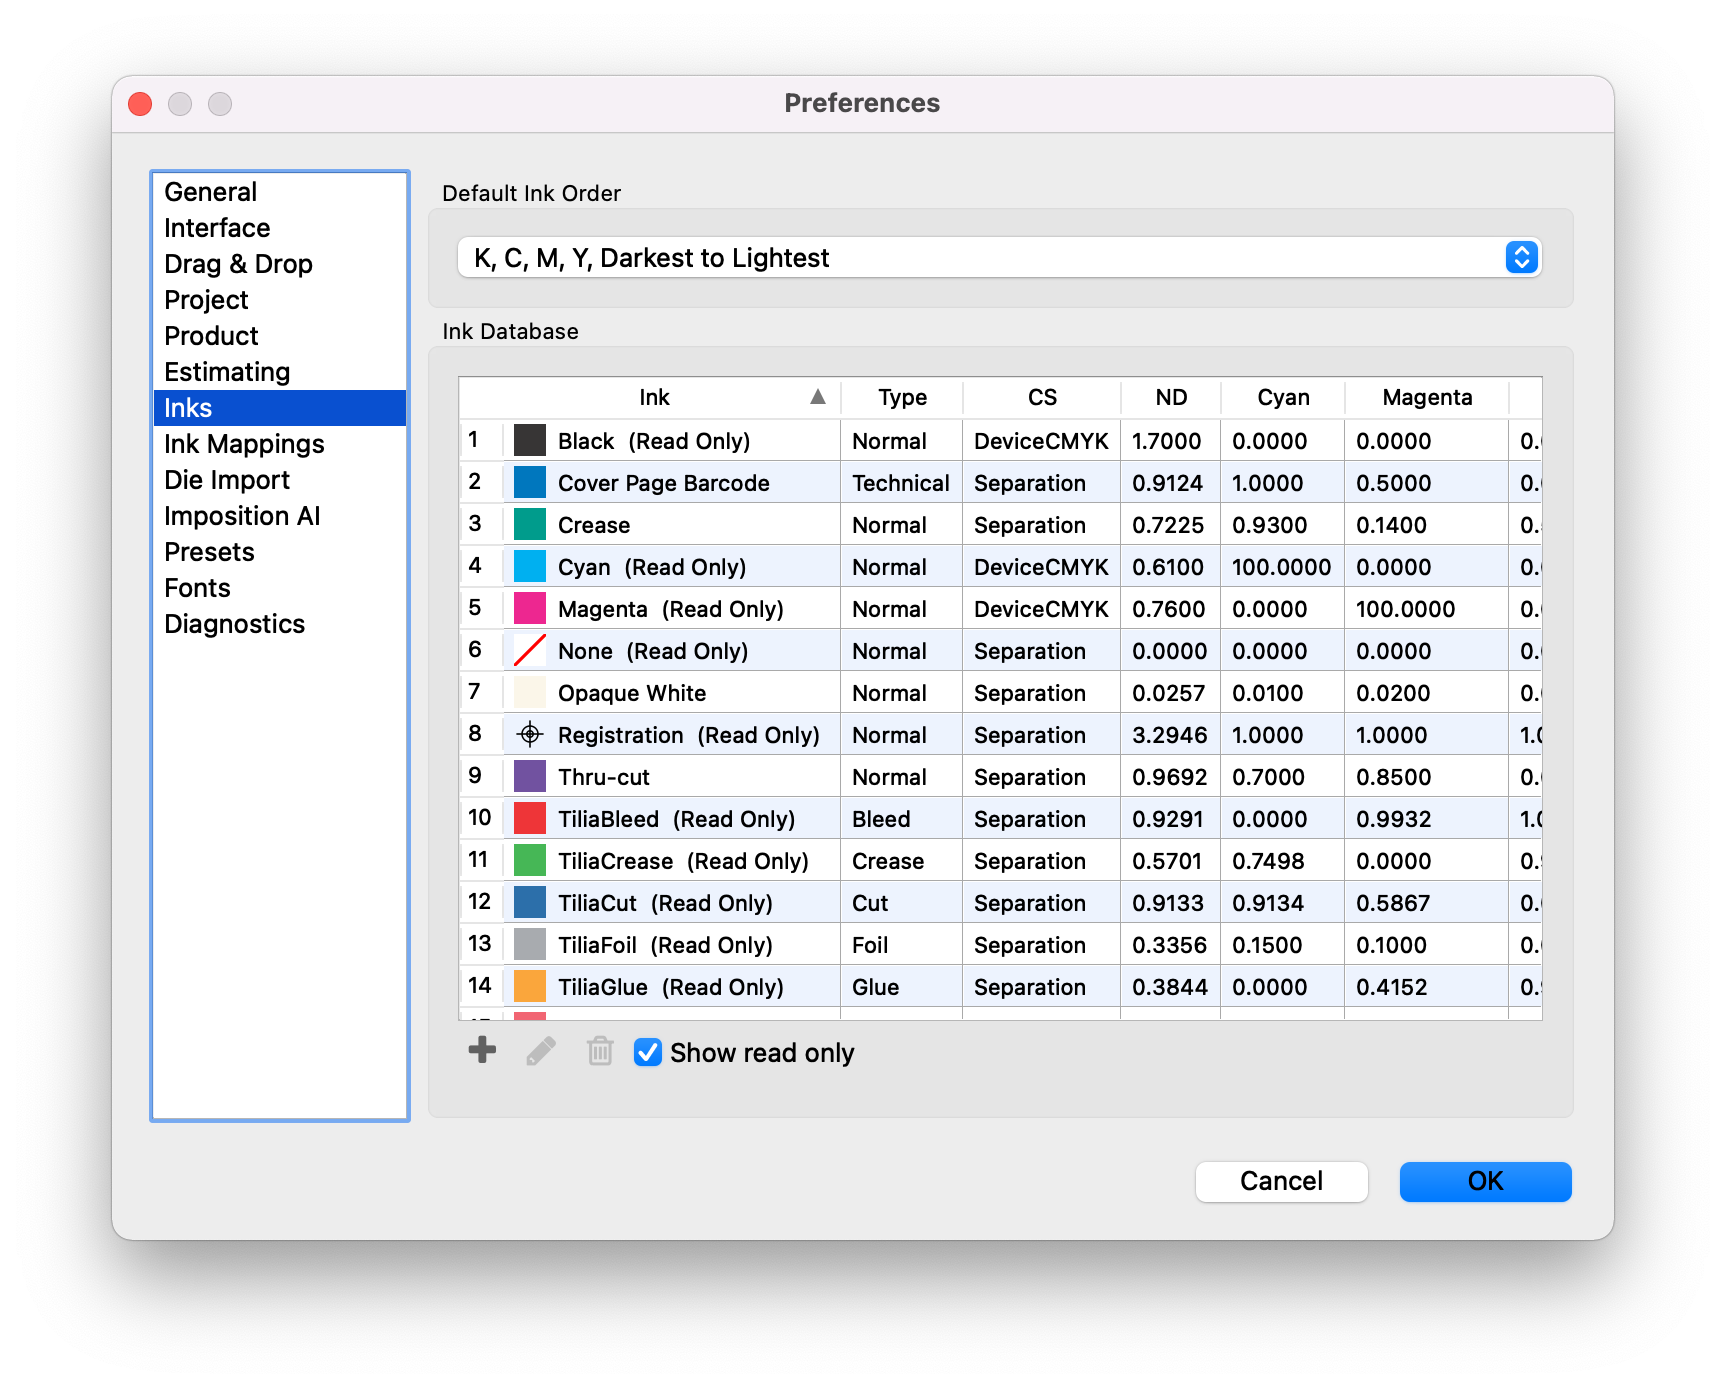
The Inks preference panel allows you to define the default ink order, as well as view, add, and edit inks in the Ink Database. To add, edit, or delete an ink, click the +, pencil, or trash buttons, respectively.
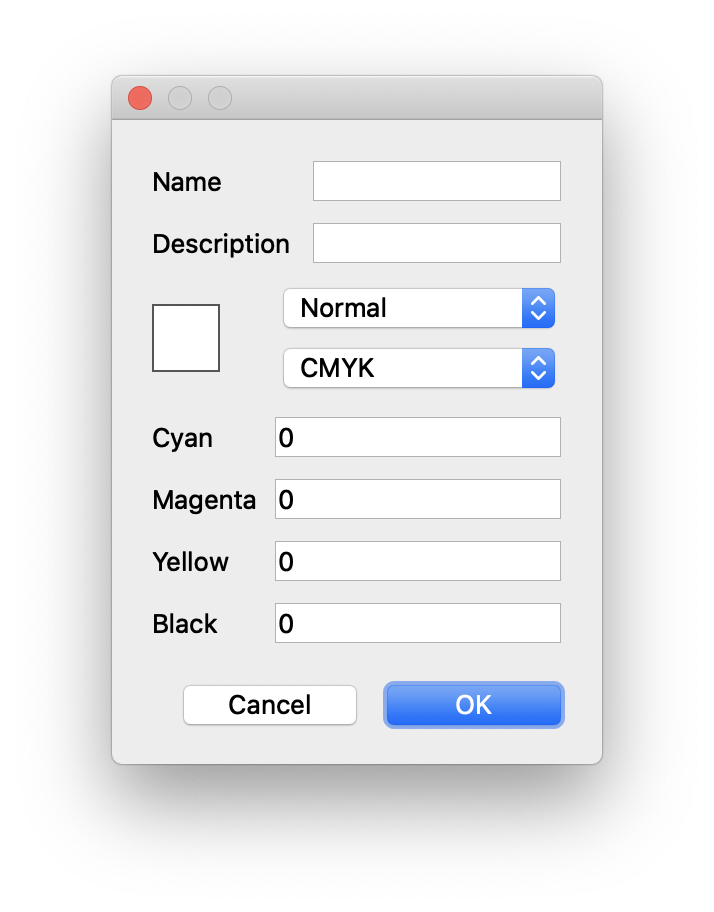
When adding (or editing) an ink, the above dialog appears. You can set the Name and optional Description for the ink. In addition, define the type of ink, and whether the ink is defined by CMYK values or LAB values.
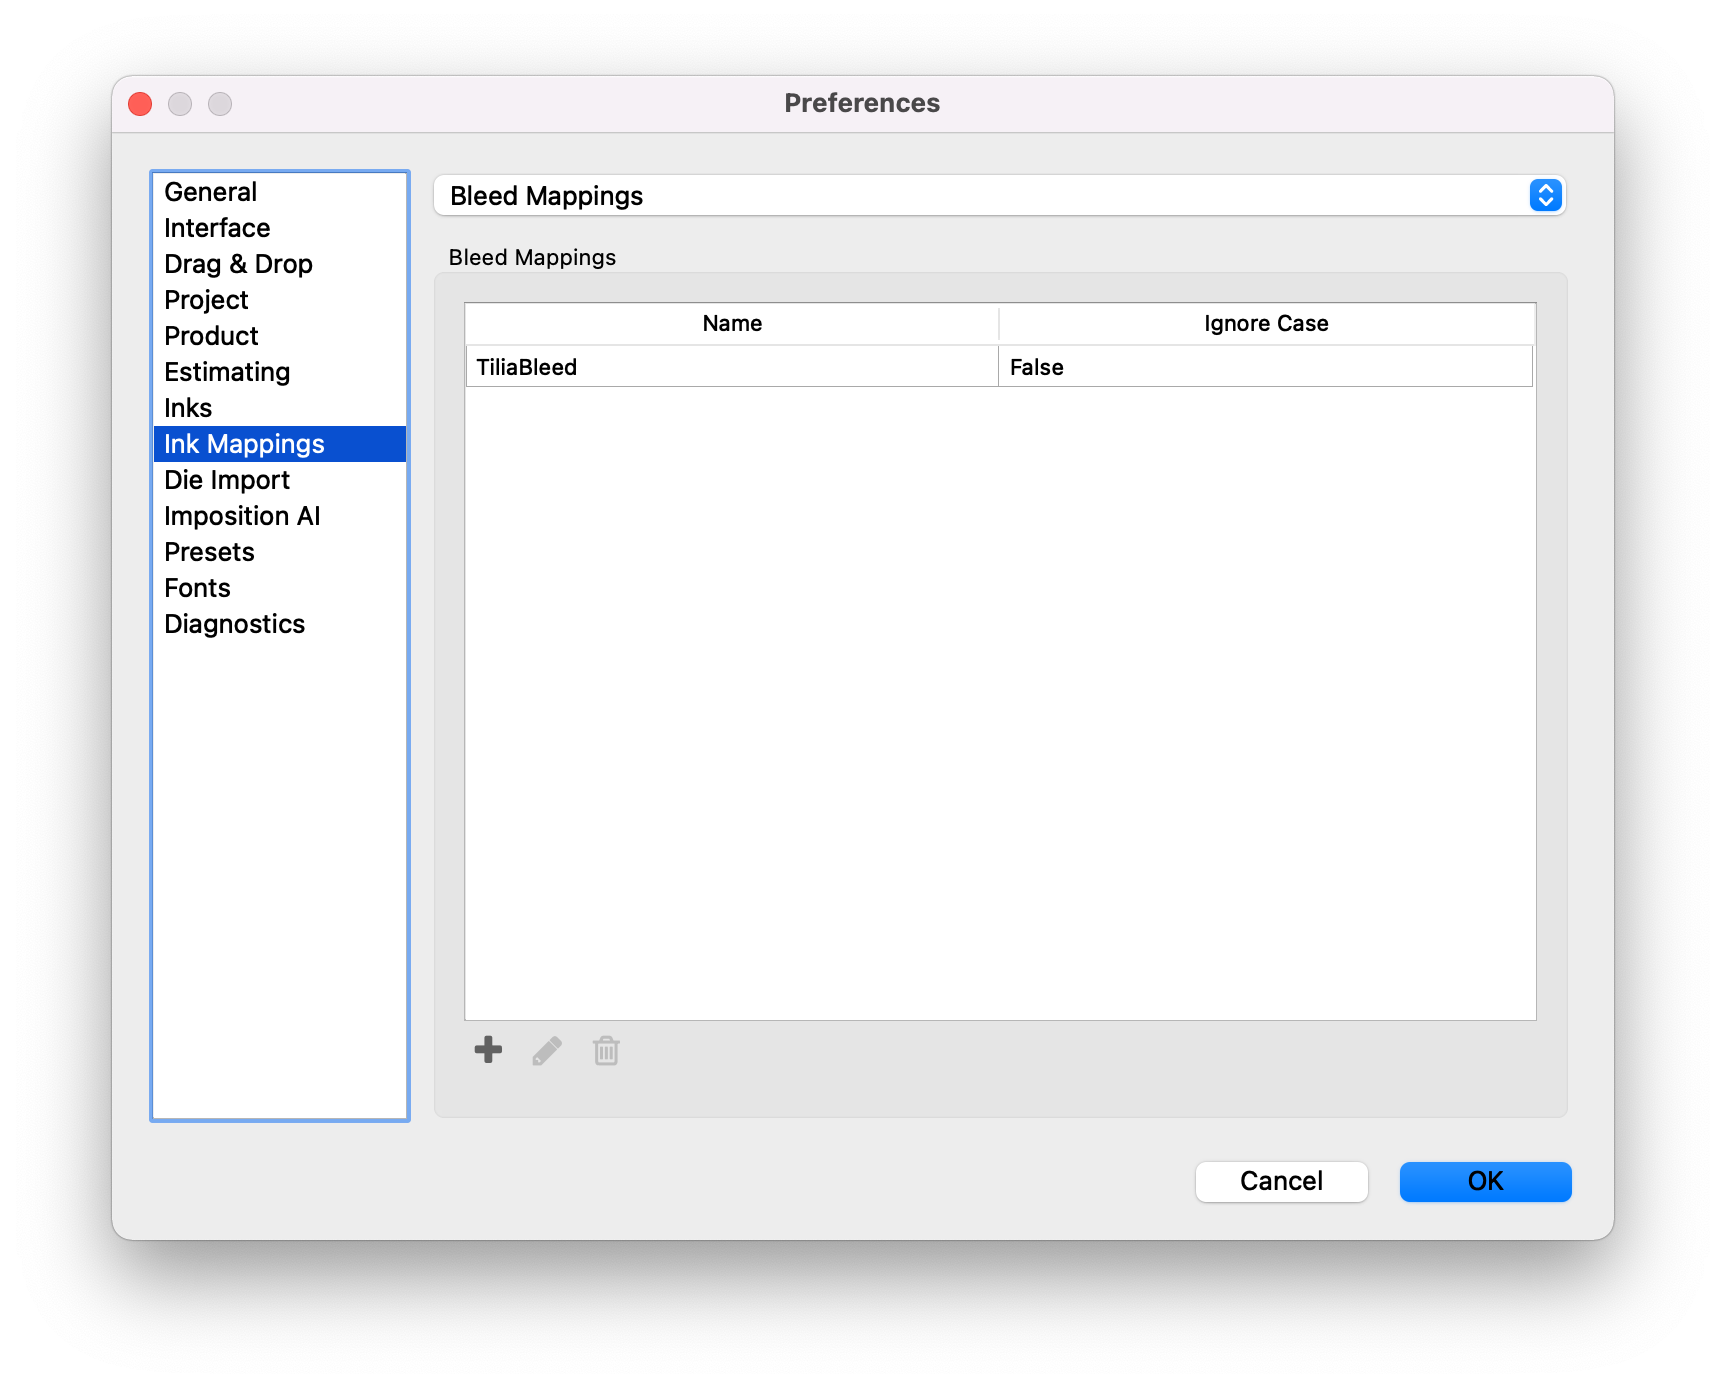
In Phoenix, Ink Mappings define how inks in a product are mapped to ink types. To set ink mappings, first choose the ink type from the dropdown at the top of the window. As you select an ink type, the inks mapped to that ink type appear in the list below.
To add an ink, click the + button below the mappings list. Here you can define the name of the ink, and whether the mapping should be case sensitive.
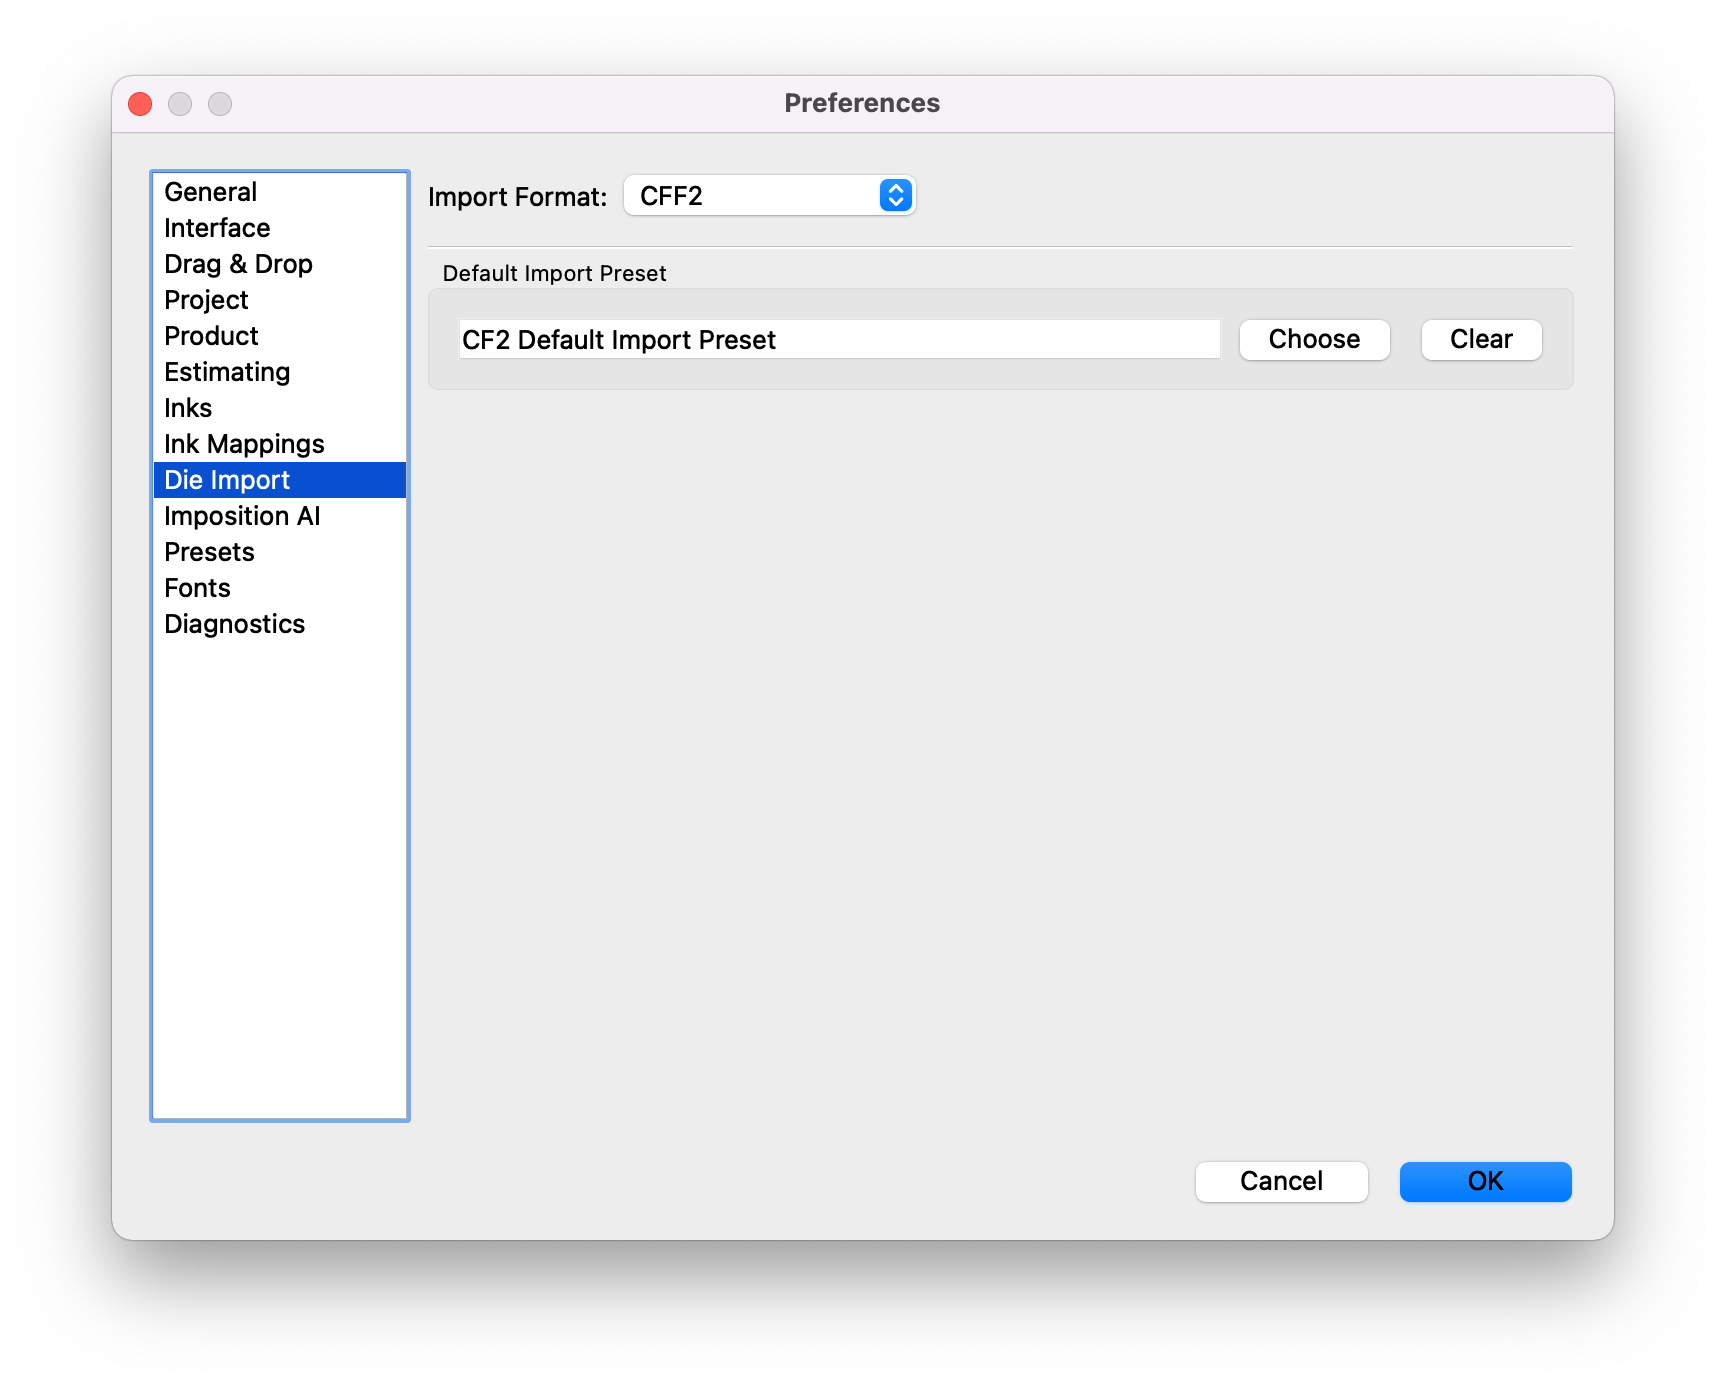
The Die Import preferences set the default import preferences for the various die types. To set up a default import preset, first choose the desired file type in the Import Format dropdown (CFF2, DDES2, DDES3, DXF, or Structural PDF™). Then click "Choose" to choose from any available presets for each format.
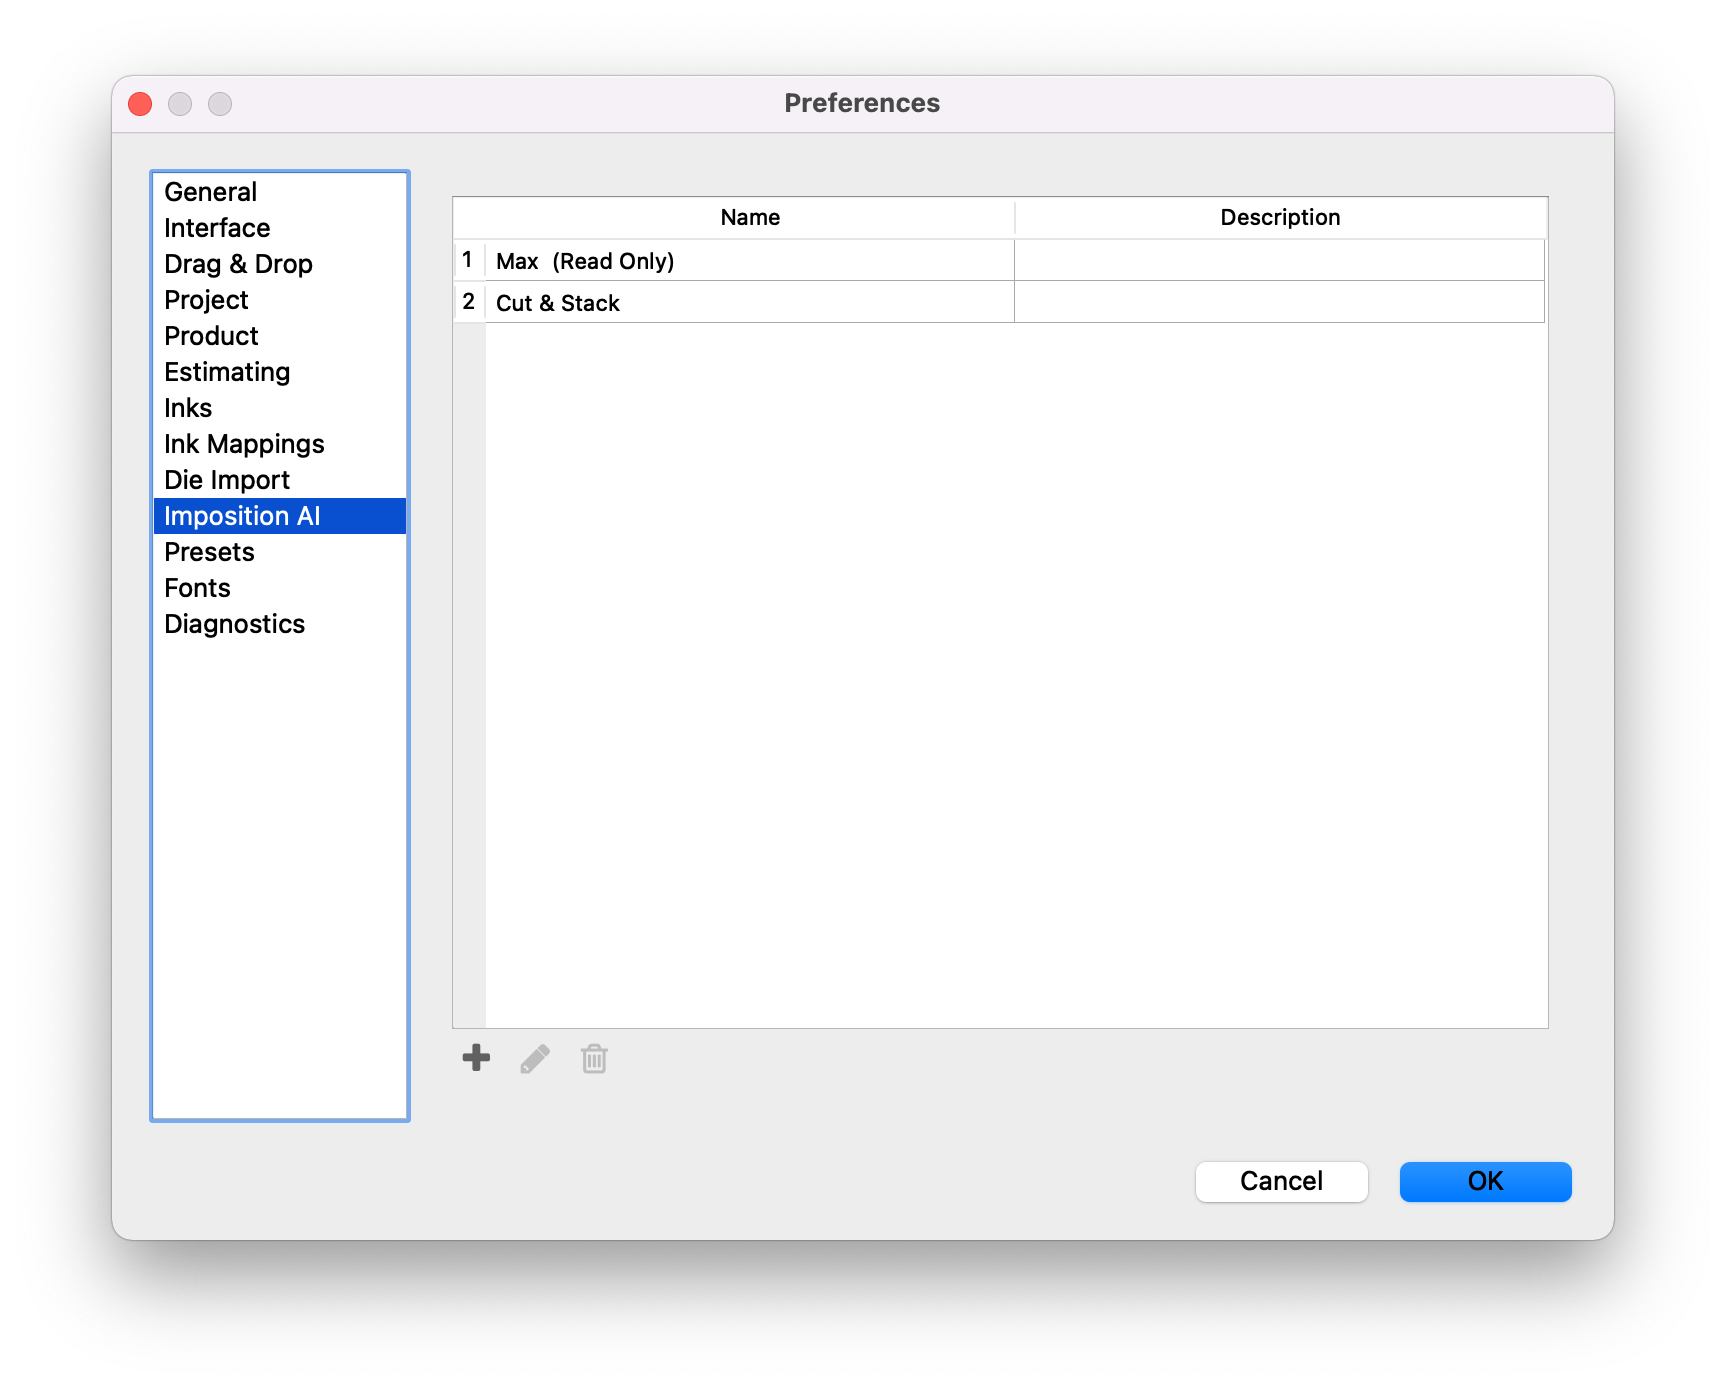
The Imposition AI tab allows you to view, manage, create, and delete Imposition AI profiles.
Phoenix allows you to create presets for the following items in the configuration to store commonly use settings:
- CF2 Export
- CF2 Import
- Cover Sheet Export
- Cutting JDF Export
- DDES2 Import
- DDES3 Import
- DXF Export
- DXF Import
- Dynamic Ink Mapping
- Dynamic Keyword Mapping
- HP JDF Export
- JDF
- JSON Job Report
- Number Style
- PDF Die Export
- PDF Job Report
- Product CSV Import
- Step & Repeat
- Stock CSV Import
- Structural PDF Import
- Tiling
- Tiling Report Export
- Vector Export
- XML Job Report
- ZCC Export
Each of these presets are created in their respective locations within Phoenix. For instance, the PDF Die Export Preset can be created or modified in the File > Export for Cutting > PDF... window. Once the dialog is open, make the desired changes, and click Save Preset at the top of the window.
To see a list of your current presets, and to remove presets, navigate to the Preferences window and select "Presets" from the left side of the Preferences window.
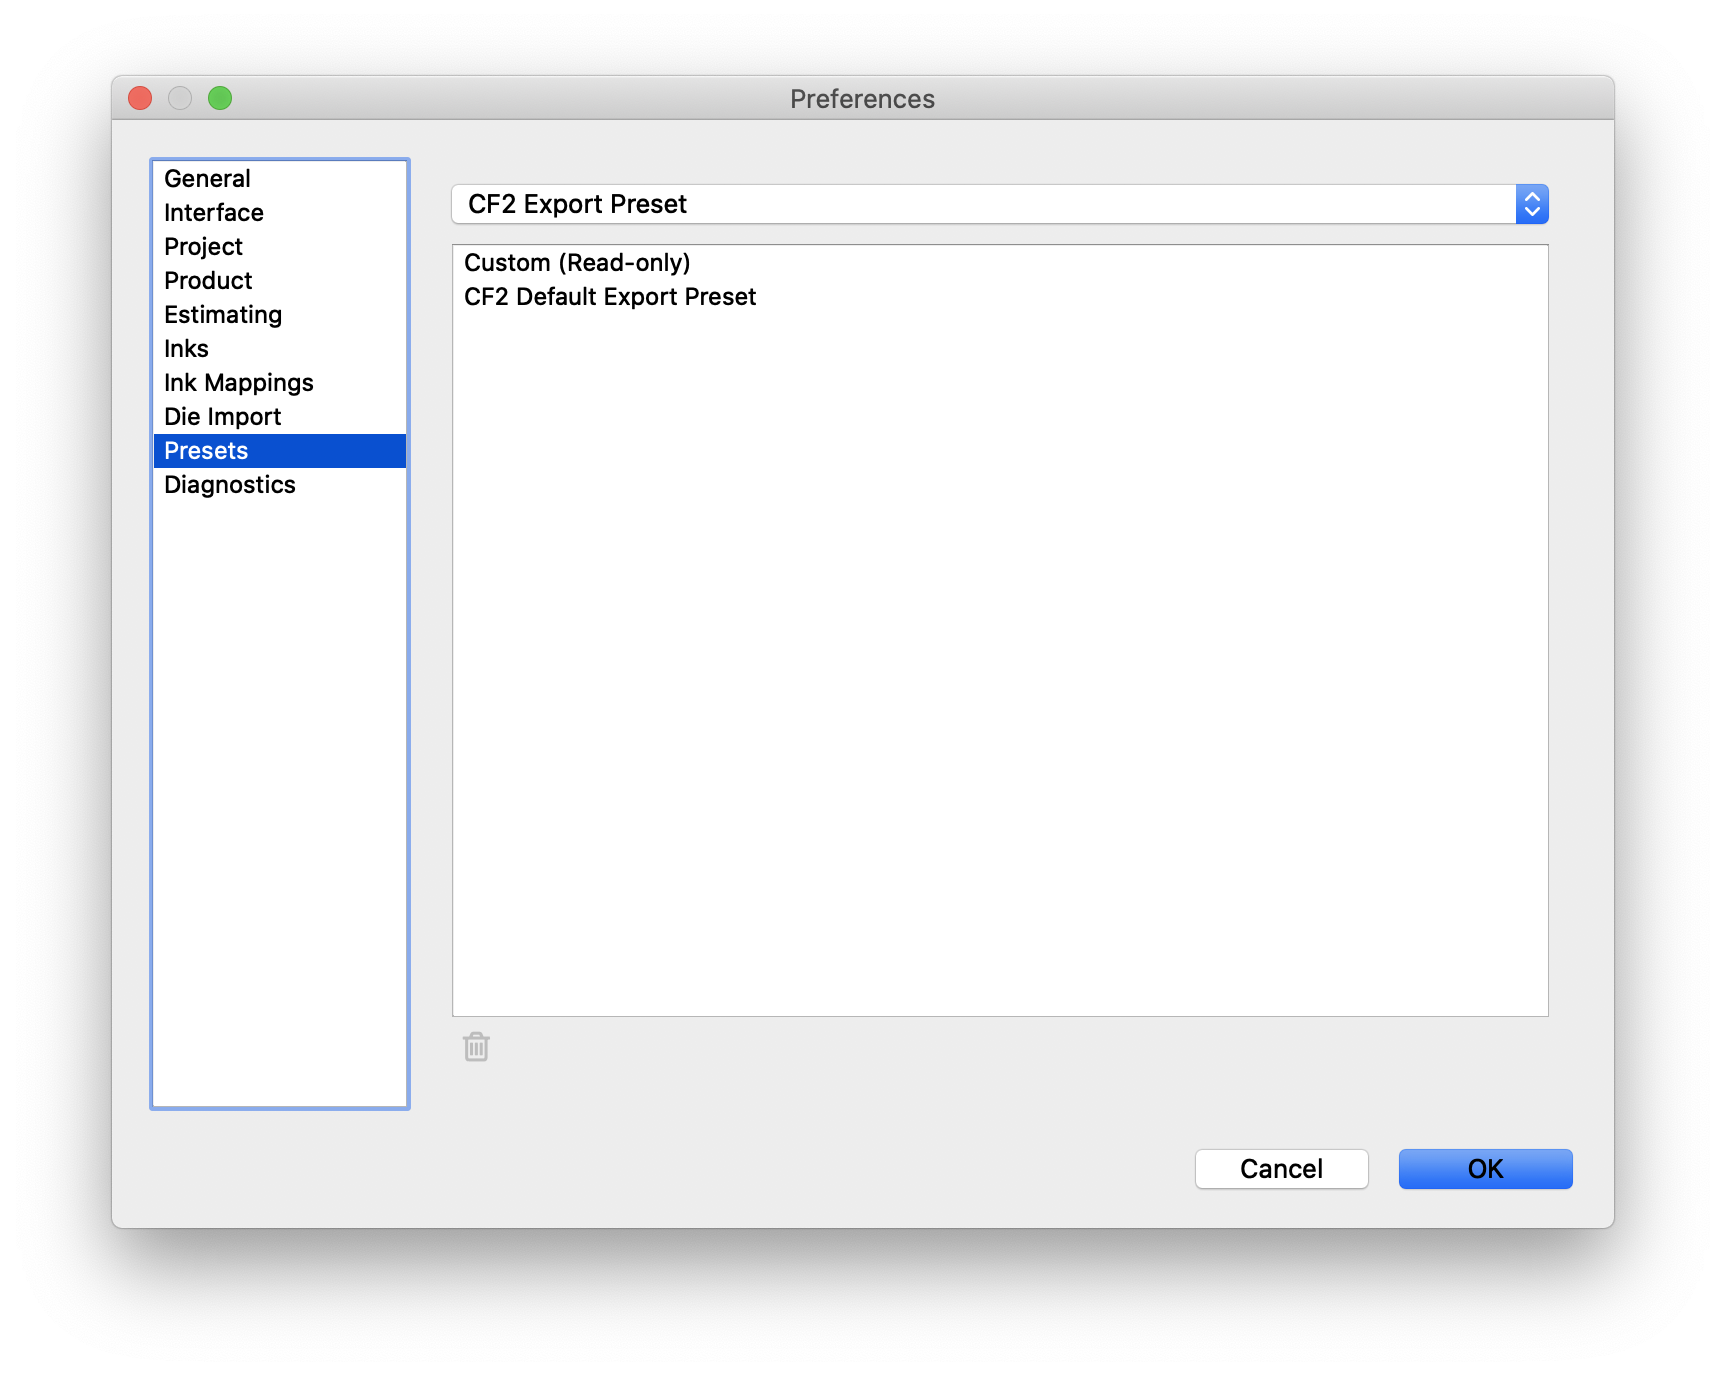
| Field | Description |
|---|---|
| Preset Selection | This dropdown shows the various types of presets available |
| Remove | After selecting a preset in the list, you can remove them by clicking this trash icon |
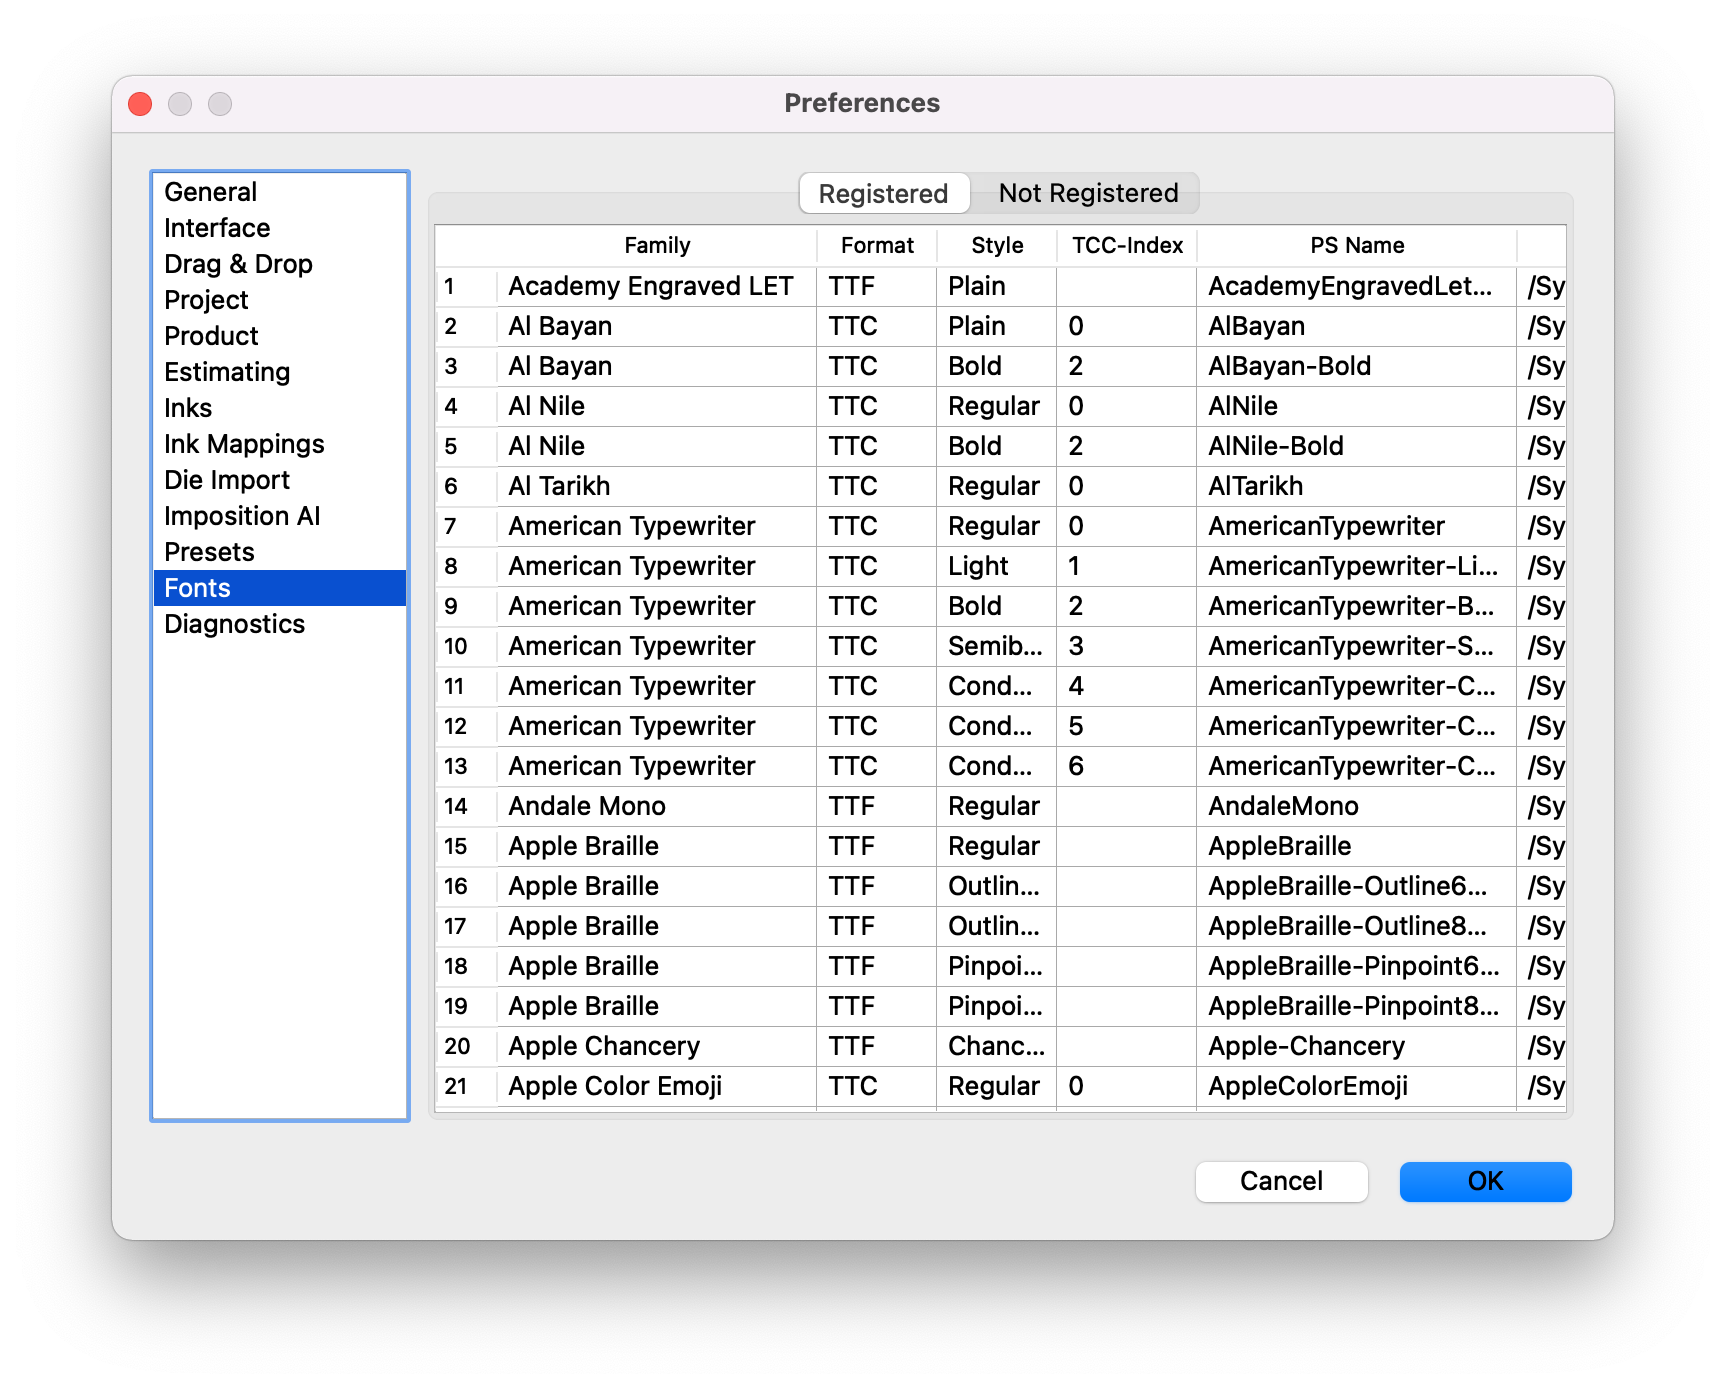
The Fonts tab allows you to view all registered Fonts available to Phoenix, along with those that Phoenix is not able to use. Phoenix should be pulling all fonts available on the system and make them available for use in Phoenix.
You can also add fonts directly to Phoenix by dropping them in the C:\Program Files\Tilia Labs\Phoenix\fonts folder. You will need to restart Phoenix before new fonts are available for use.
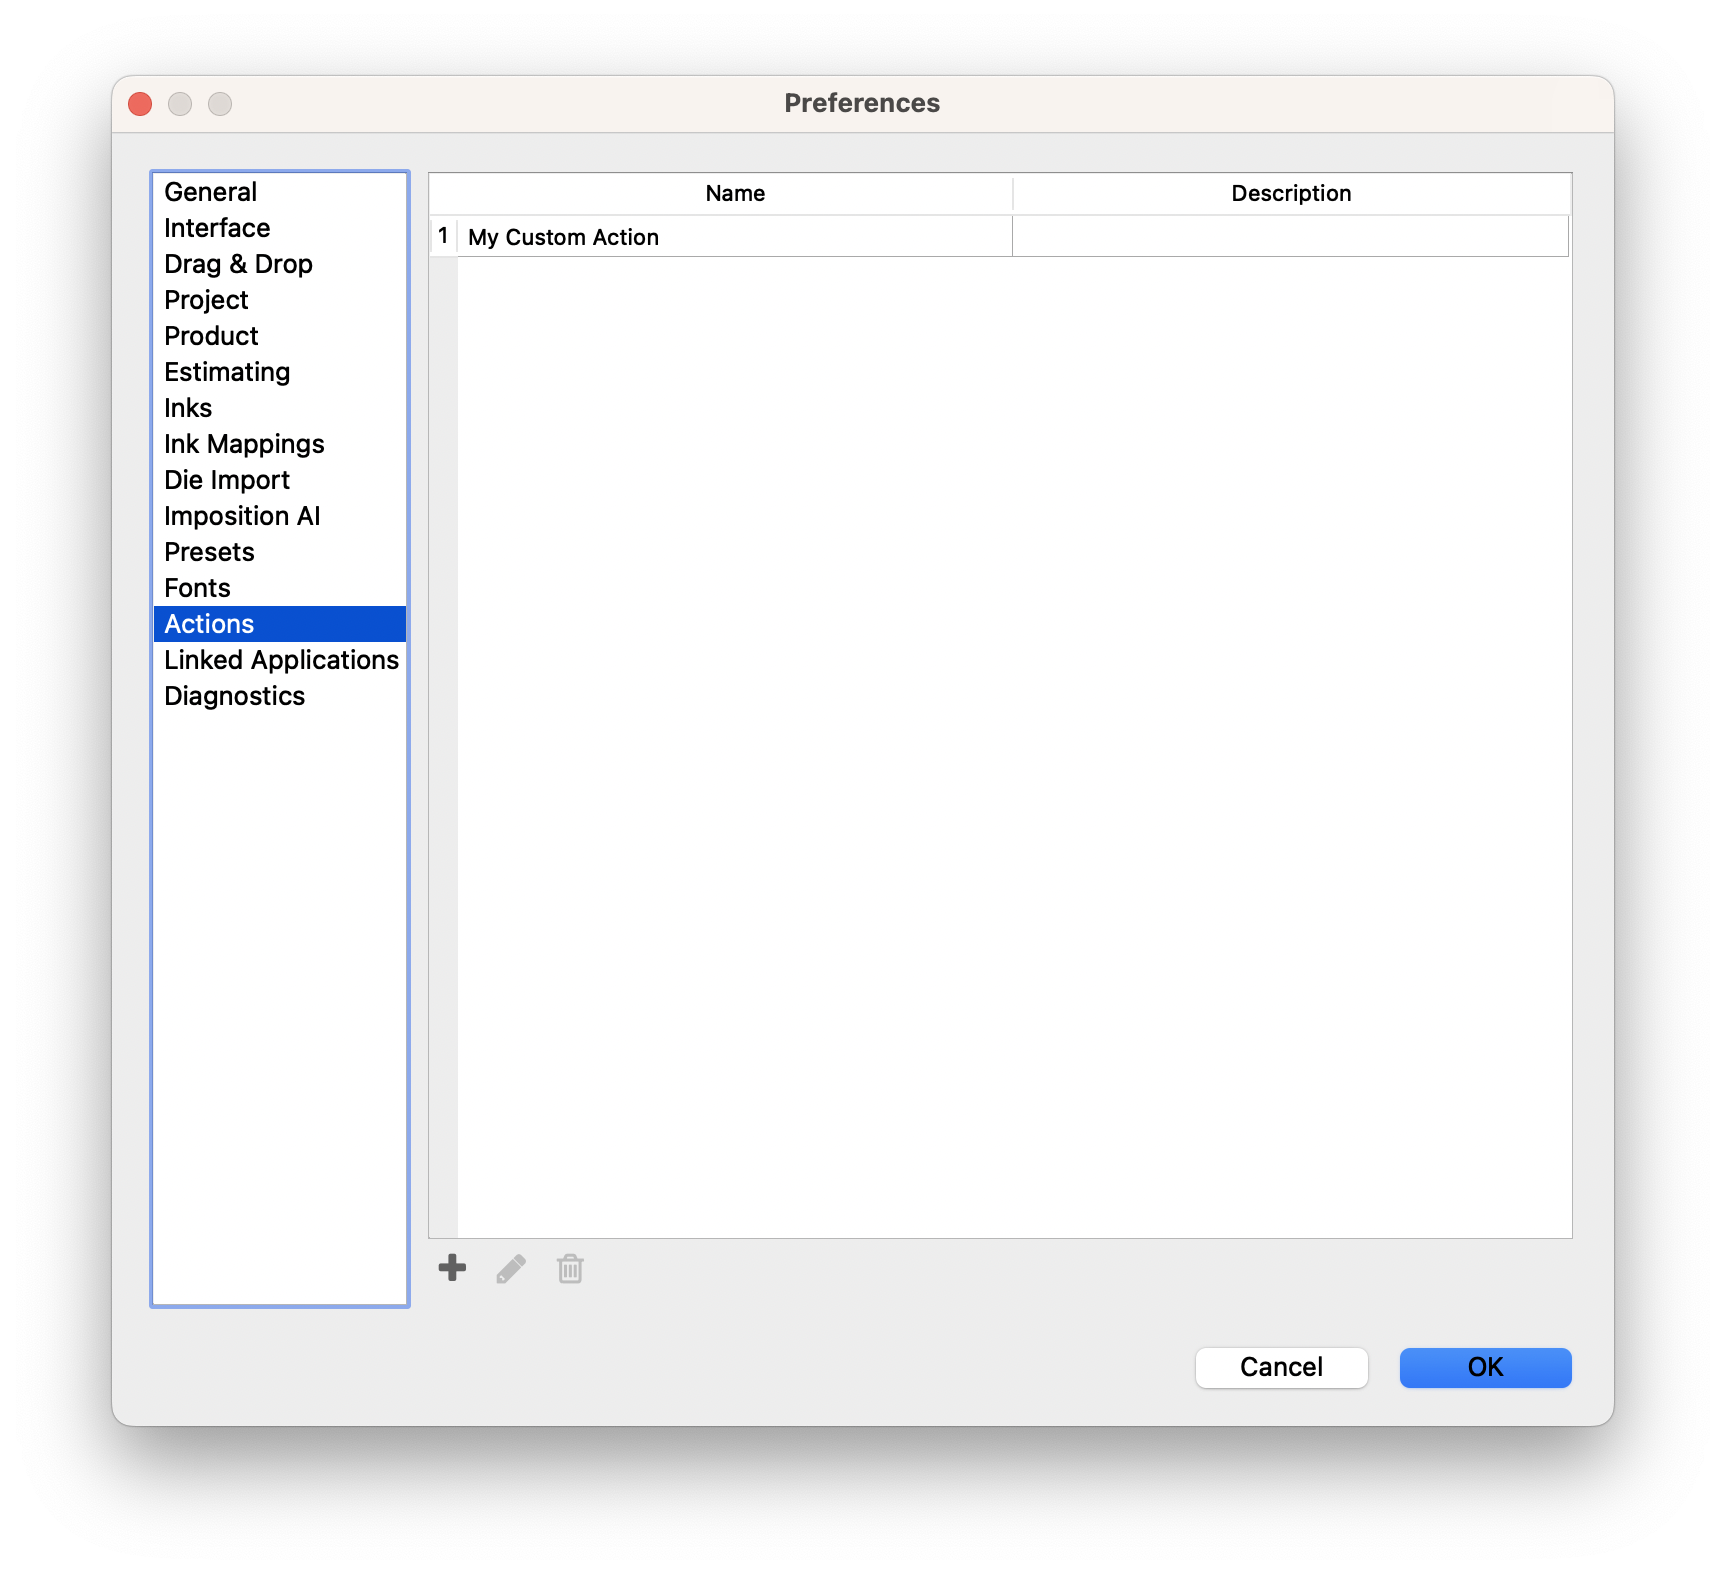
The Actions view shows all of your saved Action Scripts. Here you can create, edit, and delete the Action lists to enable easy access to a series of scripts from the Actions dropdown at the top of the Phoenix window. Note that this is only applicable if you have the Scripting module.
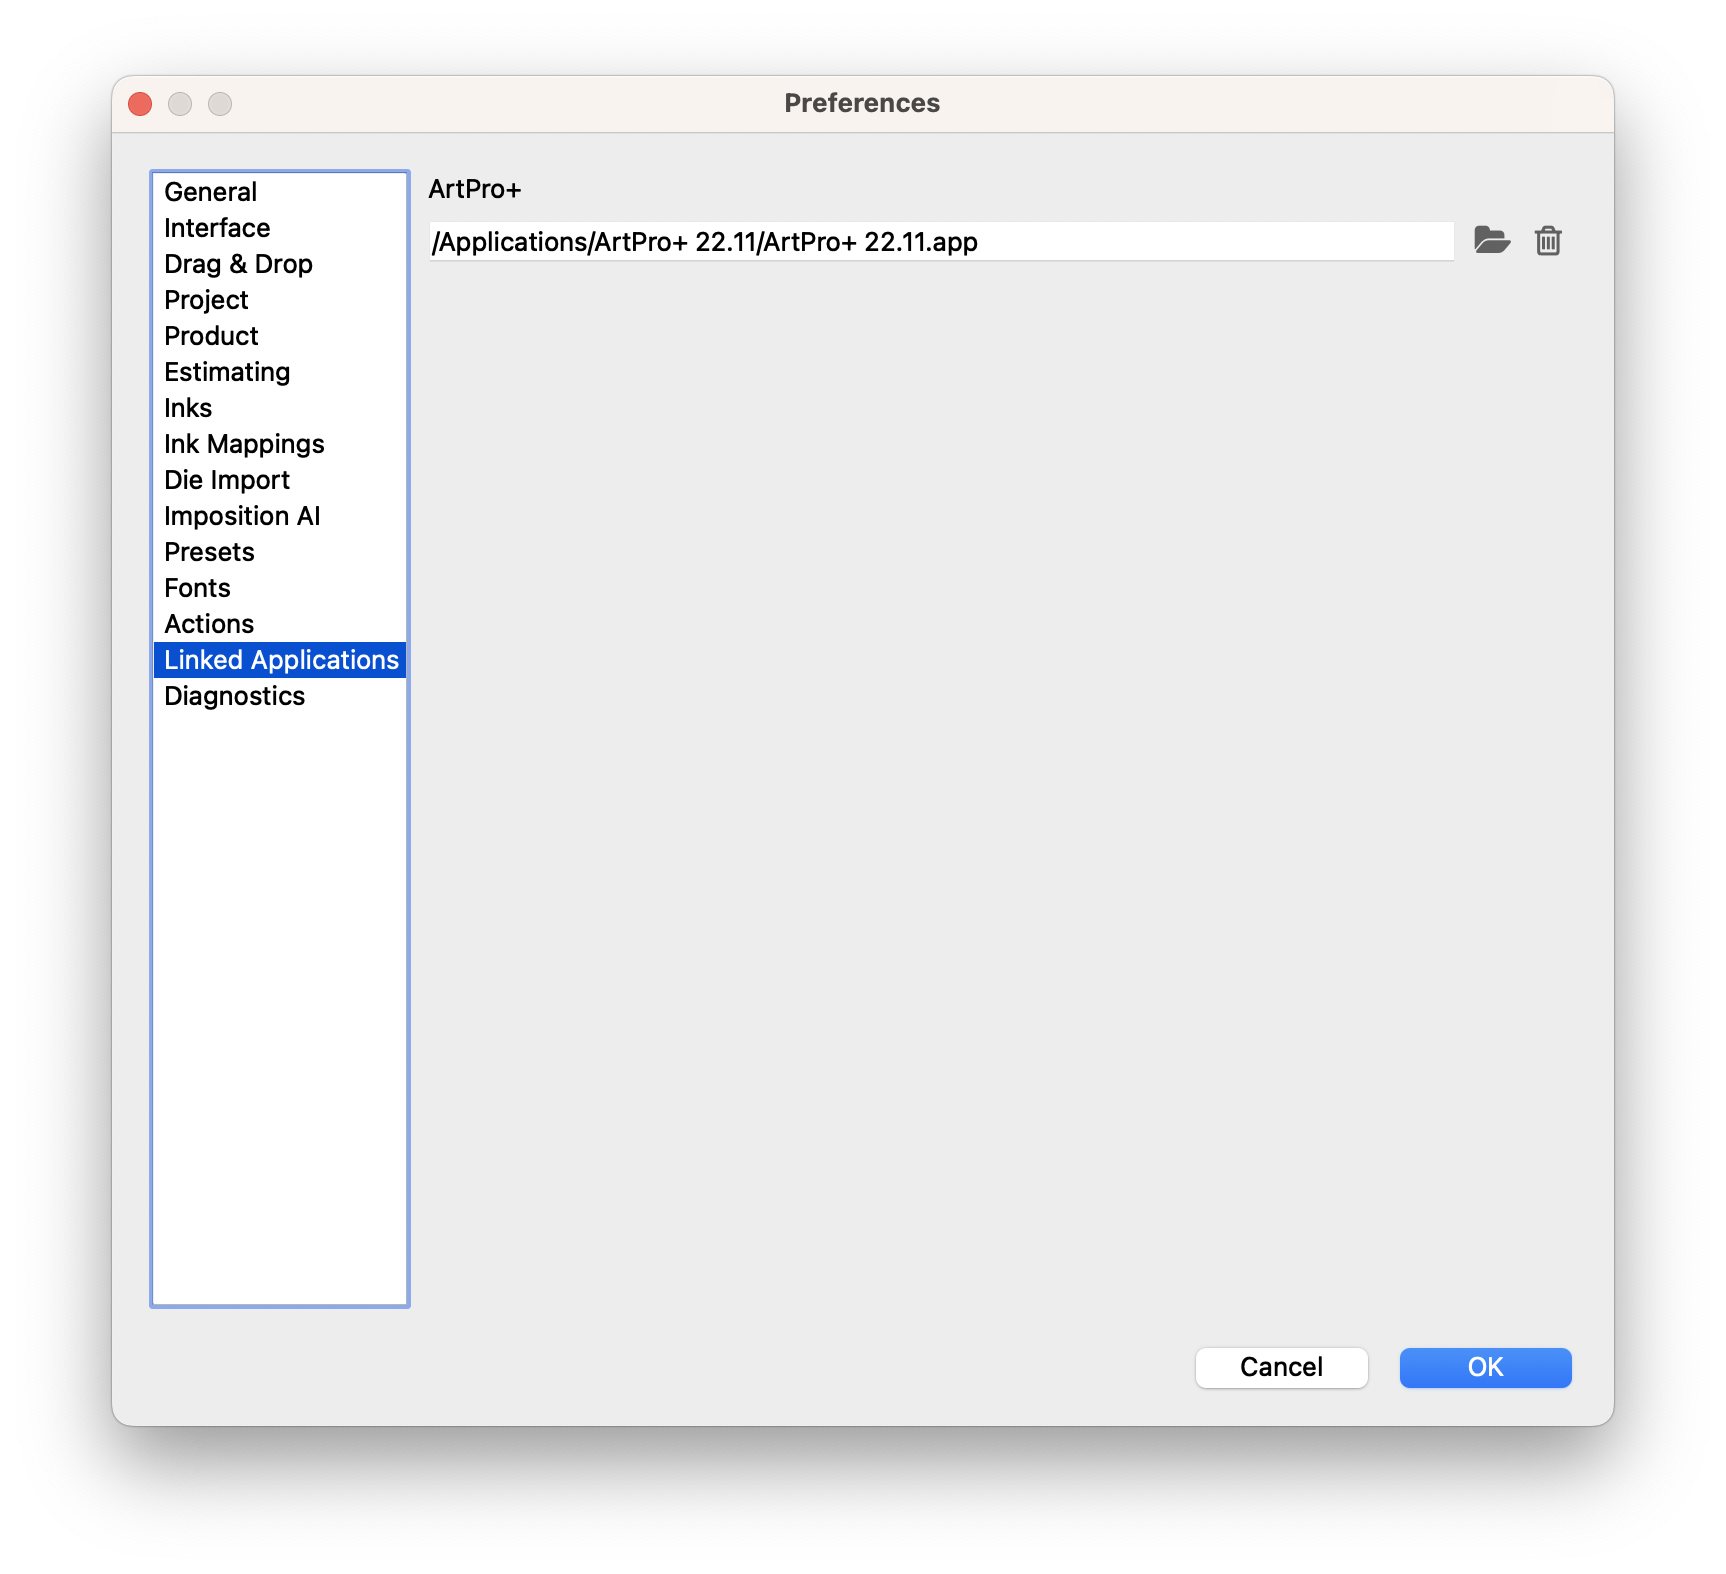
The Linked Applications view allows you to define where ArtPro+ is located to support the "Open in ArtPro+" option from the product menu. Click the folder icon to define where ArtPro+ is on your system.
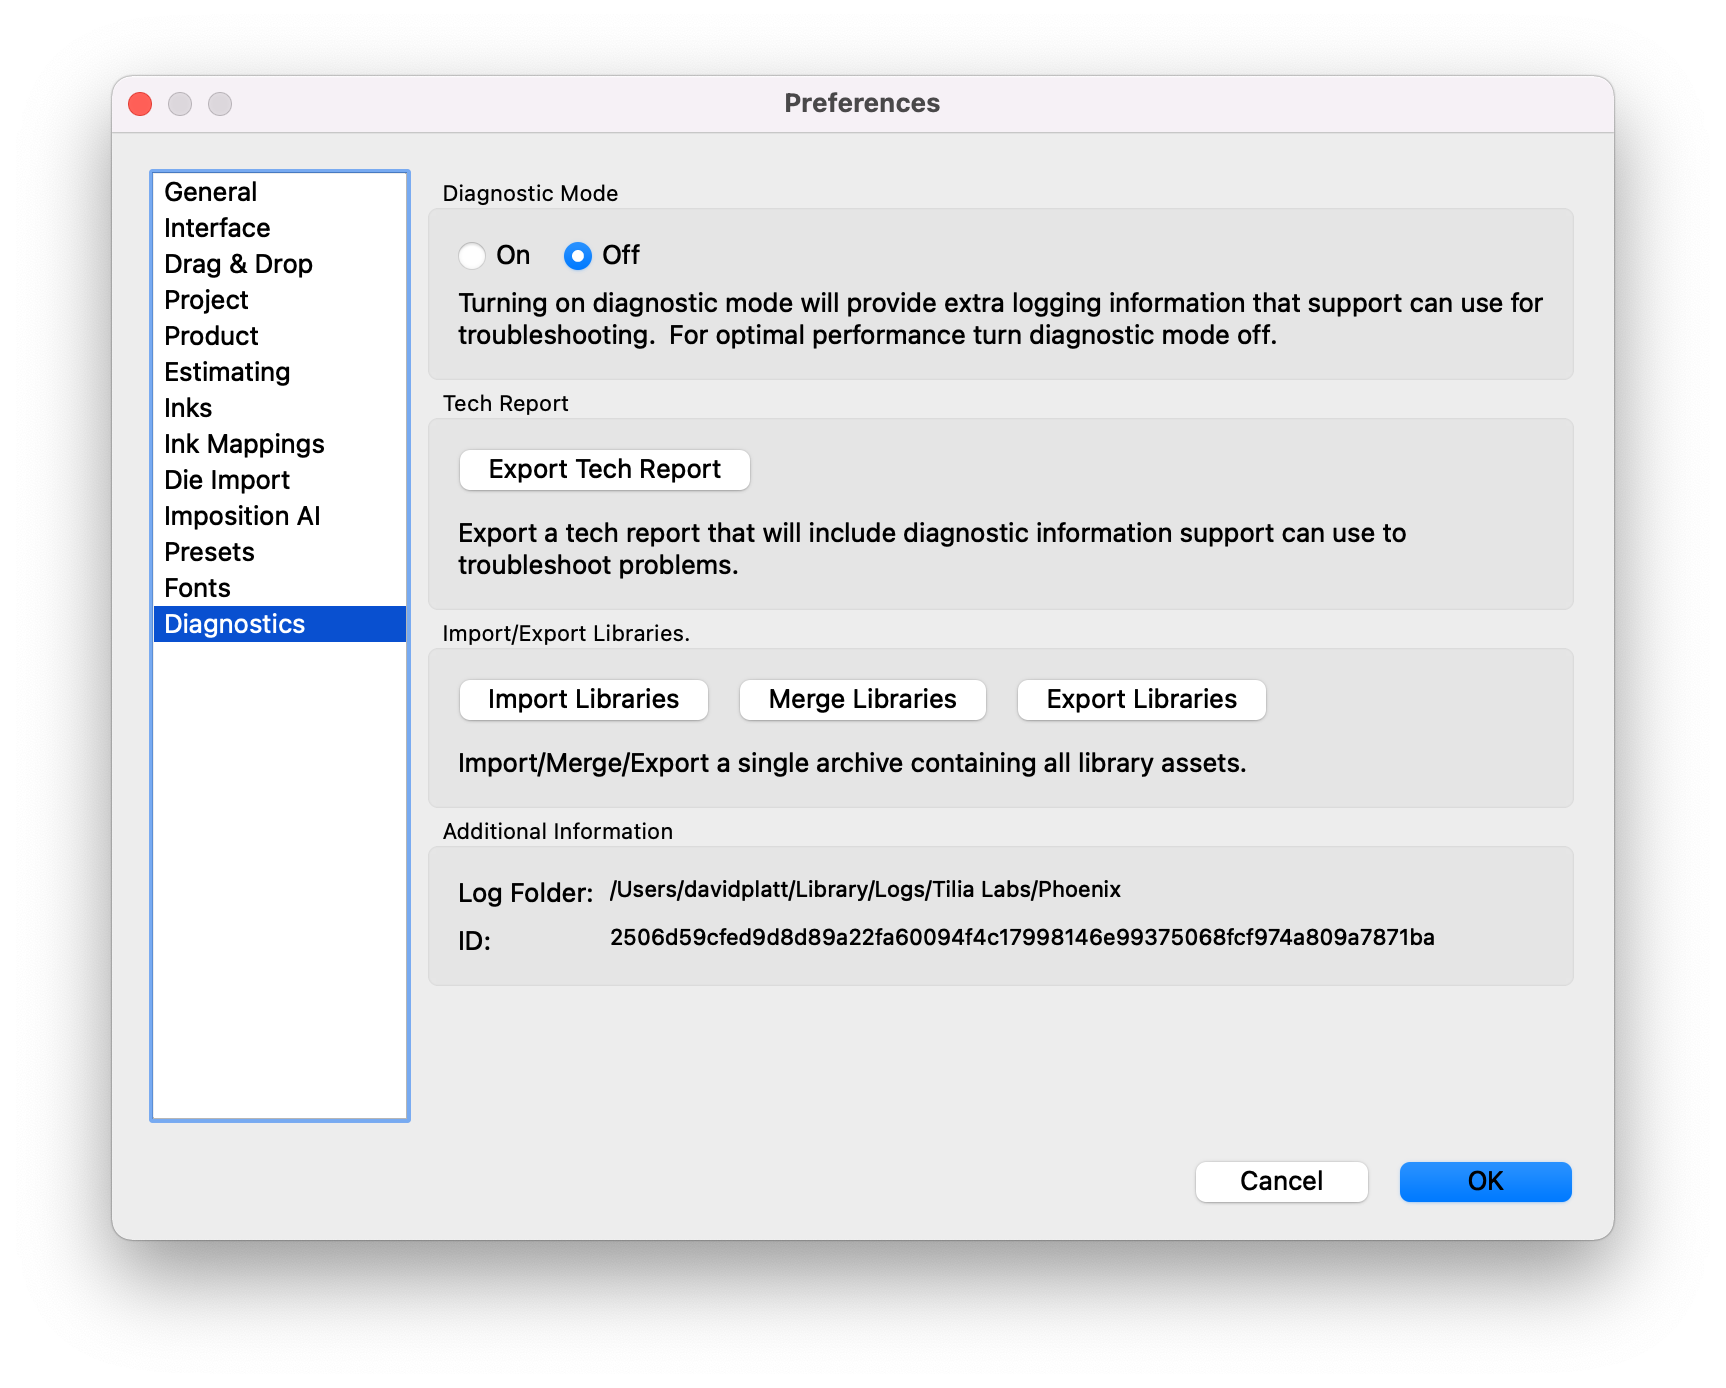
The Diagnostics view allows you to turn on Diagnostic mode, which adds additional logging information for troubleshooting purposes. You can also export a Tech Report to assist our Support team in diagnosing issues. Finally you can manage your Phoenix libraries by importing, merging, and exporting all of your Phoenix Libraries in .phxlib format.
Note
Merge allows you to combine two separate libraries. If there are any discrepancies, Phoenix will open a dialog to allow you to choose how to handle. Before merging, it is recommended to export a copy of your libraries as a backup.