# Working with Phoenix
Phoenix is designed from the ground up to be easy to use, yet powerful and feature rich. There are many different windows and menu options, which are explained in detail below.
# Main Window
The main window of Phoenix consists of the Project window, various Panels surrounding the Artboard, and Toolbars. In addition, there are menu options that provide further options for what is displayed and what can be done with the current project.
# Drag and Drop
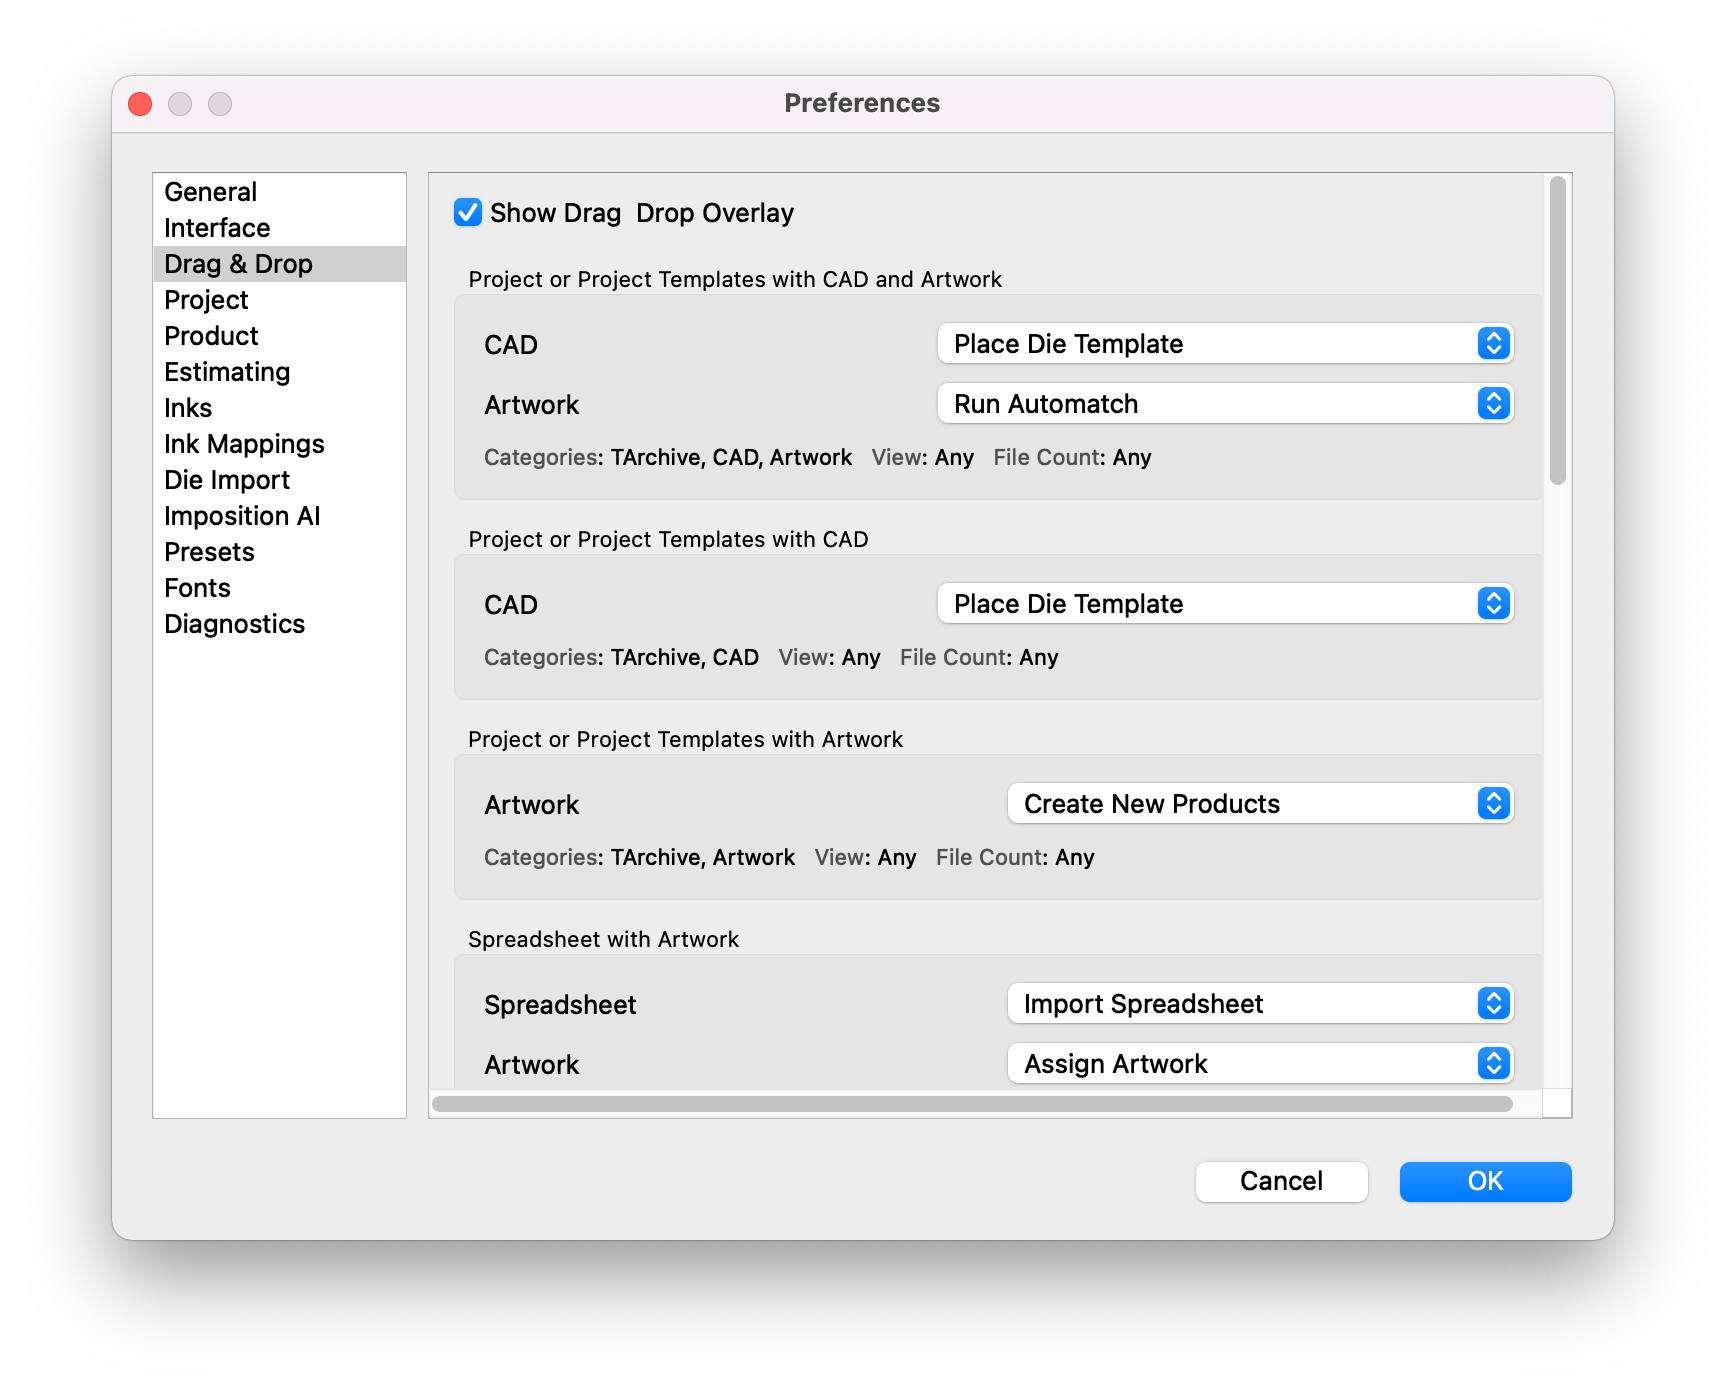
Drag and drop behavior in Phoenix has been greatly enhanced in 8.0 with a novel, patent pending approach that results in significant productivity boosts for several common use cases. Now, when dragging files into Phoenix, an overlay is displayed explaining the default behavior and in many cases giving alternative actions to perform by dragging the file(s) into clearly designated regions within the overlay.
Furthermore, multiple actions are now performed when two or more file types are dragged into Phoenix at a time to automate common tasks like placing a die template and snapping artwork files into it or importing a spreadsheet and assigning artwork files to products by filename. The default actions performed for various drag and drop scenarios involving one or more file types can be customized in Preferences → Drag and Drop.
# Projects
Phoenix uses the concept of Projects. A project in Phoenix can contain multiple products, or artwork files. Projects also contain layouts, which are imposed products on a particular sheet or roll. A Phoenix project also refers to a file saved in the native Phoenix format, .phx, which saves the entire project, including any layout(s), product(s), mark(s), and so on.
To create a project, navigate to the File menu and select New Project. A project will open, and depending on your preferences, a New Project Properties window will appear.
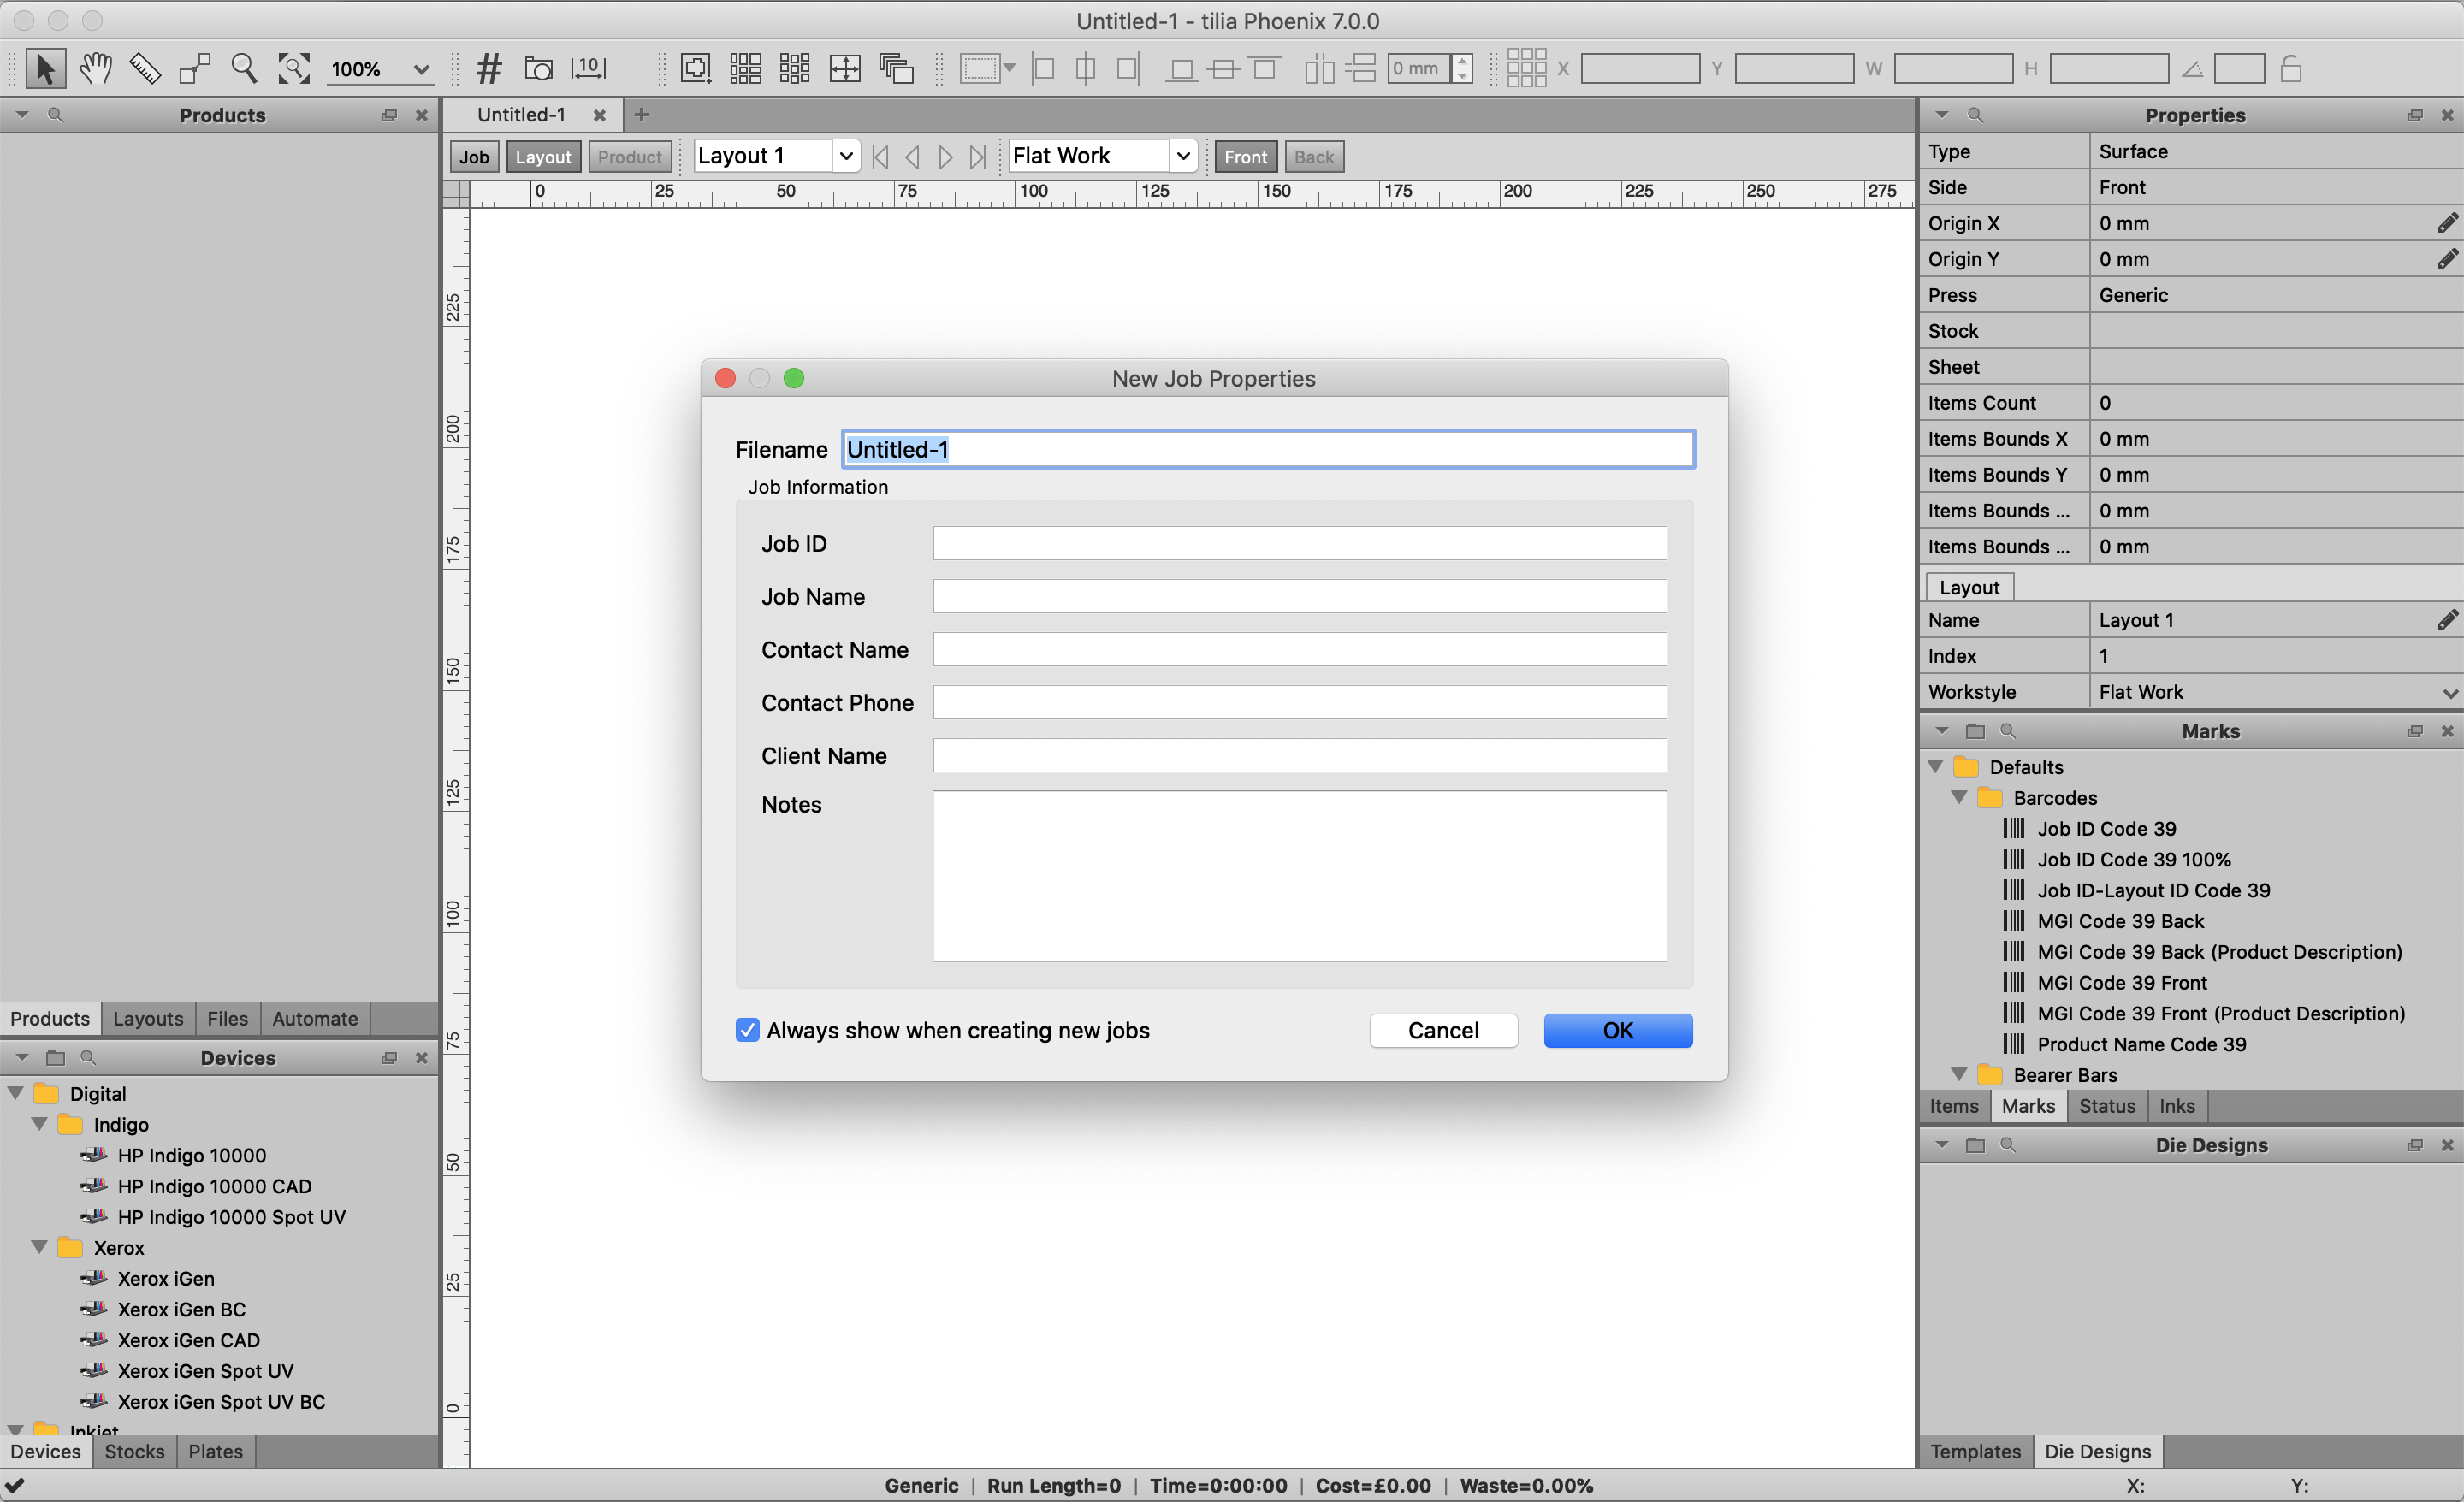
Here you can set various project properties that will be saved along with the project and can be used in Dynamic Keywords later. Once the New Project Properties window is closed, or if it's set to not display in Preferences, you'll see the main project window.
# Project Views
There are multiple ways to view at a project. The views are Project, Layout, and Product, and are shown just below the project tab at the top of the Artboard. The views are briefly described below, and more detail for each view is provided later in the user guide.
# Project View
The Project View provides an overview of the project, almost like a digital project ticket. There's a summary section that shows the total run length, cost, waste, sheet usage, press time, and percent of overage or under for the project. In addition, it shows a layout-by-layout breakdown of the press and sheet used for that layout, along with the layout run length, cost, waste, sheet usage, press time, and overage or under.
# Layout View
The Layout View shows a selected layout on the arboard and allows you to modify it. Each layout is interactive, so if anything needs to be moved or changed, you can simply click on it and drag it to another location, replace it, or remove it. You can drag products from the Products panel into a layout to manually make a layout, or view a layout that has been created via Imposition AI.
# Product View
The Product View shows a single product on an artboard and allows you to edit the product and set product parameters.
# Panels
Each of the panels surrounding the artboard has a different purpose, but they all have a similar setup. Panels are used to show all of the Things available to Phoenix, such as Devices, Plates, Stocks, as well as resources like Marks, Templates, and Die Designs. Panels also are used to display information about the open project, such as Products, Layouts, Items in the project, Inks, and Properties.
# Working with Panels
Each panel can be closed or opened by navigating to the Window dropdown and clicking on the panel name. You can also close panels by clicking on the X in the top right of each panel, and pop out a panel into it's own window by clicking the  button in the header of the panel.
Alternatively, you can right-click on any panel header to bring up a contextual menu from which panels can be opened and closed.
Panels can be rearranged and repositioned through a simple drag and drop interface to make customizing your workspace easy.
New in Phoenix 7.0, panels are also searchable by clicking the magnifying glass icon in the header. This makes it incredibly easy to find items that are in large libraries.
Also new in Phoenix 7.0 is the ability to import and export individual libraries as opposed to only being able to import and export all Phoenix libraries. Phoenix libraries can be exported and shared by clicking the dropdown in the top left corner, and selecting the Export Library option. This can then be imported into Phoenix using the Import option from the same dropdown menu. Individual library items can also be exported by right clicking on the item and selecting Export.
# Copying Library Items
If you would like to make a copy of a library item (Press, Plate, Mark, Mark Set) you can right click on the item and select "Duplicate". This makes a copy of the item in the same folder as the original. Now if you want to move the copy to a different folder you can drag and drop the new item into the folder.
Pressing Control while dragging and dropping the original item will keep that item in place while making a copy of the item. If you want to make a copy in the same folder make sure to keep the cursor position within that folder. You can also move the cursor into a different folder to make the copy directly into that destination folder.
# Products
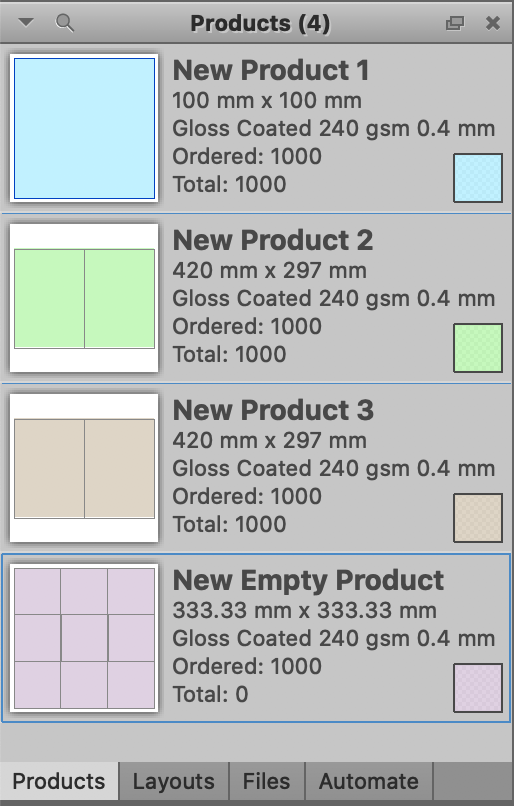
The Products panel shows all the products currently in the project. Each product has a thumbnail on the left side, the name of the product, the product size, stock, ordered quantity, and total quantity placed in the project. Products also have a color assigned that represents the product die shape if the artwork is hidden in the Items view and also displayed in reports (if Show Artwork is disabled) and Imposition AI summary previews.
The Products panel is useful for selecting products to manually create layouts by dragging and dropping from the Products panel into a Layout.
# Create New Products
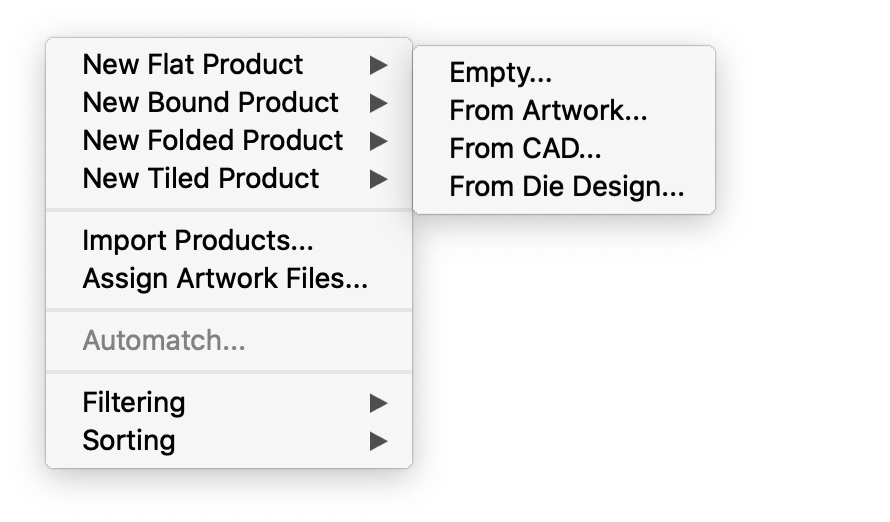
To create a new product, click the dropdown in the top left of the panel, find the product type you wish to create, and then select the artwork source. For more in depth info on products, check out Products.
# Contextual Menu
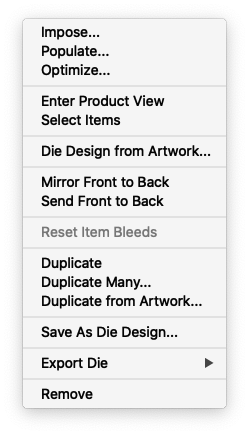
If you right click on a product, you have some additional options from the contextual menu.
| Option | Description |
|---|---|
| Impose, Populate, Optimize | Quickly run Imposition AI on the product |
| Enter Product View | Open this product in the Product View |
| Select Items | Selects all instances of this item in the current layout |
| Die Design from Artwork | Opens the Tool Mapping window to create a die design from layers or inks in the artwork |
| Mirror Front to Back | Mirrors the artwork on the front of the product to the back |
| Send Front to Back | Copies the artwork from the front of the artwork to the back |
| Reset Item Bleeds | Resets the item bleed to the default value specified in Preferences |
| Duplicate | Create a copy of the product |
| Duplicate Many | Create multiple copies of the product |
| Duplicate from Artwork | Create a copy of the product with different artwork |
| Save As Die Design | Saves the die shape of the product to the Die Design library |
| Export Die | Exports the die shape as a CFF2, DXF, or PDF |
| Remove | Removes the product from the project |
# Filter and Sort
The Products panel allows for filtering and sorting to make it easier to view specific products. You can filter and sort through the dropdown menu in the top left of the panel.
# Layouts
The layouts panel shows all layouts currently in the project. Each layout has a thumnail with the product colors to show a representation of the layout, along with the stock, size, and run length displayed. You can add new (empty) layouts from the dropdown in the top left of the panel.
In addition, there are a few important options available by right-clicking an existing layout. First, you can enter the Layout view for that particular layout (you can also enter the layout view by simply double-clicking a layout in the list).
Next, you can save the layout (including product die designs and their positions) as a template for reuse. You can also export the layout, either with die information as a CFF2, DXF, PDF, ZCC, or Cutting JDF file, or export vector separations of the layout. Finally, you can remove a layout from a project.

# Files
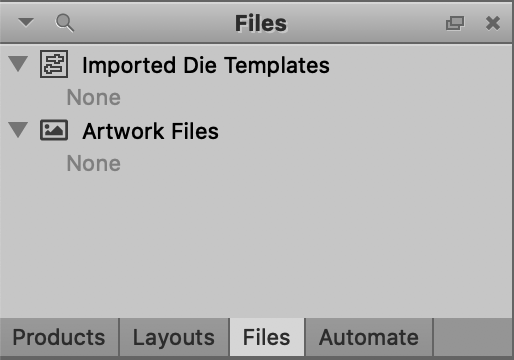
The Files panel displays a list of all external files used in the project, separated by imported die templates and artwork files. You can import die templates through this panel using the dropdown menu option.
# Properties
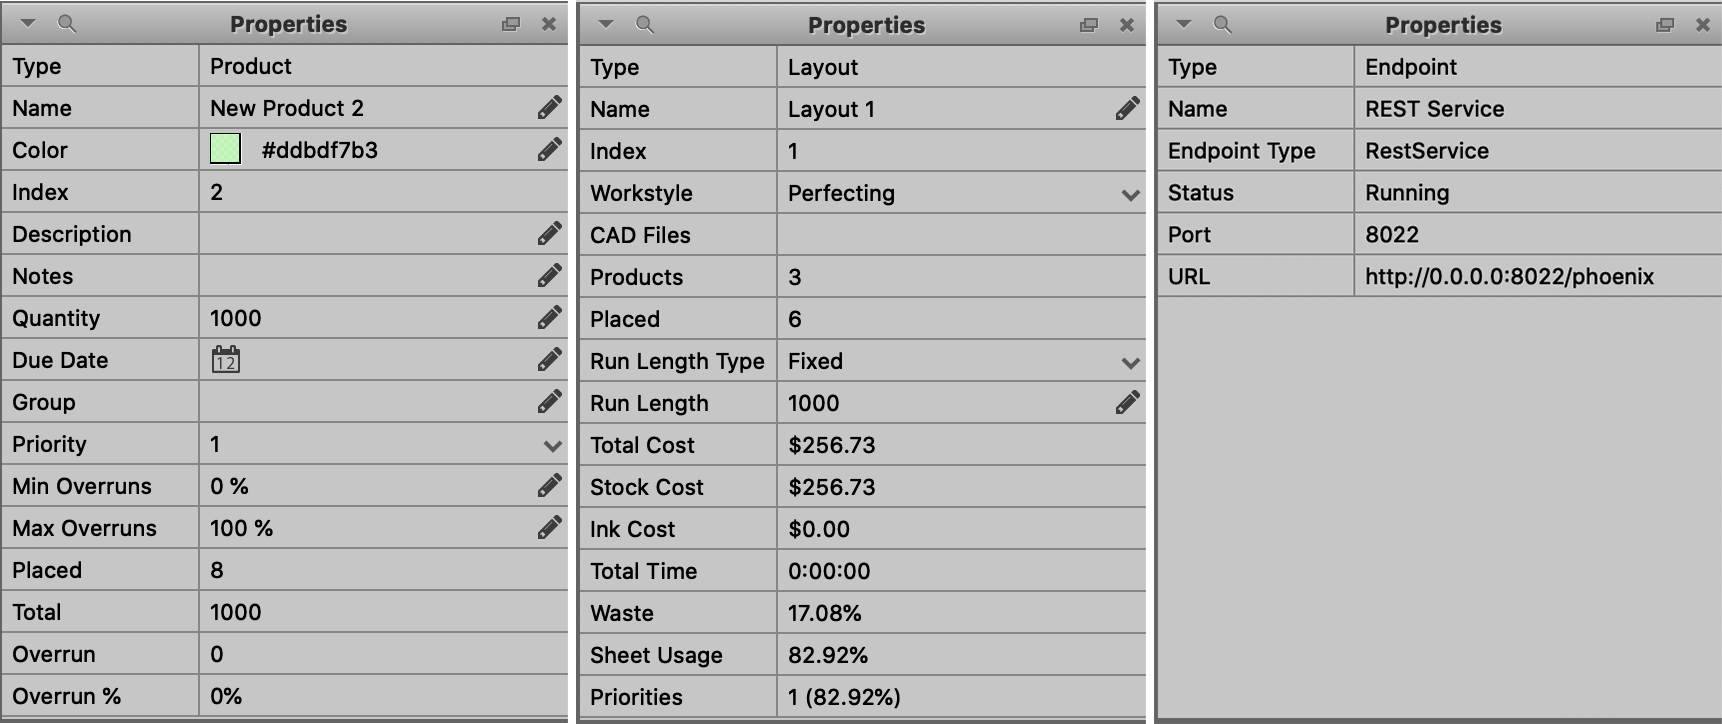
The Properties panel is one of the most important panels in all of Phoenix. It dynamically shows the properties of the currently selected item. Some properties may be editable, and these are notated with the pencil icon ( ). You can double click these fields to edit the property of the selected item. Each item in Phoenix has unique properties.
# Custom Properties
You can add custom properties to Projects, Layouts, Layout Surfaces, Product Parts, Product Components, and Library Items, which can be referenced later in keywords and through the optional Scripting module. To add a custom property from the Properties panel, click the dropdown in the top left of the panel and choose Add Property.
# Items
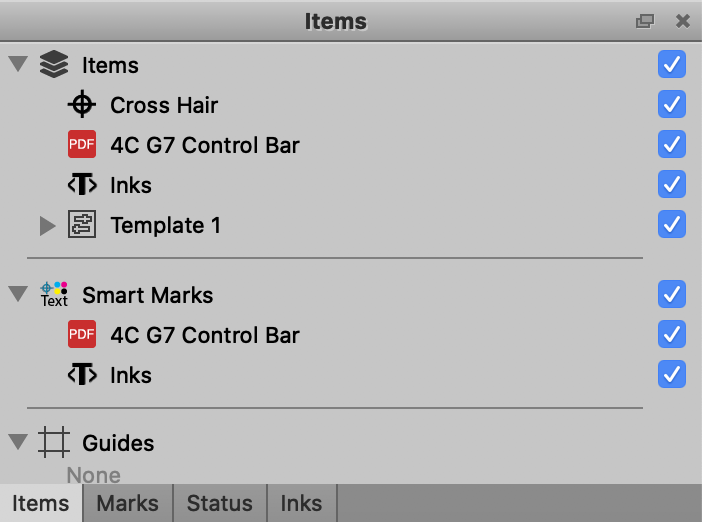
The Items panel displays all items in the current layout. This includes all marks, templates, and products. The items can be rearranged through drag and drop to re-order the items. You can toggle the visibilty of an item by clicking the checkbox to the right of each item.
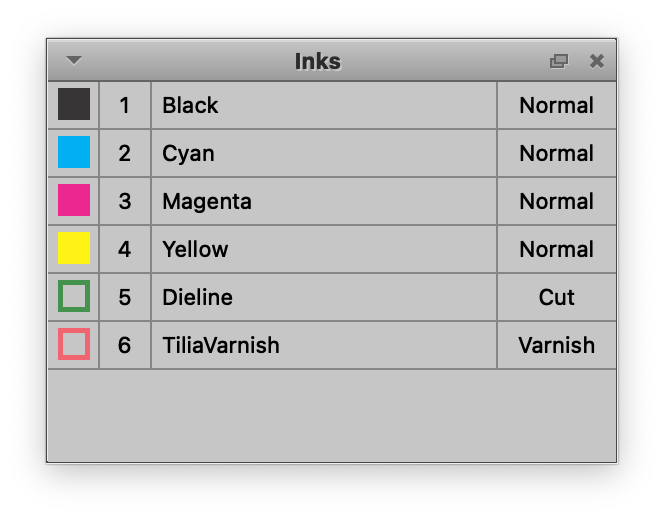
# Inks
The Inks panel displays the inks in the current layout or product. For each ink, a swatch is displayed, followed by the ink index, the name of the ink, and the ink type.
The ink order can be changed through dragging and dropping an ink, or by right-clicking on an ink, selecting "Change Ink Order" and specifying the desired ink index for that ink. In addition, the ink type can be quickly changed by right clicking on the current ink type and selecting the desired ink type. Otherwise, the ink types are pulled from the Phoenix Preferences.
New in version 8.0, Phoenix has a Separations View which can be enabled by toggling off one or more Inks. Simply click on the Swatch next to the Ink name, which will automatically switches the current view to Output Preview mode for more accurate rendering of the currently visible inks. Note that current ink visibility is purely a display feature and does not affect the way layouts are exported in any way. In the screenshot below, the Dieline and TiliaVarnish inks have been disabled, as can be seen by the Swatch not being filled.
Starting in Phoenix 8.0, any ink in product components and in layouts can be removed at any time. Inks are removed directly from the Inks Panel or from the product page color properties list in the Properties Panel. This allows users to remove inks that should not have been included in imported artwork or inks that were detected incorrectly during the import process.
An ink can be added from the ink library by clicking the drop-down in the top left of the panel. You can also reset the ink order in that same menu by clicking "Reset Ordering." Finally, if there are any inks listed in the Inks panel that are unused, you can select "Remove Zero Coverage Inks" to remove them from the Inks panel.
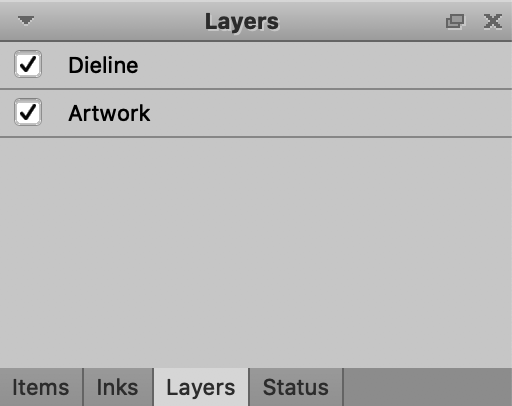
# Layers
The Layers panel displays the PDF layers in artwork files in either the product view or layout view. You can turn the visibility on/off by clicking the checkbox next to the layer, which will then affect output from Phoenix.
New in version 8.0, the Layers panel is now active in Project View, showing all layers across every layer in the current project. Each individual layer can be turned on or off in Project View which turns them on and off in all layouts where this layer is present.
# Status
The Status panel shows various warnings and errors that may occur in a project.
# Imposition AI
The Imposition AI panel allows you to run the four Imposition AI tools, specify exactly how you want Imposition AI to run, and what criteria should be evaluated when run.
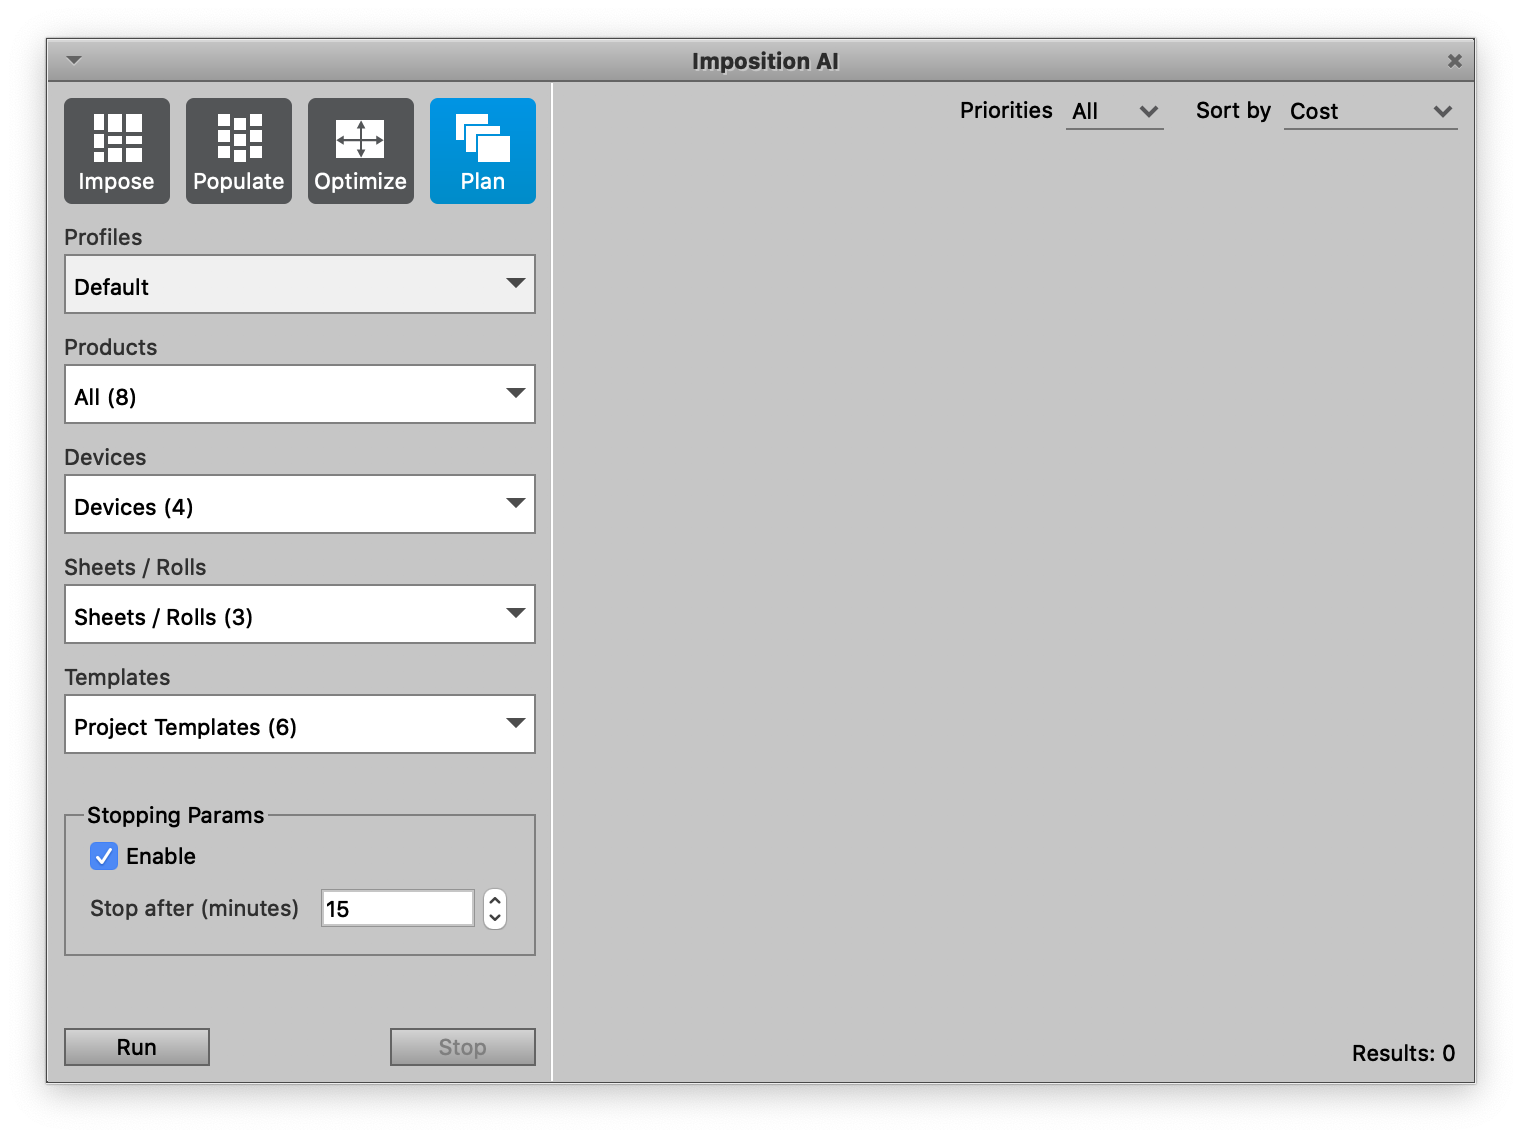
For the Plan and Optimize tools, you can choose the profile to be run, the products to evaluate, which devices you want to use, what sheets or rolls should be considered, and what templates Imposition AI can attempt to use. The Impose and Populate tools don't have the Devices and Sheets/Rolls options, as they only look to find results with the current device and stock in the project. In addition, Populate doesn't have an option for Templates.
The other option for running Imposition AI is the Stopping Parameters. The Stopping Parameters simply allow you to specify if Imposition AI should stop searching for results after a preset amount of time. In some cases, Phoenix could continue searching for results, but in most cases, it should finish searching in a reasonable amount of time.
Finally, the Imposition AI panel allows you to sort results. By default, the results are sorted by cost, but you can change this to sort based on time, waste, sheet usage, run length, or layout count. When using Plan mode, you can also enable the Priorities option, which restricts Imposition AI to only plan products that have a priority value within a certain range.
While running Imposition AI, a status message will appear to update you on the status until results are found. If Imposition AI is run with a Zund Cutting Device configured to connect to Zund Cut Center Server, Imposition AI will report the status of the connection until it is connected.
For more detailed information on Imposition AI Profiles and Modes, please see the dedicated page to Imposition AI.
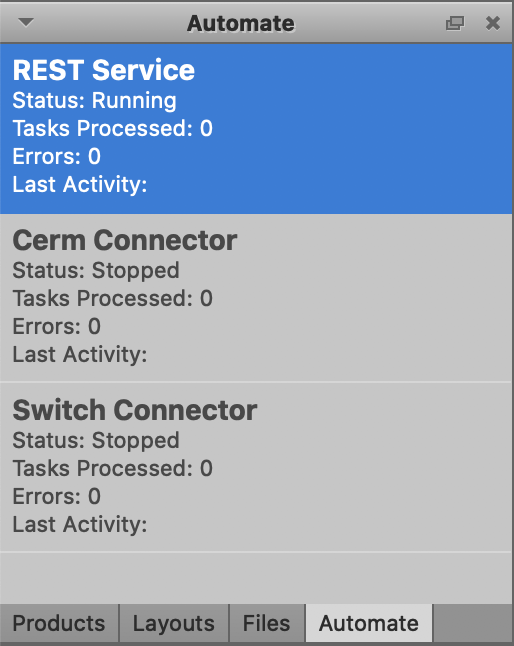
# Automate
The Automate panel is where Phoenix automation can be configured and managed. The Automation module is an optional part of Phoenix and is spelled out in detail in the Automation Guide.
To use the panel, first add an automation type through the drop-down menu. You can choose from Hot Folder, REST service, Switch connector, or CERM connector. Once added, you can right-click the service to configure it.
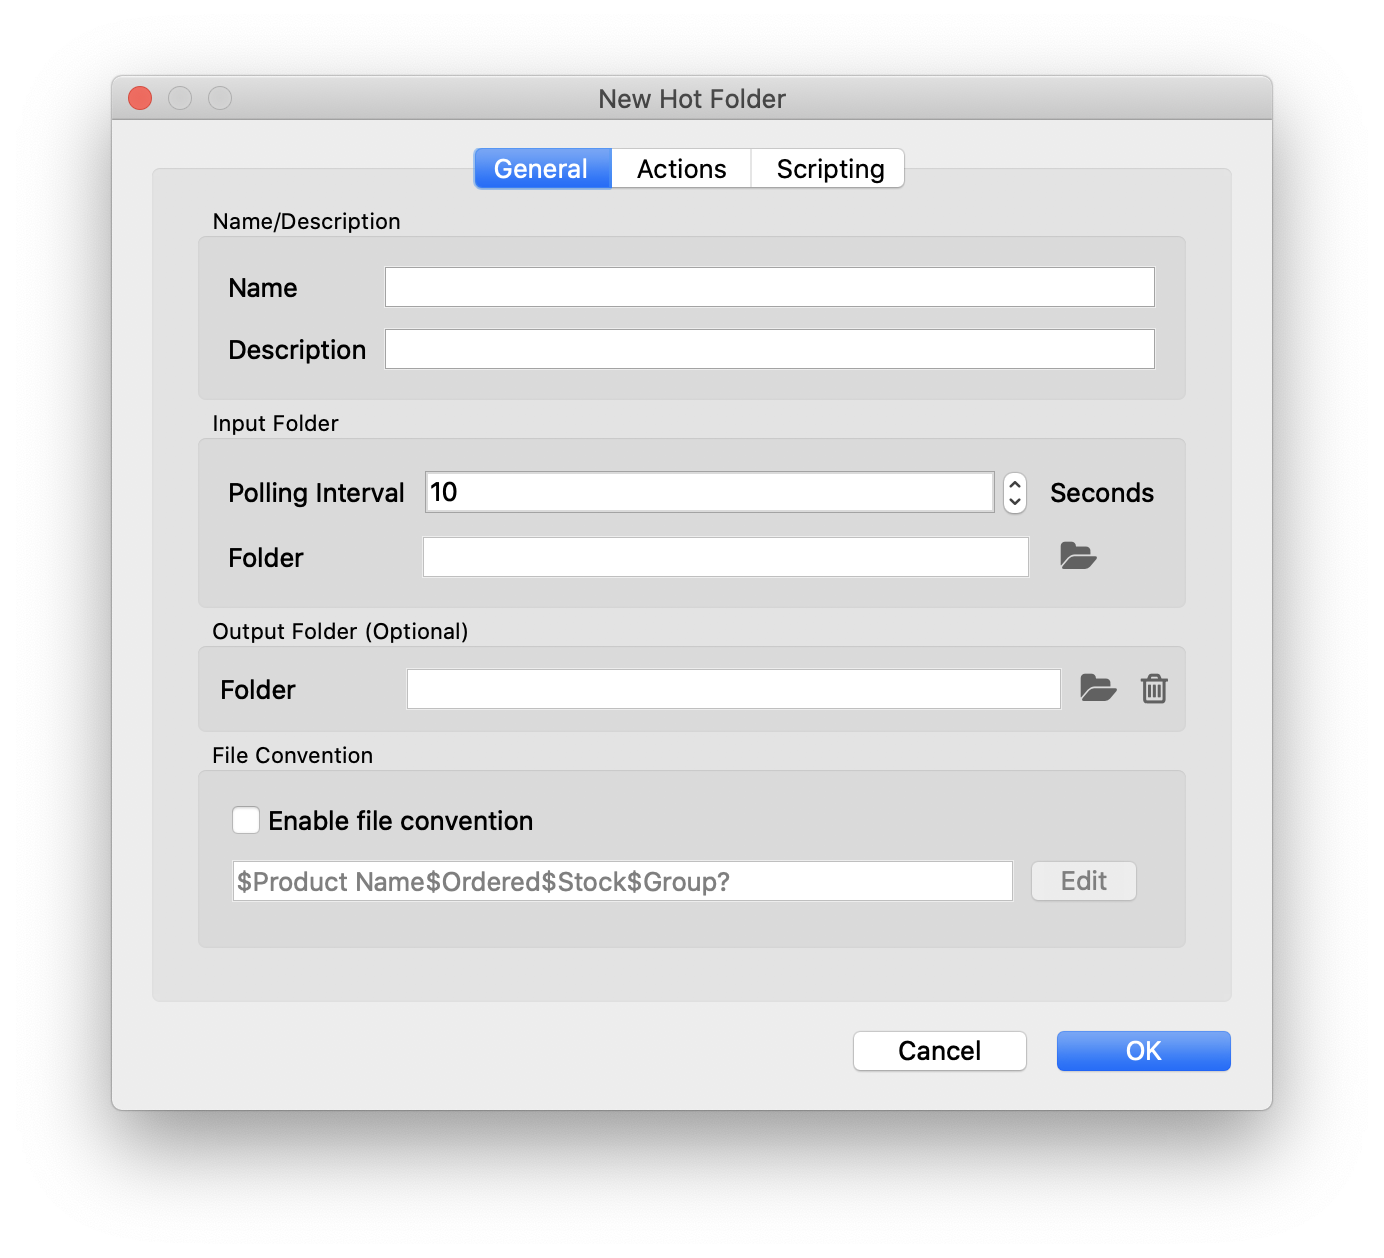
For hot folders, you'll need to specify the details of the hot folder before you can add it. When you add a hot folder, the hot folder setup will pop up and allow you to set the following options:
| Field | Description |
|---|---|
| Name/Description | Set the desired name and description of the hot folder |
| Polling Interval | Set how often should the hot folder check for new files |
| Folder | Choose the folder to be monitored where new files will be ingested for the hot folder. |
| (Output) Folder | Optionally set the output folder where successful files will be placed |
| File Convention | Optionally enable and define the file name convention. |
For the Actions tab, click the Load... button to select the actions .xml file that defines the actions to be completed by the hot folder.
On the Scripting tab, you can click the folder icon at the bottom to optionally load a script to run on input files in your hot folder.
For more information on Hot Folders, see the dedicated pages in the Automation guide here.
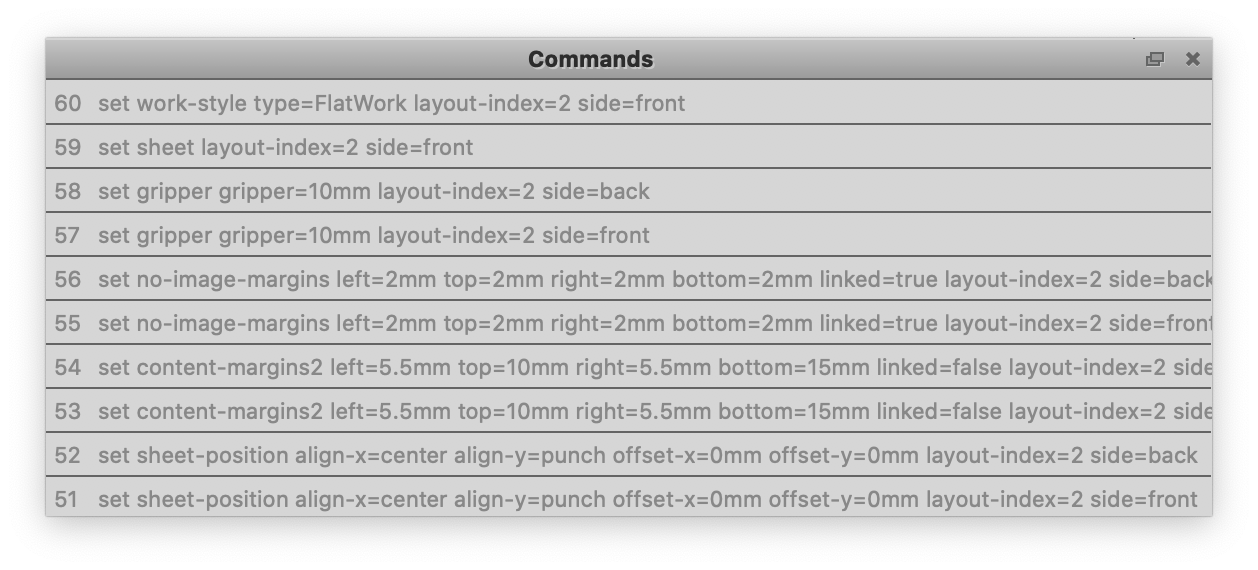
# Commands
The Commands panel shows a reverse chronological history of the commands run in Phoenix.
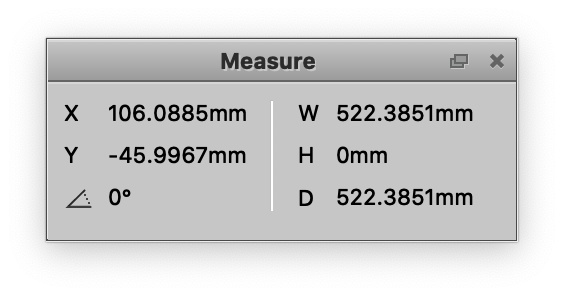
# Measure
The Measure panel is used in conjunction with the Measure tool to display the X and Y coordinates of the cursor on the layout, along with the width, height, distance, and angle of the measured line.
# Overlaps Tool
The Overlaps Tool panel is used to analyze the current layout for overlaps and control how overlaps should be handled.
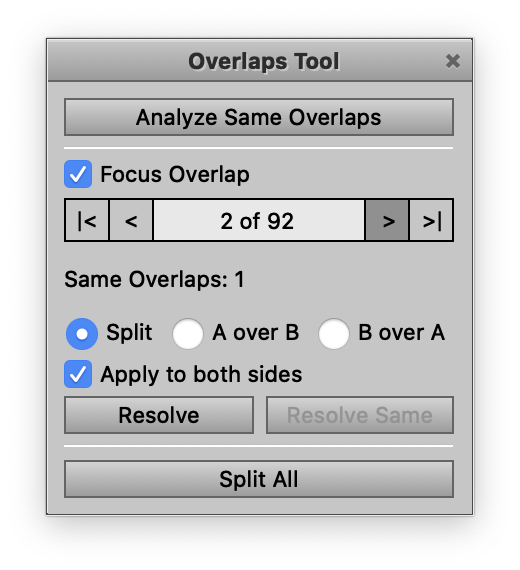
The Analyze Same Overlaps button searches for overlaps that are the same across the layout to enable the Resolve Same button for handling all similar overlaps at once.
Focus Overlap enables Phoenix to automatically zoom to highlight and focus on the selected overlap. You can click through the various overlaps with the arrow buttons, and select how they should be handled from the following options:
- Split - splits the overlap down the middle between the two objects
- A over B - allows object A to overlap on top of object B
- B over A - allows object B to overlap on top of object A
- Resolve - applies the selected overlap decision
- Resolve Same - applies the selected overlap decision to all same overlaps
- Split All - Splits all overlaps in the project
# Artboard
The Artboard is shown when in the Layout View or Product view and is where layouts or products can be previewed and manipulated.
# Artboard Toolbar
The Artboard Toolbar is the toolbar shown just below the project tab in Phoenix.

The Artboard Toolbar allows you to change views of the project between the Project View, Layout View, and Product View. In addition, each view has additional tools available specific to that view as described in detail below.
# Project View
The Project View provides an overview of the project, broken down into a project summary, layouts, and templates.
The Summary provides data about the entire job, including total run length, cost, and time, as well as figures for the average waste, sheet usage, and unders or overs.
The Layouts section provides a breakdown of each layout. This includes the devices and sheet used for the layout, total run length required, cost, waste, sheet usage, estimated time, and unders or overs.
Finally the templates section provides a list of templates used in the project, as well as what layouts they are used on, the source of the template, Die Making information, and any file path if using a referenced template.
# Layout View
The Layout View displays a selected layout in the project. You can choose which layout is selected via the dropdown in the Artboard Toolbar, or by double clicking a layout in the Layouts panel. In addition, the Artboard Toolbar contains a dropdown for selecting the work style of the layout, and a toggle to display either the front or back of the current layout.
# Work and Turn / Work and Tumble
New to Phoenix 8.0, you can change the work style of a layout to Work and Turn or Work and Tumble.
If you choose Work and Turn, the layout automatically changes to reflect the change, and you'll see a dividing line running vertically in the middle of the layout, while Work and Tumble will do the same thing but with a horizontal line showing the axis that is used to flip the sheet. Everything on one side of the line shows the front of the product, and the other side shows the back, reflecting the workstyle chosen. While working with the layout manually in this workstyle, any changes you make to positioning is reflected on the opposite side to keep the products in perfect register. You can build up and manually edit with the full set of artboard tools, such as the Step & Repeat tool and the Alignment and Geometry toolbars.
# Editing Items in a Layout
Layouts in Phoenix are always editable - you can just click and drag to move items, or use any of the tools at any point. There are a few tips and tricks to make Phoenix even easier to use and get print ready files out quicker.
You can move any item by clicking and dragging, and can restrict the movement to be only horizontal or only vertical by holding the Shift key while dragging. In addition, you can hold the Option key to make a copy of the item as you drag and drop. If you have multiple items on a layout, Phoenix will automatically help you align items by snapping to bounds of other items on the layout to make alignment even easier. If you drag a product next to another product, Phoenix will auto-snap the products so the bleeds are perfectly aligned. Keep dragging and you can auto-snap the dielines if you want a dutch-cut.
New to version 8.0, you can interactively rotate items in the Layout view. Simply select an item and move the cursor to a corner of the bounding box. The cursor will change shape to indicate rotation, and you can rotate by clicking and dragging to the desired rotation. Holding the Shift key will lock the rotation to 45° increments.
Phoenix also makes replacing artwork very easy. If you have a product in a layout, simply click it to select it. Then find a different product in the Products panel, click and drag it on top of the existing artwork in the layout, all while holding the control or command key. Phoenix will automatically swap out the artwork without changing the product placement.
# Product View
The Product View displays a singular product from the project. You can select the product to view by double-clicking in the Products panel to enter the Product View, or click the Product View button in the Artboard Toolbar. Each product type provides slightly different tools in the Artboard Toolbar for working with the product.
All products contain the Pages view, which displays the pages in the product and allows you to assign artwork to a page.
# Flat Product
Flat Products show the following tools in the Artboard Toolbar:

A - Front and Back options provide a quick toggle to view the front or back side of the product.
B - The Choose Artwork button allows you to choose an artwork file to assign to the product. The dropdown option provides perform Page Mapping for both the Front and Back of the product.
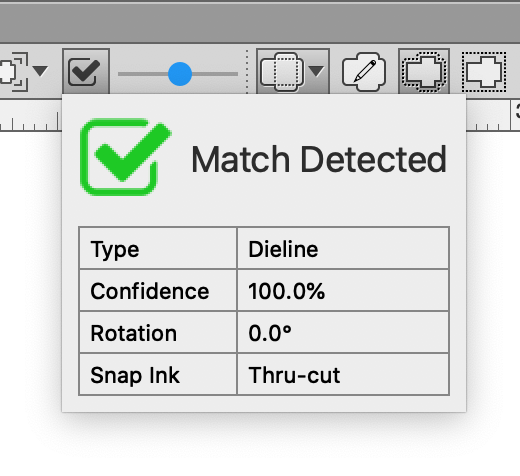
C - The autosnap dropdown allows you to use the autosnap tool on a layer or ink to have Phoenix automatically find the die shape based on an ink or layer in the artwork. If artwork is assigned to the product, the Autosnap Analysis tool will appear to display if and how an autosnap match was detected.
D - The bleed opacity slider allows you to define how much of the artwork outside of the bleed should be displayed in the Product View. Note that this does not affect output, but is a useful tool for seeing artwork outside of the bleed.
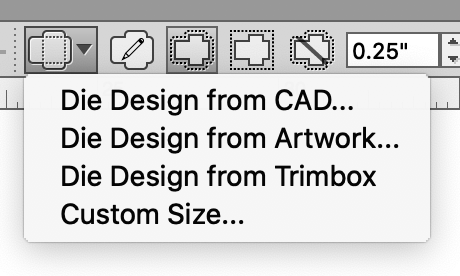
E - The Die Design dropdown allows the Die Design to be set from an external CAD file, from the artwork using a tool type mapping, from the trim box of the artwork, or based on custom dimensions.
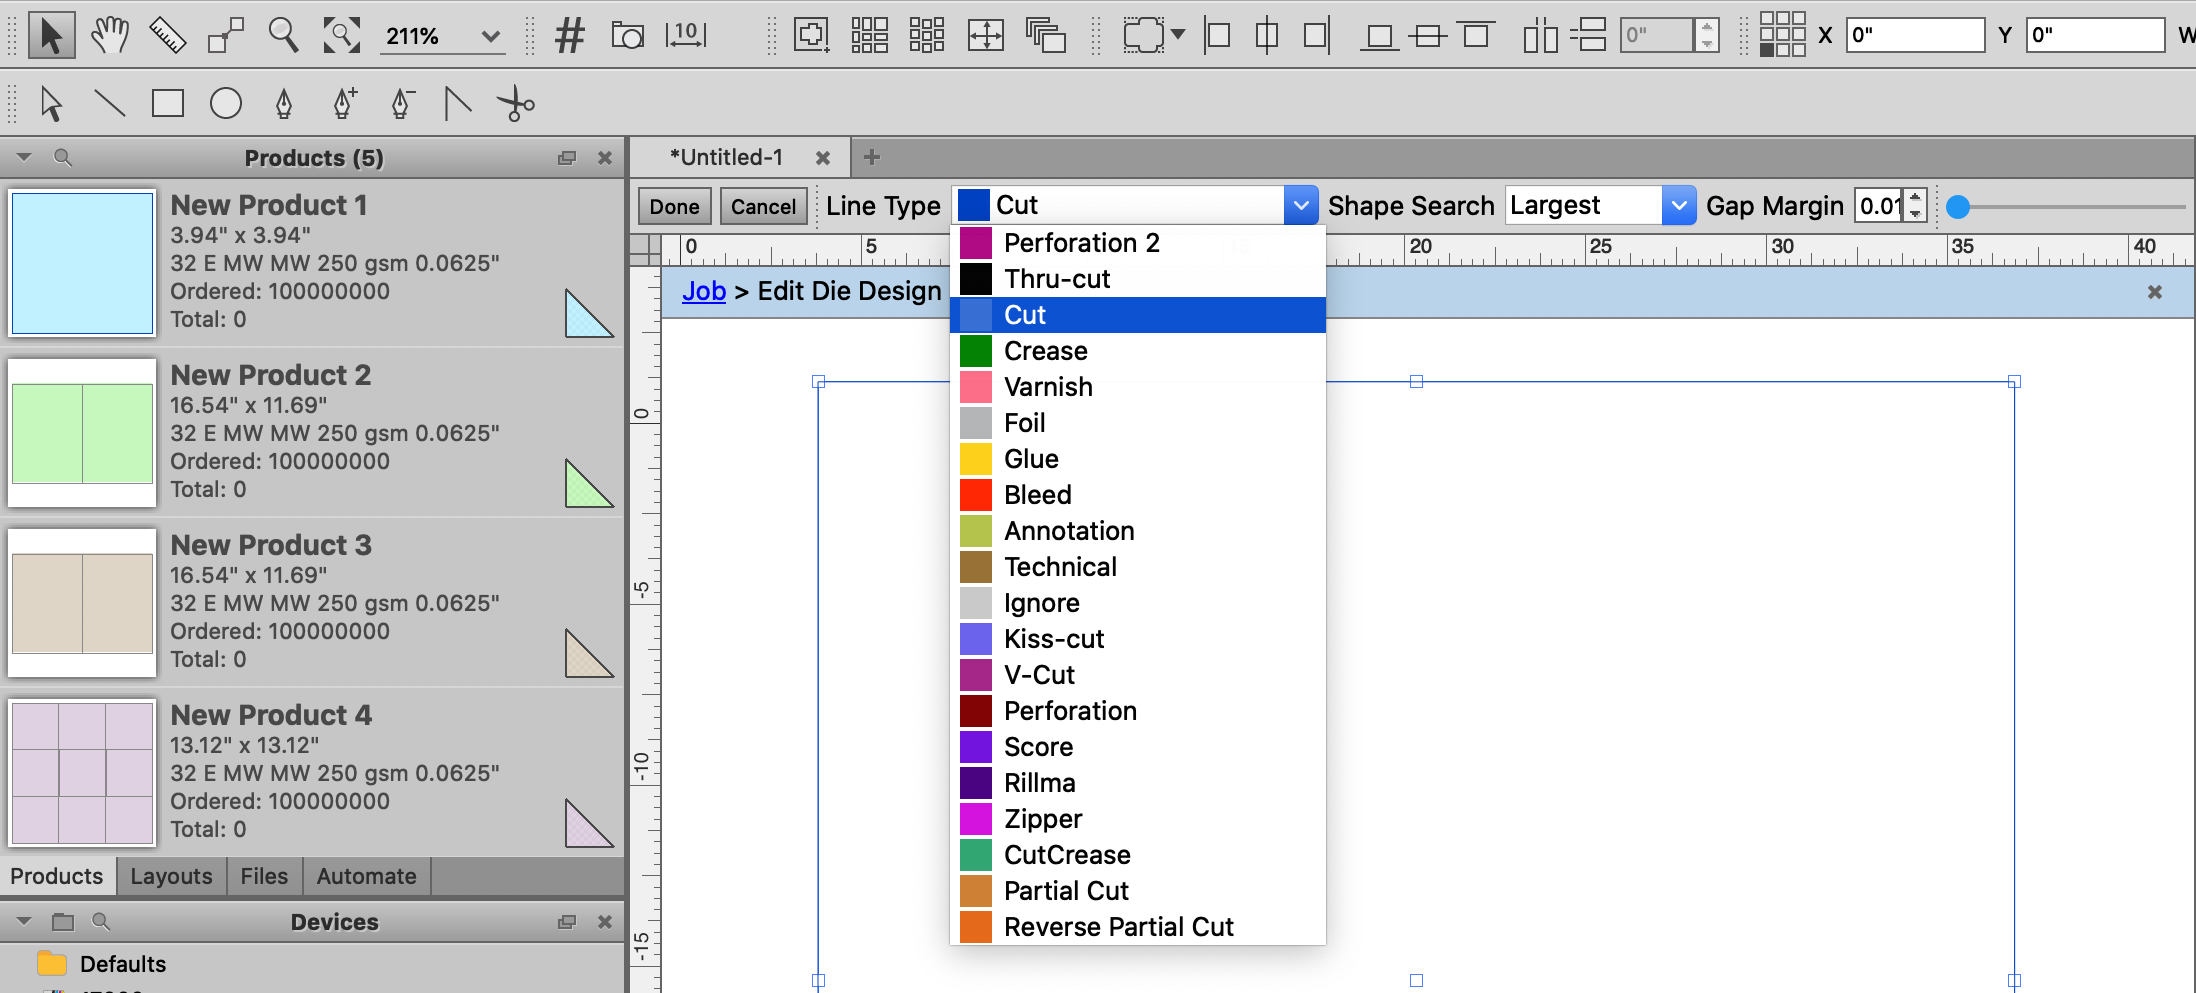
F - The Edit Die Design button allows you to manually edit the die design. When this button is selected, the product enters the Die Design Editor mode. This mode allows you to click and select any die lines in the artwork and assign a line type using the dropdown menu that appears in the toolbar. Further, you can use Shape Search along with setting a Gap Margin to find a die design from current die lines. You can also use the Drawing tools which appear under the main Toolbox at the top of the screen to select, draw, and edit die lines in the artwork.
G - The Generate Bleed Mask from Die allows you to easily create a bleed mask based on the die shape of the product.
H - The Rectangular Bleed Mask button creates a rectangular bleed mask based on the bounds of the die shape.
I - The No Bleed Mask button disables the bleed mask altogether.
J - If there is a bleed mask, this field allows you to specify the bleed distance. This value can also be set in the product's properties using the Properties panel.
# Bound Product
Bound products have two primary view modes, parts/sections and signatures.
The Parts/Sections view allows you to visually see the parts that make up the bounded product, including the folding pattern and how the signatures are bound together.

You can add, match, or remove signatures through the buttons in the toolbar or by right clicking in the main window. You can easily add a signature in a particular location by right clicking on the signature just before or after the spot where you want to add the new one.
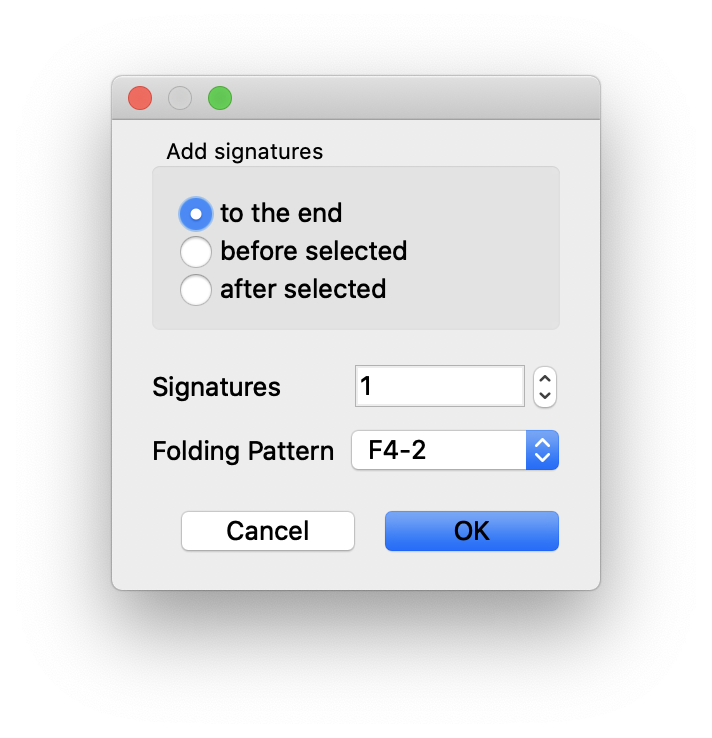
The other main view is the Signatures view, which shows each individual signature.

A - The signature dropdown allows you to select a particular signature to view. You can also double click on a signature in the Parts view to open it up in the Signature view.
B - Easily toggle between signatures using the arrow selectors.
C - Choose the front or back side to display.
# Folded Product
Folded products have the same Signature View as described above in the bound Signature section.
# Tiled Product
Tiled products give you two views, one for all of the tiles together, and then one for individual tiles.
The Tiles view shows an overview of all the tiles in the product.

In the Tiles view, you have many of the same options as for normal Flat products. In addition, there is a toggle to show the overlay of the tiles on the Product, or to just display the tiles with dummy colors to easily view the shapes.

The Tile view shows each individual tile. The toolbar allows you to choose which tile to view, along with the standard product toolbar buttons.
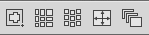
# Artboard View
Just underneath the artboard toolbar is the Artboard itself. There are a few items to point out in the artboard:
- Rulers - Rulers are shown along the top and left sides of the artboard and behave similar to the rulers in other programs. You can see and change the units in the ruler by right-clicking on it and choosing a different unit. You can also create a horizontal or vertical guide line by clicking and dragging from the ruler down or over into the artboard. These guides can then be locked in place or removed by right-clicking on the guide line. The guides can be repositioned by clicking and dragging, or by single clicking to select a guide and then typing in an exact position in either the Y or X coordinate in the toolbar.
- Origin - By default, the origin of a layout is in the bottom left corner of a layout. To move the origin, you can either right-click on the area where the two rulers meet, or click and drag from this area and then release at the spot where you'd like the new origin to be.
# Toolbars
The tools in the main Toolbar are split into six sections. The different sections can be shown/hidden from the Window -> Toolbars sub-menu or by right clicking on the toolbar and checking the sections to be shown.
Phoenix is built for speed. This secion also describes the shortcuts in Phoenix that can dramatically cut down the time it takes to build print-ready layouts in Phoenix. To switch between tools, you can click on the corresponding button or you can use the keyboard shortcut (as long as the corresponding tool is visible).
# Toolbox
Some of the most frequently used tools in Phoenix are placed in the Toolbox Toolbar.
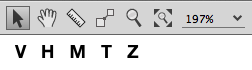
| Tool | Hotkey | Tool Overview |
 Selection Selection | v | Main selection tool for selecting items, entering item context, moving items and more |
 Hand Hand | h | Hand tool for moving artboard around and zooming in and out |
 Measure Measure | m | Measure distances between items in artboard |
 Move Move | t | Move one product relative to another by selecting reference points on die lines between the two |
 Zoom Zoom | z | Zoom in and out of the artboard |
 Fit All in View Fit All in View | ctrl+alt+0 | Fit all items in the current artboard into view |
# Selection Tool
Typically, left click is used with Selection Tool (v) to select a given item while right click on an
item will show that item's Content Menu. Left clicking and dragging the mouse in an area
with no items will create a selection area that will select all items inside the rectangle when you release the mouse button.
The following additional are available:
# Forcing Selection Area
Shortcut: Control + Shift + Left Click + Mouse Drag
Description: Normally selection area gets created when you start Left Click + Mouse Drag in an area with no items. Sometimes you will want to select multiple items with selection area but it is difficult or impossible to start selection area in an empty region. If you hold down the Control and Shift keys, a selection area will be created regardless of whether an item is beneath the cursor or not.
# Multiple Item Selection
Shortcut: Shift
Description: To add more items to your current selection, hold down the Shift key while clicking on the additional items. Similarly, hold Shift key while using Selection Area to add all items in the current mouse selection area to your existing selected item(s).
# Alt+Drag Duplicate
Shortcut: Alt + Left Click Item(s) + Mouse Drag
Description: Holding the Alt key while moving items in the Artboard with your mouse will duplicate the item in the destination instead of moving the items, essentially performing duplicate and move in a single action.
Alt+Drag Duplicate works on single items as well as multiple selected items, giving you the power to duplicate entire groups of items to a specific location in one shot. All relative positions of selected items are preserved during this action.
# Alt+Click
Shortcut: Alt + Left Click when item(s) are selected
Description: This shortcut behaves similarly to Alt + Drag Duplicate. Select item(s) and click anywhere on the artboard to duplicate those items in the location of the mouse click. The new duplicate item(s) will be centered in the cursor position of the click. For multiple item selection, the relative positions of items are preserved.
# Swap Items Shortcut
Shortcut: Control + Left Click Item(s)
Description: You can swap two items or groups of items in the sheet in a single action by selecting an item (source) and click on another item (destination) while holding the Control key. The selected source items will move to the position of the clicked destination item while the destination item will move into the position of the source items. Product items, marks, and groups can all be swapped using this shortcut. If any source or destination items are locked, a dialog will appear explaining the swap action cannot be performed.
The reference point used during Swap Items is controlled by the 9-point selection widget in the Geometry Panel. For example, if the center point is selected in the Geometry Panel, the center source and destination item positions are swapped. If the lower-left corner of the 9-point selector is chosen instead, the lower-left corner positions of source and destination items are swapped.
Multiple destination items can be swapped by holding the Control key and left mouse button while dragging the mouse to create a selection area. Once the mouse button is released, all items in the selection area will be treated as destination swap items. This features allows you to quickly swap entire groups of items without explicitly grouping them beforehand.
# Zooming in Selection Tool
Shortcut: Control + Mouse Scroll Wheel
Description: You can quickly switch to the Zoom Tool to zoom in and out of the Artboard but if your mouse has a scroll wheel it can be even faster to stay in the Selection Tool, hold down the Control key and move the scroll wheel up and down to zoom in and out.
# Scrolling Up and Down in Selection Tool
Shortcut: Mouse Scroll Wheel
Description: To move the Artboard up and down in Selection Tool move your mouse scroll wheel up and down respectively.
# Fit Item in View
Shortcut: Alt + Shift + Left Click
Description: If you hold the Alt and Shift keys and click on an item, the Artboard will automatically zoom in fitting the item in the visible space. For example, if you want to zoom into a specific mark, hold down Alt and Shift and click on the mark in the Selection Tool.
# Entering Item Context
Shortcut: Double Click
Description: If you want to edit child items of another item, such as Repeat Marks within a Repeat or Artwork within a Product, double click on the parent item(s) until you are in the desired context to perform edits.
# Leaving Item Context
Shortcut: Escape
Description: To quickly leave any item context and go back to the global context press the Escape key. Note this also works for leaving Overlaps Tool Mode, Output Preview Mode and other context-based tool modes.
# Delete Multiple Anchors Shortcut
Shortcut: Shift + Delete
Description: Removes all currently selected anchor points in a single action. Available in both Die edit and Bleed edit modes.
# Hand Tool
Hand Tool (h) works normally by holding down the left mouse button and dragging to move the Artboard around. This is at times the most efficient way to move around.
# Zooming in Hand Tool
Shortcut: Mouse Scroll Wheel
Description: You can quickly switch to the Zoom Tool to zoom in and out of the Artboard but if your mouse has a scroll wheel you can also zoom in and out by moving the scroll wheel up and down.
# Spacebar Shortcut
Shortcut: Hold down Spacebar key
Description: Hold down the spacebar at any time to temporarily switch to the Hand Tool. Once the spacebar is released the previous tool will be restored. This shortcut allows you to pop into Hand Tool to do fast navigation before continuing with your current tool without having to switch back and forth.
# Measure Tool
Measure Tool (m) works normally by holding down the left mouse button to start measuring, dragging the cursor to the desired location and releasing the button to take a measurement at any angle. When starting a measurement, the Measure Panel will appear automatically if not visible.
# Forcing Horizontal or Vertical Measurements
Shortcut: Shift + Left Click + Mouse Drag
Description: Holding down the Shift key while taking measurements forces the measurement line to be either horizontal or vertical depending on current cursor position. This is useful for measuring the distance in a single dimension only.
# Zoom Tool
Zoom Tool (z) will zoom into the Artboard when left mouse button is clicked. Also you can zoom into a defined area by holding down left mouse button, dragging the mouse to define the desired zoom area and releasing the mouse button.
# Zooming Out in Zoom Tool
Shortcut: Control + Left Click
Description: Holding down the Control key while clicking will zoom out slightly instead of zoom in.
# Imposition AI
The Imposition AI toolbar is available when the license includes the Imposition AI module.
| Tool | Hotkey | Tool Overview |
 Smart Place Smart Place | s | Select an open area in the layout to find unfulfilled products in the project that can be placed while honoring spacing and media margin constrains |
 Impose Impose | Opens the Imposition AI dialog and runs the Impose tool with the latest settings | |
 Populate Populate | Opens the Imposition AI dialog and runs the Populate tool with the latest settings | |
 Optimize Optimize | Opens the Imposition AI dialog and runs the Optimize tool with the latest settings | |
 Plan Plan | Opens the Imposition AI dialog and runs the Plan tool with the latest settings |
# Alignment
The Alignment toolbar provides tools to quickly align selected items to media or other items.

| Tool | Tool Overview |
 Alignment Target Alignment Target | Select what target the alignment is to be based off |
 Align Left Align Left | Align to the left edge of the alignment target |
 Align Center Horizontal Align Center Horizontal | Align to the horizontal center of the alignment target |
 Align Right Align Right | Align to the right edge of the alignment target |
 Align Bottom Align Bottom | Align to the bottom edge of the alignment target |
 Align Center Vertical Align Center Vertical | Align to the vertical center of the alignment target |
 Align Top Align Top | Align to the top edge of the alignment target |
 Span Horizontally Span Horizontally | Horizontally space the selected items evenly spanning the alignment target by the given gap distance |
 Span Vertically Span Vertically | Vertically space the selected items, evenly spanning the alignment target by the given gap distance |
# Geometry
The Geometry toolbar reports the positions, rotations, and dimensions of selected items and when possible allows you to accurately define new values for them.

| Tool | Tool Overview |
 Reference Point Reference Point | Set the reference point for the item |
 X Position X Position | X position of item relative to the reference point. When possible, item position(s) can be moved by editing this field. |
| Y Position | Y position in layout relative to the reference point. When possible, item position(s) can be moved by editing this field. |
 Item Width Item Width | Item width. When possible, item widths can be changed by editing this field. |
 Item Height Item Height | Item height. When possible, item widths can be changed by editing this field. |
 Item Rotation Item Rotation | Item rotation. When possible, item widths can be changed by editing this field. |
 Lock Items Lock Items | Lock/Unlock items |
# Marks
The Marks toolbar contains mark-related tools Place Numbers, Camera mark, and Dimension Mark.

| Tool | Hotkey | Tool Overview |
 Place Number Place Number | n | Place new Product Number Marks directly into Products in Product or Layout View by mouse click |
 Camera Mark Camera Mark | Manually place a camera mark in the layout by clicking mouse in the artboard | |
 Dimension Mark Dimension Mark | d | Manually create a dimension mark by clicking on snap points in Product or Layout View to measure distances |
# Drawing
The drawing tools are used for drawing and editing die designs and bleed paths in die edit and bleed edit modes, drawing shape marks to products or layouts in normal mode, or manipulating bleed overlaps in overlaps mode.
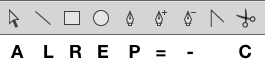
| Tool | Hotkey | Tool Overview |
|---|---|---|
 Direct Selection Direct Selection | a | Select and move individual control points on a path in die edit and bleed edit modes. |
 Line Line | l | Add new lines in die and bleed edit modes. Draw line marks in normal mode. |
 Rect Rect | r | Add new rectangles in die and bleed edit modes. Draw line marks in normal mode. |
 Ellipse Ellipse | e | Add new ellipses in die and bleed edit modes. Draw line marks in normal mode. |
 Pen Pen | p | Draw paths (lines and curves) directly in the shape in die edit and bleed edit modes. |
 Add Anchor Point Add Anchor Point | = | Add anchor points to an existing path in die edit and bleed edit modes. |
 Delete Anchor Point Delete Anchor Point | - | Delete anchor points to an existing path in die edit and bleed edit modes. |
 Anchor Point Tool Anchor Point Tool | shift + c | Select anchor points and manipulate the handles to change the curve shape in die edit and bleed edit modes. |
 Cut Cut | c | Clicking on a path splits the path segment in two in die edit and bleed edit modes. In overlaps mode, drawing a line splits bleed overlaps in two so they can be resolved independently. |
# Cut Overlap Tool
The Cut Tool (c) works in Overlap Mode by drawing a line bisecting a given overlap. Start the cut by holding the left mouse button and moving the cursor to the desired endpoint.
Releasing the left mouse button will perform the cut on the overlap closest to the start point of the line drawn.
# Cutting All Same Overlaps at Once
Shortcut: Control + Left Click + Mouse Drag
Description: Holding down the Shift key while drawing the bisection line will cause the overlap cut to extend to all other identical overlaps in the layout. For example if you have the cartons with the same flaps overlapping 20 times that all need to be cut before resolving, holding the Control key during overlap cut will perform all 20 cuts at once.
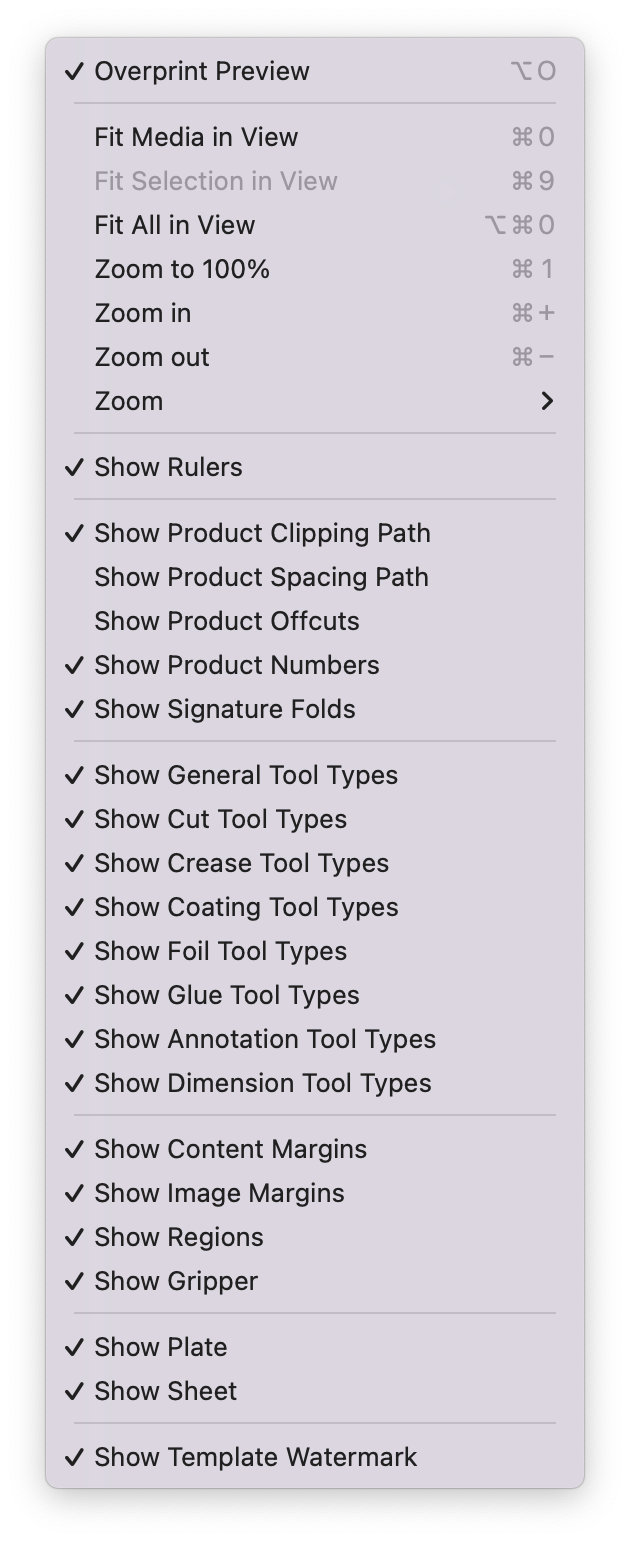
# View Menu
The View Menu in the top menubar of Phoenix (or in the Mac Menubar) provides additional ways to view Phoenix.
These options give an easy way to change the artboard view, or provides a way to show or hide a path, tool type, or attribute of an item in the artboard.
← Presets Phoenix Tools →