# Tiling
tilia Griffin includes powerful tiling capabilities with several options controlling how artwork is split up into individual tiled pieces.
Tiling can be controlled independently in horizontal and vertical directions. Also, in both directions you can also optionally define gaps or overlaps between tiles with options for extending gaps and masking off no-image overlap regions.
Griffin tiling also supports internal cut lines. When artwork contains internal cut lines, these cuts will be preserved in the corresponding tiles, allowing you to handle multi-step panel installations like non-rectangular peal-offs.
To create tiles from artwork:
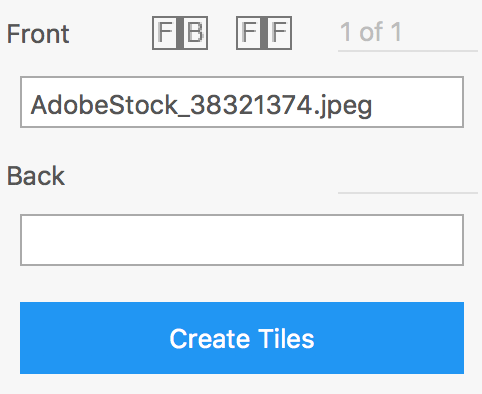
- Select the artwork piece you want to tile in the Artwork List.
- Navigate to the Artwork properties in the Sidebar (right-side panel).
- Click on the "Create Tiles" button.
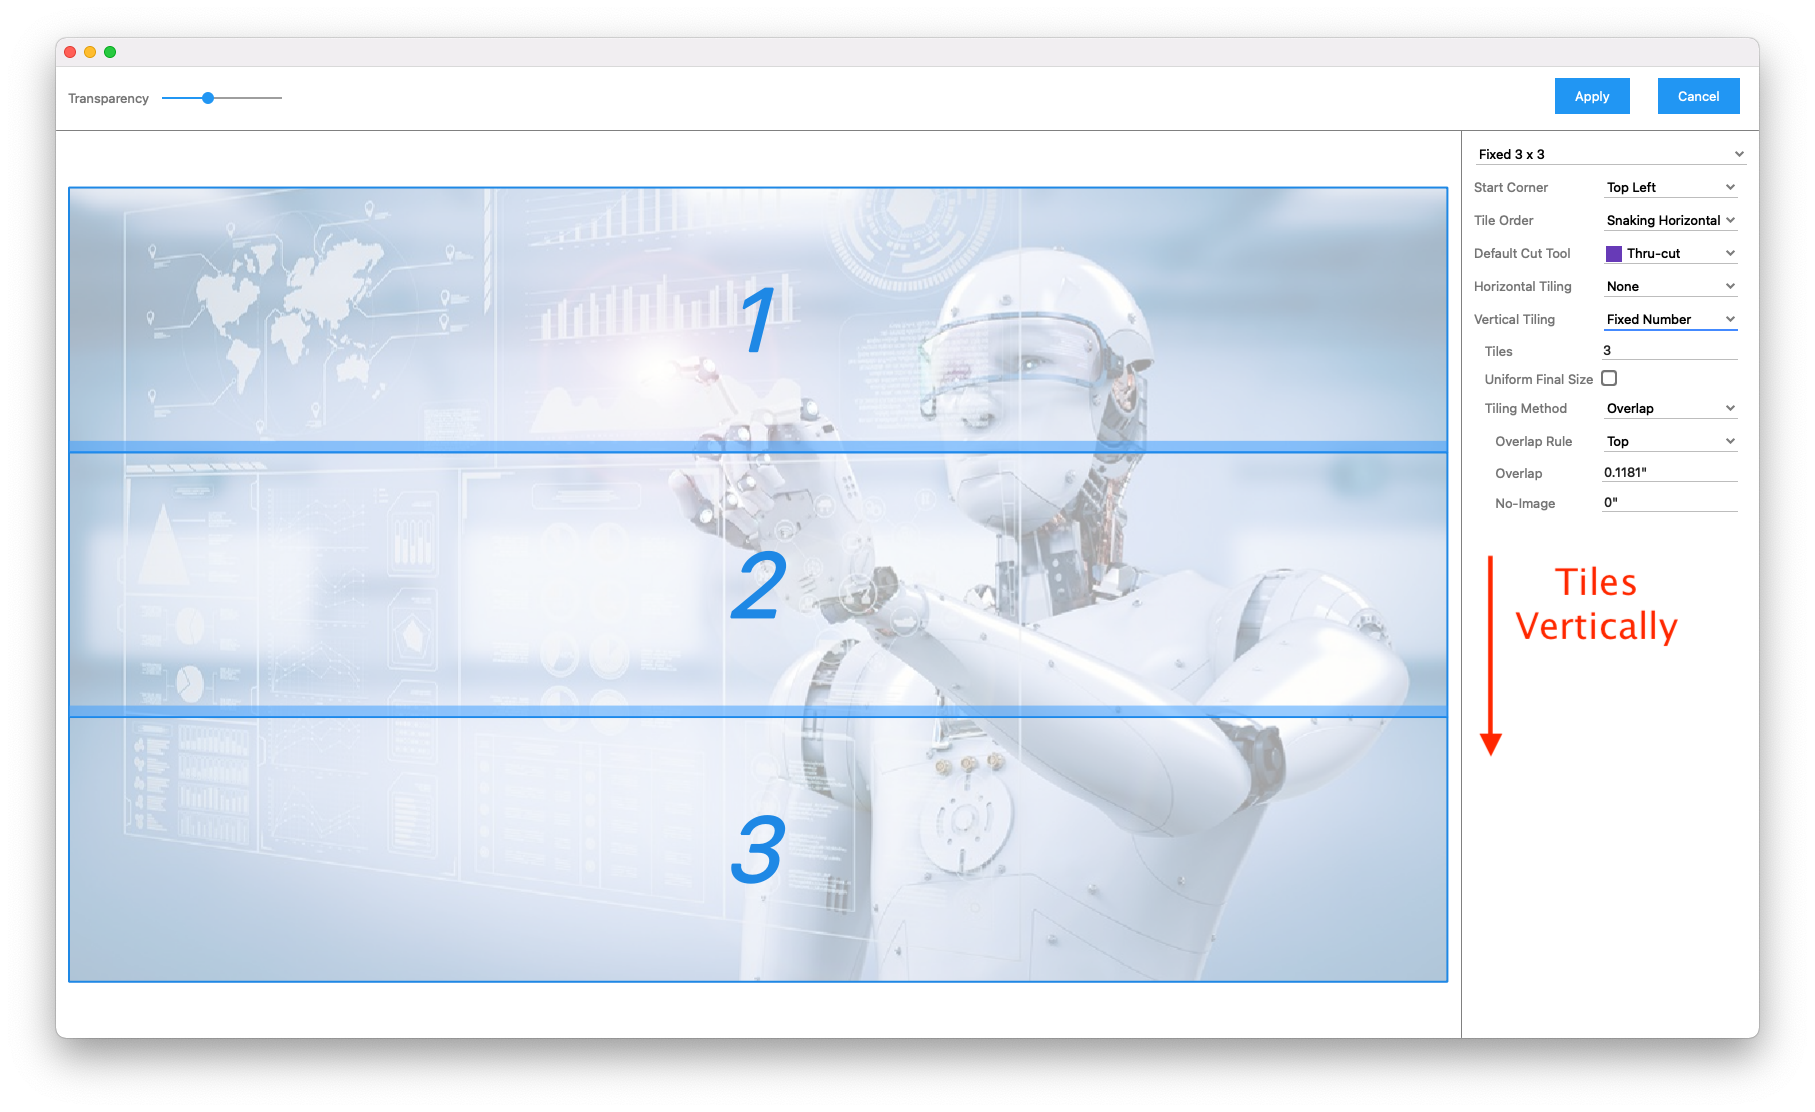
Now you will enter Tiling View where you can see a live preview of how the tiles will be created with the current settings. Tile dimensions, order, and gap/overlap regions are all displayed in the preview.
The toolbar at the top of the Tiling View contains the following:
- Transparency - Slider controlling the visibility of the artwork content under the tiles being previewed. This feature is especially useful in cases where the tile preview colors are similar to the artwork content making it hard to preview the tiles.
- Apply - Button to apply the current tiling settings to the given artwork piece. Once applied, you will be taken back to the Artwork List view where the original artwork is now broken up into individual tiles.
- Cancel - Button allowing you to cancel tiling and go back to Artwork List view without making any changes.
The Sidebar on the right side of the Tiling View contains all the settings controlling tiling behavior.
- Preset - Tiling preset settings to use.
- Start Corner - Corner of the artwork to start tiling.
- Tile Order - The order to perform tiling, horizontal or vertical, snake or zigzag.
- Default Cut Tool - Cut tool to use for tiles when artwork is non-rectangular.
- Horizontal | Vertical Tiling - Method defining the tiles in the given direction, either fixed number, fixed size, or variable sizes.
- Tiles | Size | Sizes - The number of tiles or size(s) of tiles in the given direction.
- Uniform final Size - When defining a fixed number of tiles, enabling this option ensures the final tile sizes are uniform regardless of gap or overlap settings. When not enabled, inner and edge tile sizes can differ because uniform tile sizes are then calculated before gap or overlap rules are applied.
- Tiling method - Tiling method to use in the given direction if any: Gap or Overlap.
- Overlap Rule - Rule defining what edge(s) of tiles will overlap with neighboring tiles.
- Overlap - Distance beyond tile edge to extend the tile in the given direction to create overlap.
- No-Image - Width of the section at the end of the overlap where no artwork content is allowed, e.g. glue strips.
- Gap - Gap distance between tiles in the given direction.
- Extension - Amount of extra artwork content beyond the tile gap edge to extend in the given direction.
- Direction - Rule defining which direction(s) the gap is extended for each tile.
Once you have finalized your settings, click Apply to create tiles from the given artwork.
Each tile will be assigned a number based on the tiling order. You can reference the current tile number and total number of tiles in artwork text and barcode marks using the <artwork.tile> and <artwork.tile-count> dynamic keywords.
# Tiling Types
The size of tiles can be defined with the Horizontal Tiling and Vertical Tiling parameter, which is chosen from one of the following options:
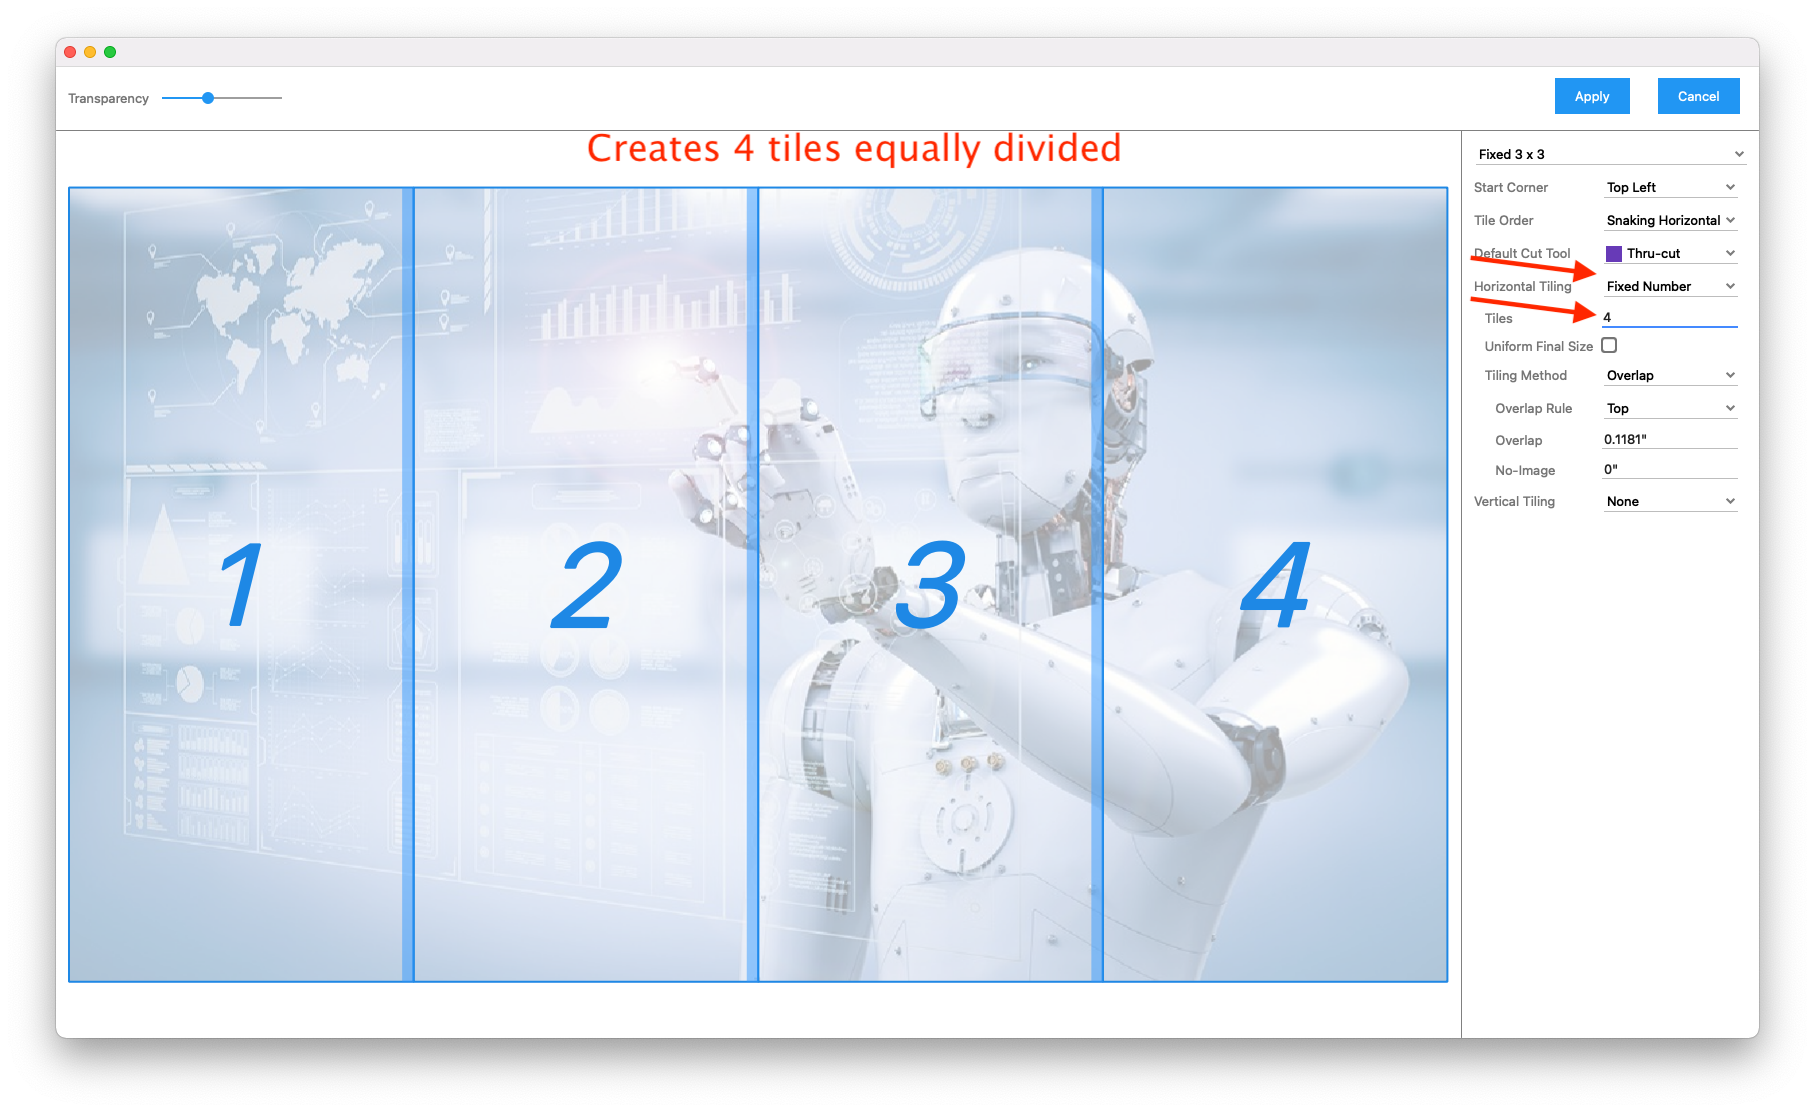
# Fixed Number
The exact number of tiles is specified, and Griffin creates equally divided tiles in the specified dimension
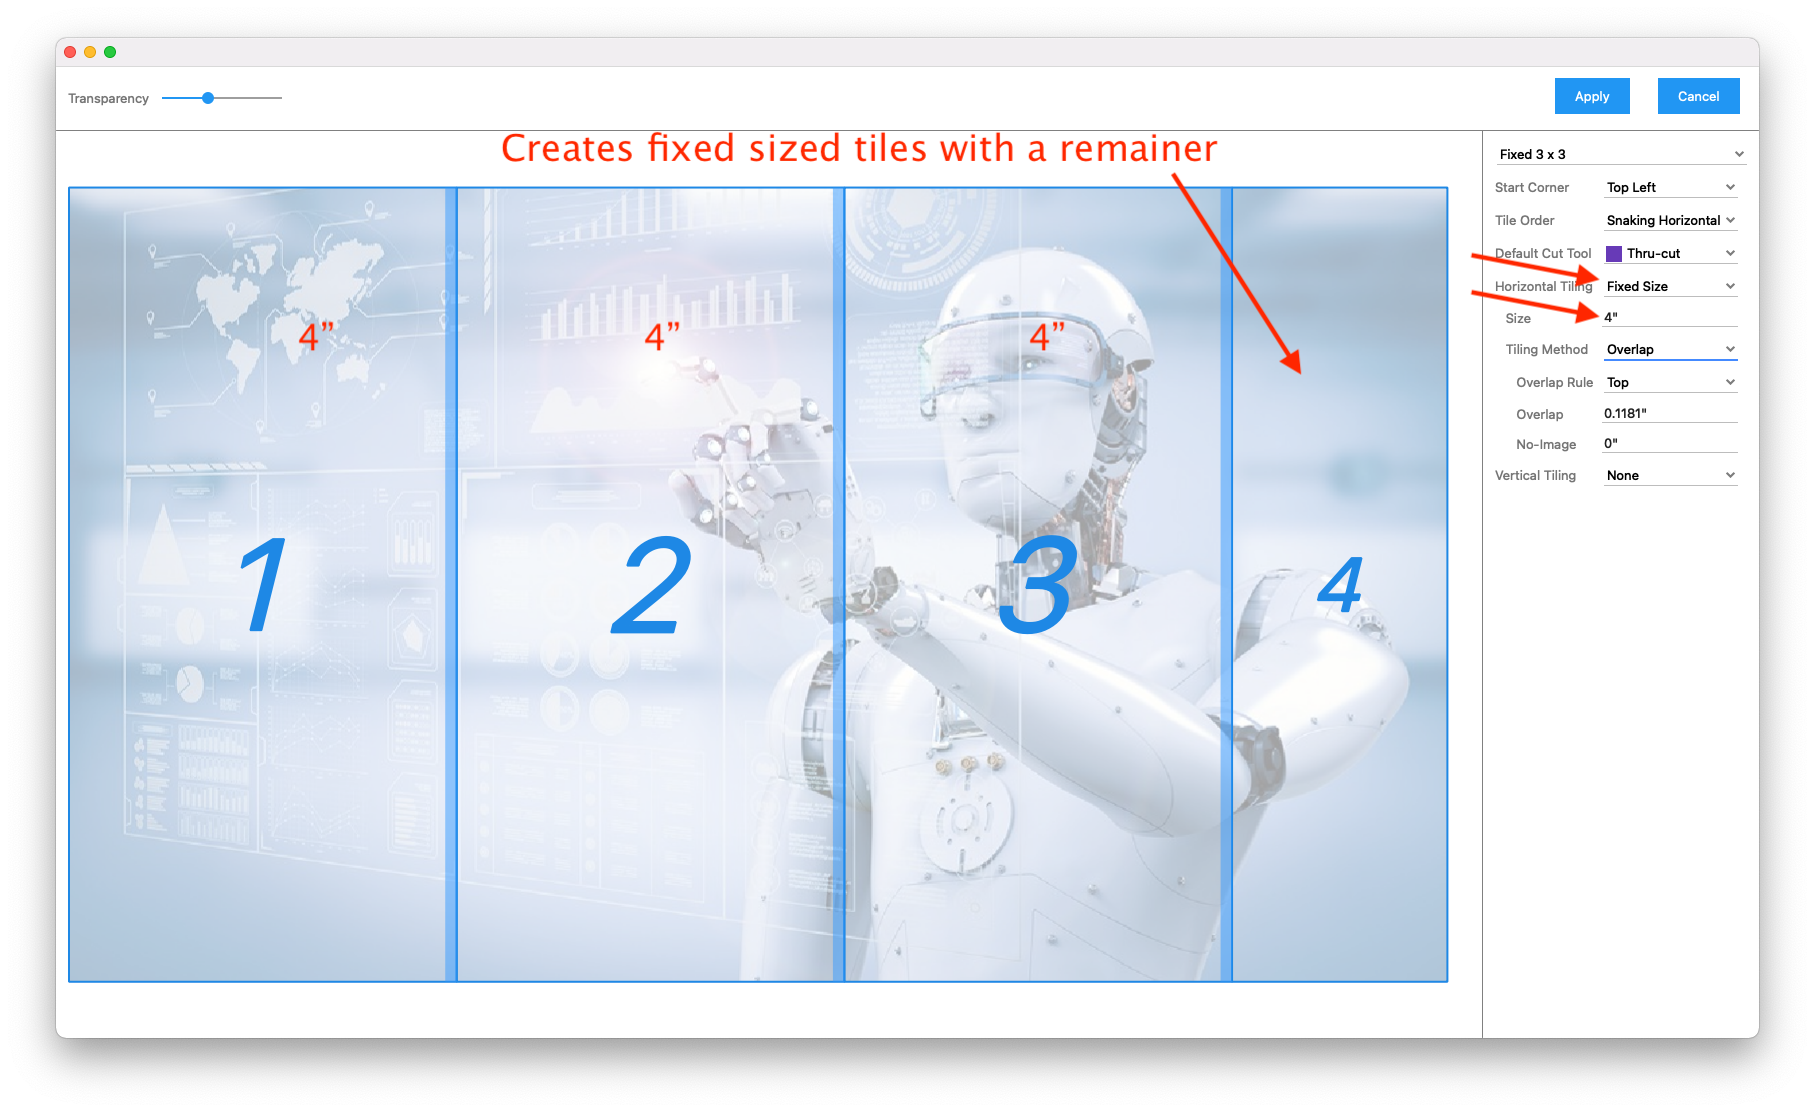
# Fixed Size
The size of each tile is specified, and Griffin will create as many tiles of this size to fit the length of the artwork, with the last tile filling any remaining space less than the tile size
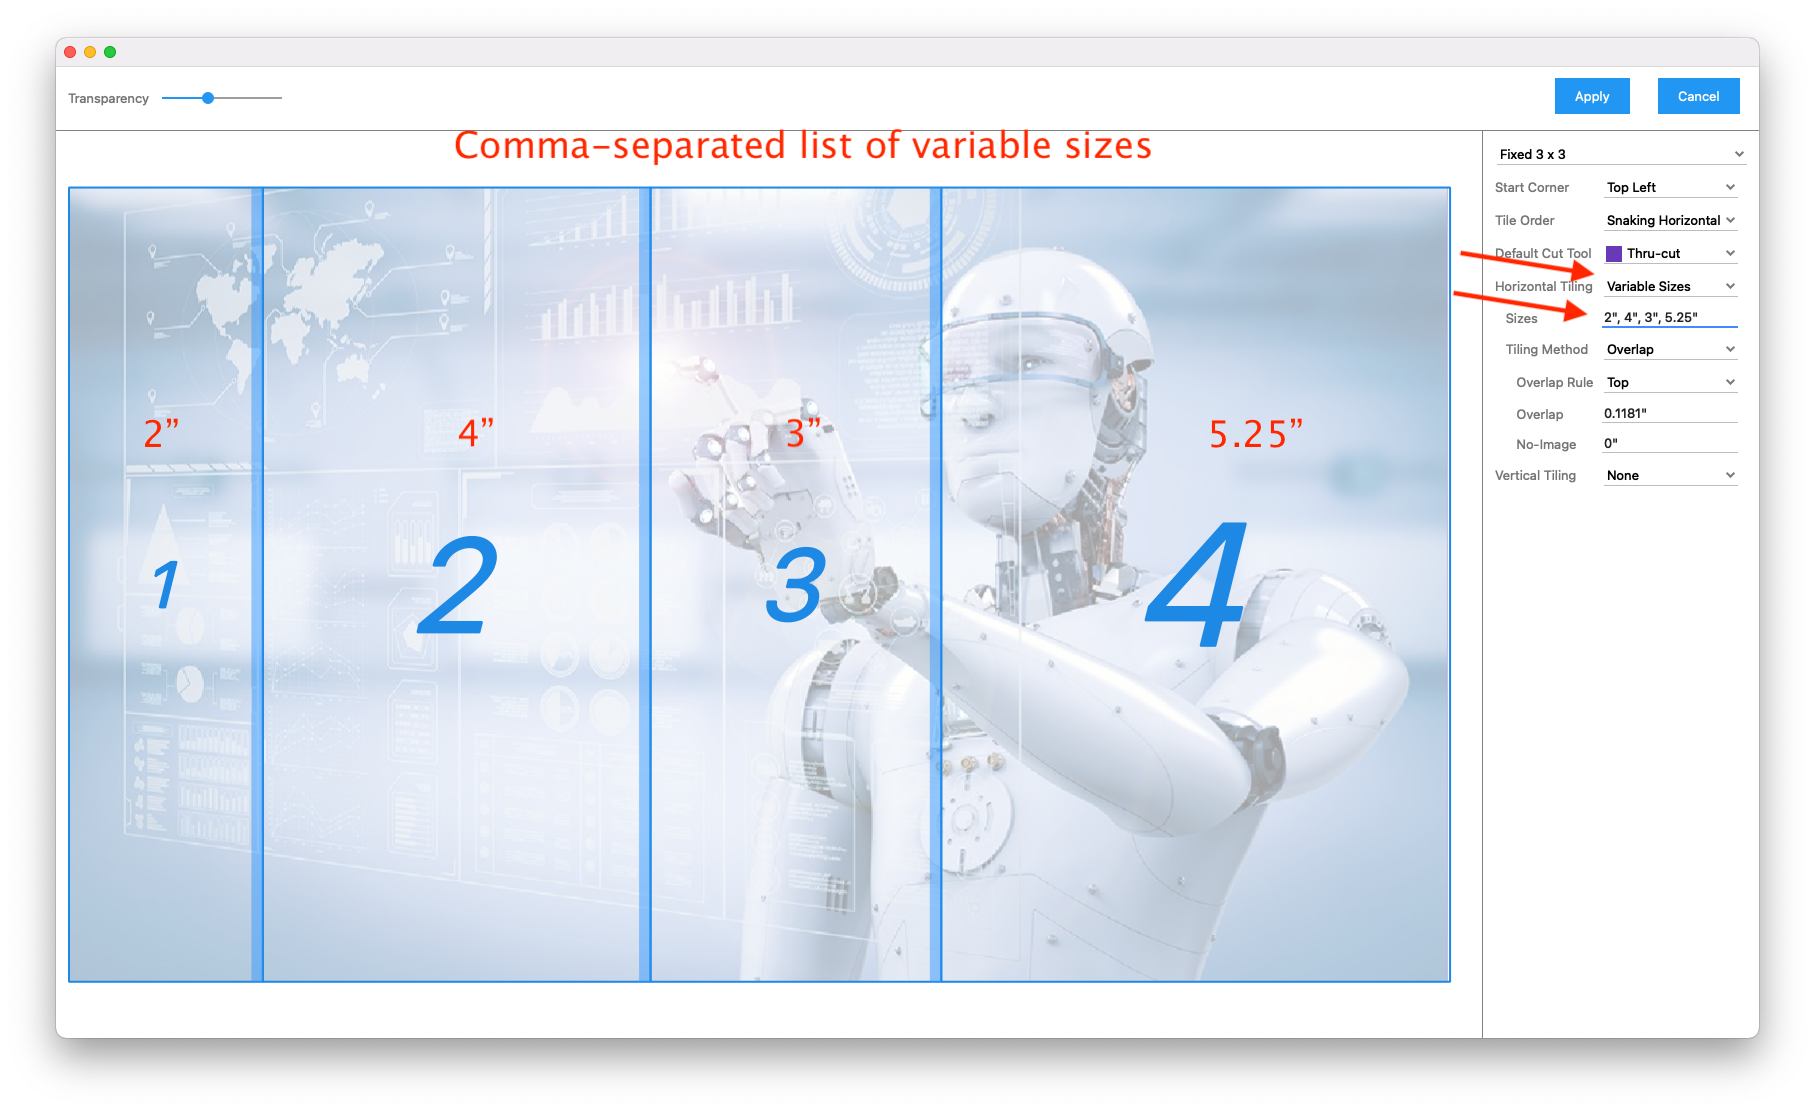
# Variable Sizes
A comma-separated list of tile sizes is entered, and Griffin creates tiles of this size either from left to right (if horizontal tiling) or top to bottom (if vertical tiling).
# None
No tiling is done in the specified dimension