# Custom Properties
Phoenix 7.0 introduced the ability to add custom properties to Products, allowing you to add custom values to properties. These properties can then be used in marks, in Imposition AI Plan Rules, export presets, reports, and more.
Phoenix 8.0 brings custom properties to even more areas of Phoenix, including Components, Parts, Projects, Surfaces, and Layouts. These custom properties can be added manually by clicking the dropdown in the Properties panel and adding a new custom property, or they can be added through scripting.
Custom properties always take the form of .custom.customPropertyName. For example, we could add a new custom property to all projects specifying the destintion Store ID for the project. First, navigate to the project view to find the project properties in the Properties panel, and click the dropdown to add a property:
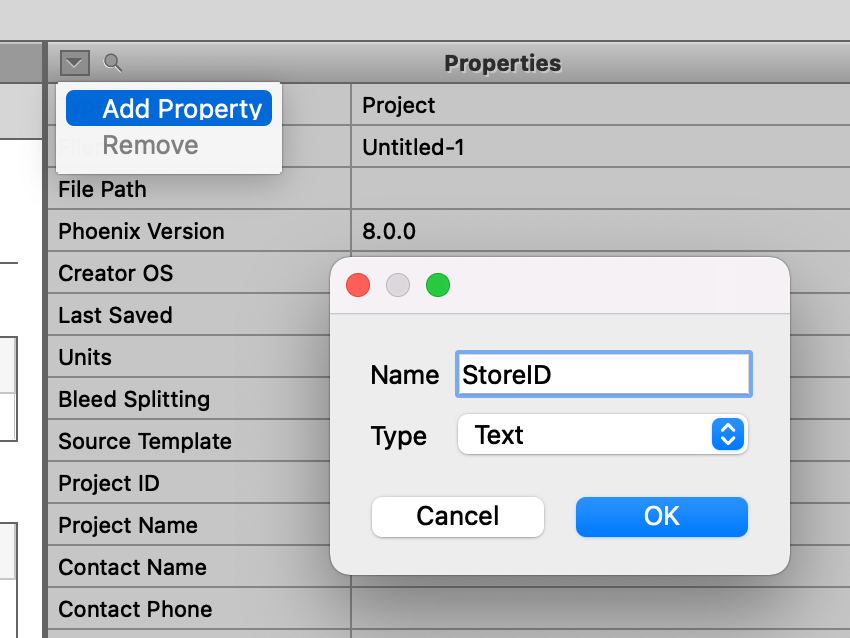
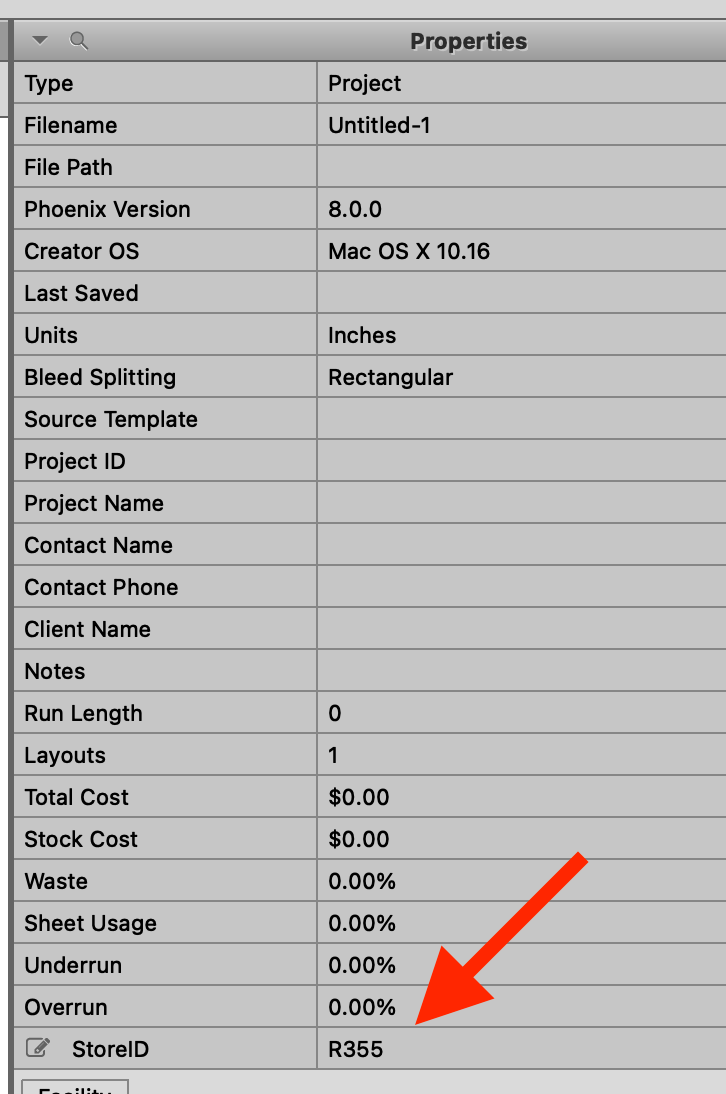
Once the custom property is added to the project, we can add or edit a value, and then that value is available as a keyword <project.custom.StoreID> anywhere we can use keywords!
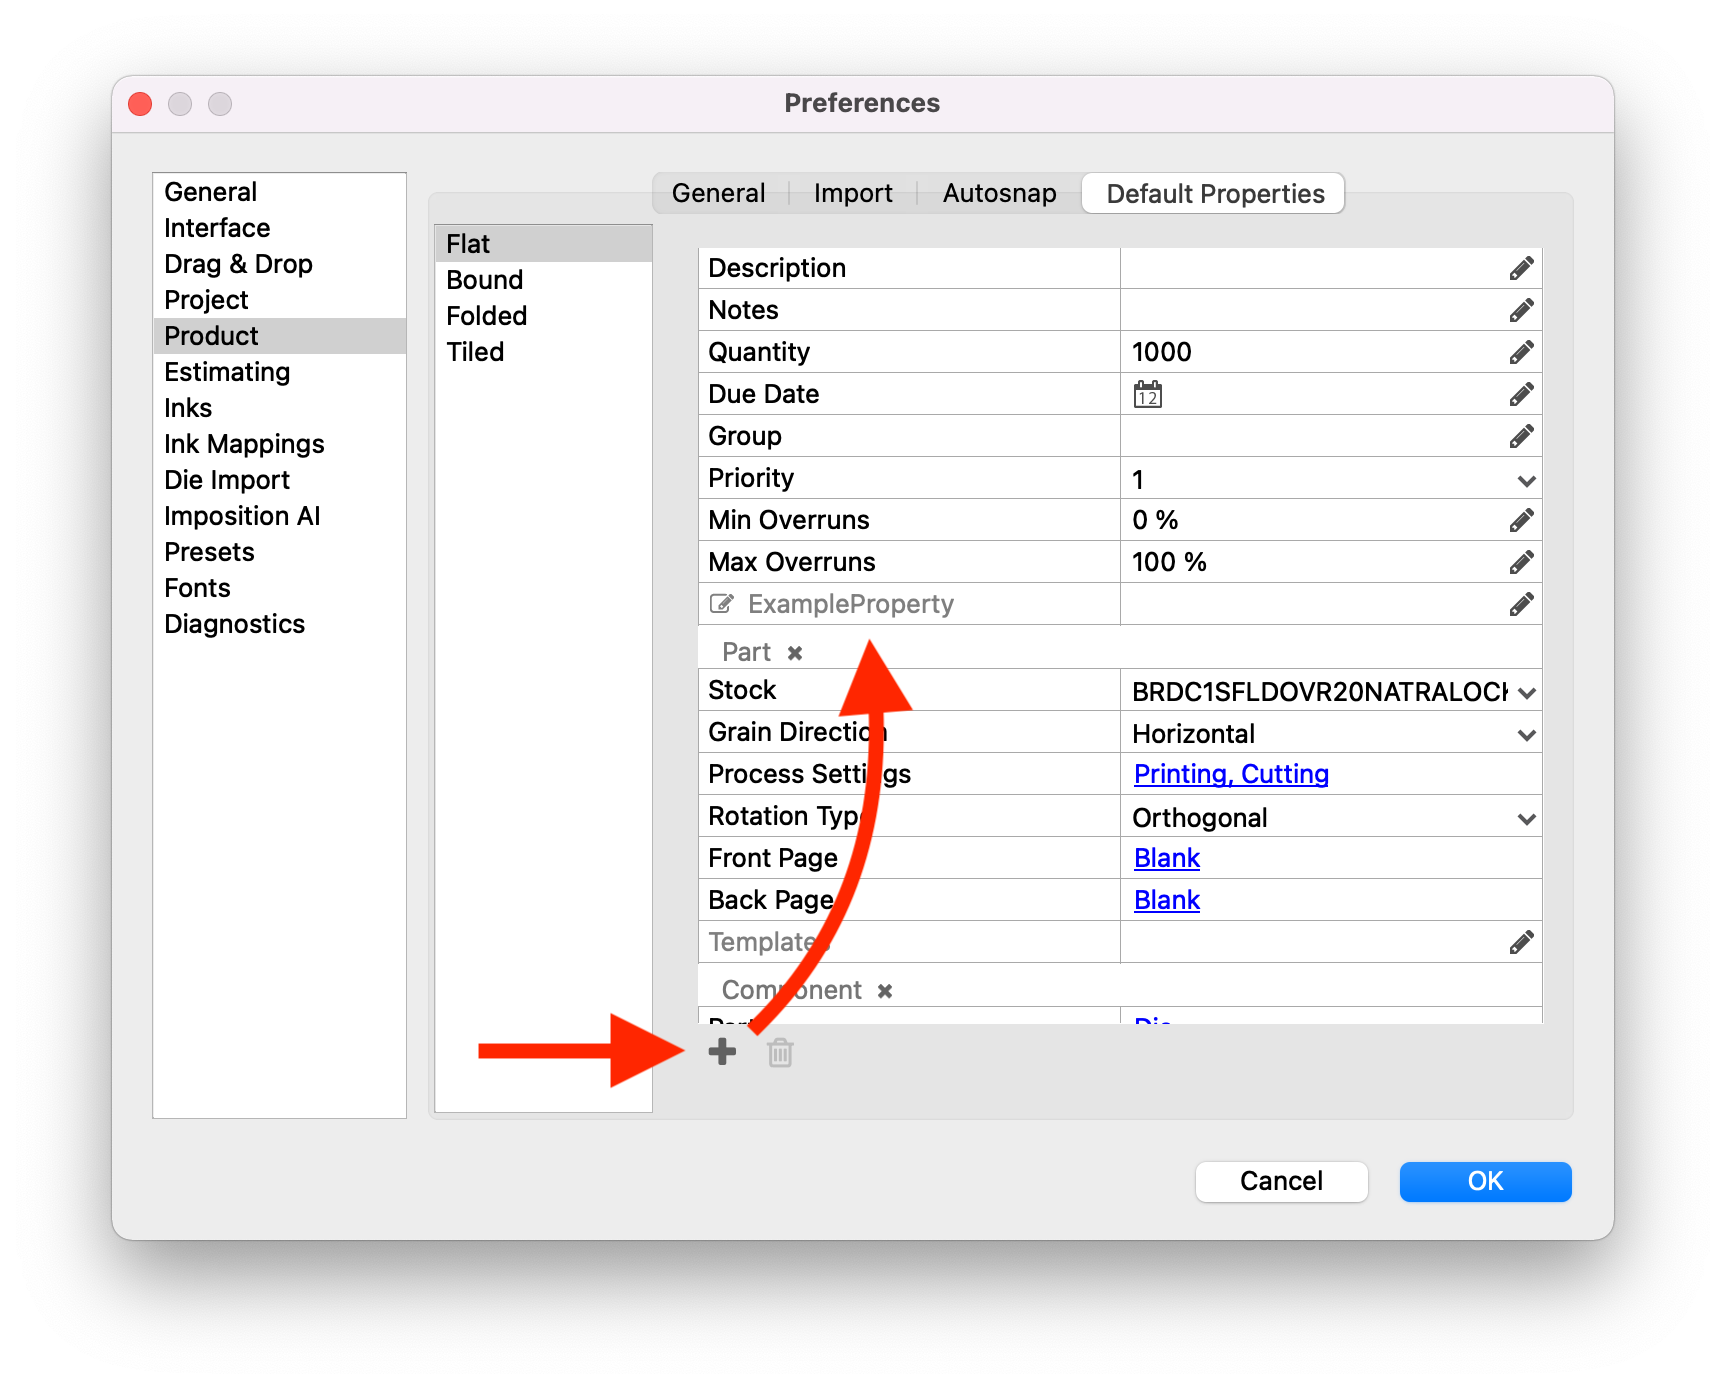
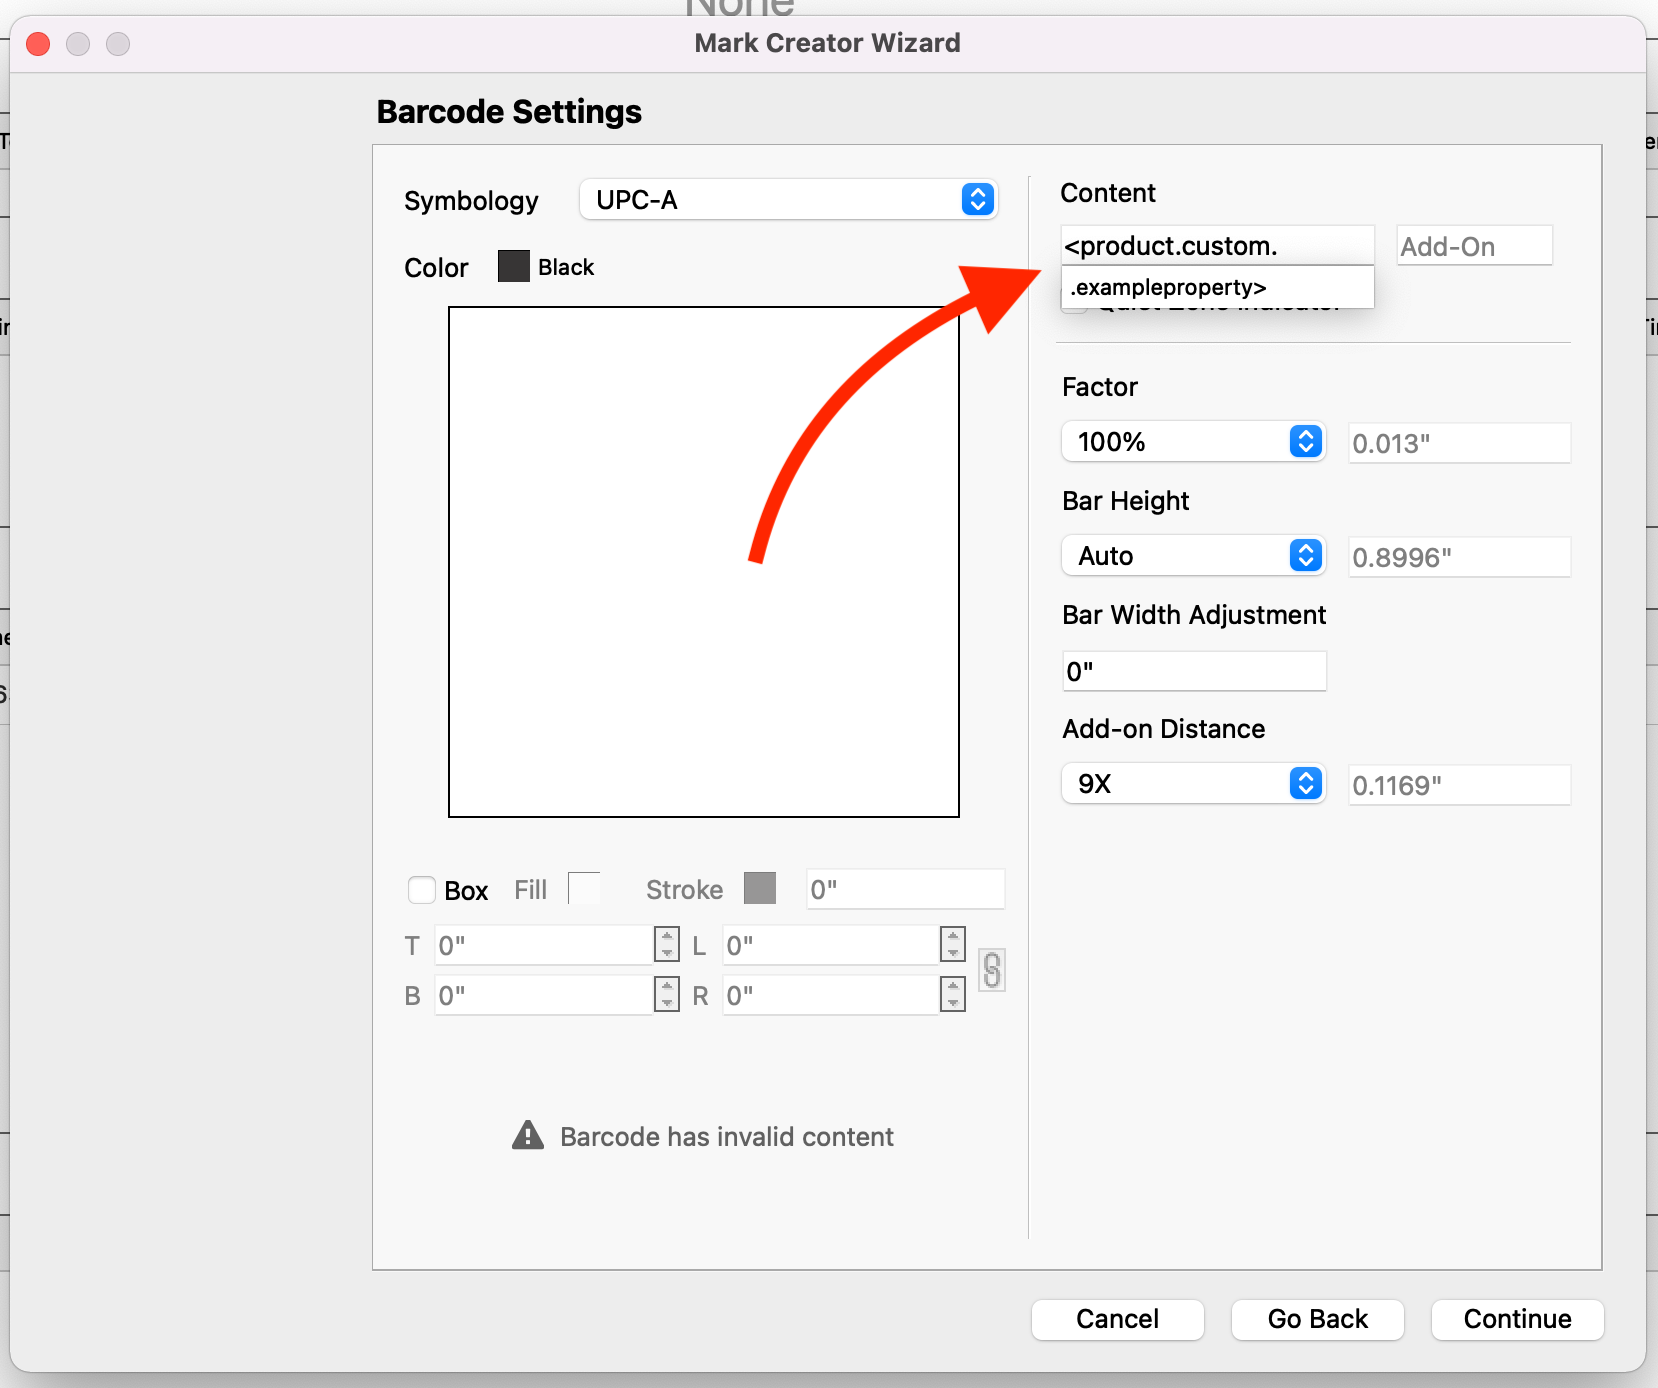
# Default Product Properties
You can add custom properties to all products on creation by adding a Default Custom Property and optionally specify a value for it. This adds a custom property to all products created. Where this is especially useful is if you are using custom properties with marks that perform validation, such as barcodes. These marks are verified to make sure they contain valid data - for Phoenix to see a custom product property and display it as an available option in the marks creator, you need to first define it in the Preferences. Note that you can specify a default value for the custom property, but that is not necessary.